
Office help — for office admins. Customers, scales, scheduling, review, placed-in-service reports, test weights, reports, settings and users.
Welcome
This manual is for the office: the people who set up customers and scales, schedule and dispatch the technicians, check their work, send reports to weights and measures, and look after the test weights. It assumes no calibration experience. If you are new to scales, read Calibration basics first; everything else builds on it.
CertaCal has two parts:
- the office app, used on a computer in the office, which this manual covers; and
- the technician app, used on a phone or tablet in the field (see Technician help).
Who does what in CertaCal
Everyone signs in with their own username and password. What you can see and do depends on your role, which the office sets in Settings › Company › Users. You only see what your role lets you act on: pages and lists you can't use don't appear at all. Auditors are the exception: they see everything and change nothing.
| Role | Works in | Can do |
|---|---|---|
| Technician | Technician app (phone or tablet) | Works the jobs dispatched to them, records calibrations, prints stickers, adds a scale found on a job (for the office to check), asks the office for a job. Sees only their own jobs and what each scale needs (its procedure, checklist and tests), not the company's lists, and no office app unless given an office add-on. |
| Reviewer | Office app: Home, Review, In progress, Jobs, Scales, Customers, Test weights, Reports | Reviews finished jobs: audits a sample of each job's scales against the program's quality score, decides anything flagged, and approves the job (which issues the certificates) or sends scales back to the technician; re-sends the job package to the customer. |
| Office admin | Office app | Everything a reviewer does, plus: sets up customers, locations and scales; schedules and dispatches jobs; answers technicians' requests; placed-in-service reports; test weights; reports and exports; settings; users. Approving procedures and tolerance rule sets is left to owners and quality managers. |
| Quality manager | Office app | Everything an office admin does. Owns the quality records: weight certificates, impact reviews, certificate wording, work instructions, checklists; approves procedures and tolerance rule sets. |
| Owner | Office app | Everything, including creating and changing other owners' accounts. |
| Auditor | Office app, read-only | Can look at everything, including Settings and the audit trail, and change nothing. |
| CertaCal administrator | CertaCal's administration address, outside your company | Adds companies, billing, site backups and notices. Not one of your users; sees your records only under Support access. |
This table is CertaCal's default. The owner can change who may approve amendments, rule sets, company policies, procedures and certificate wording, name technical managers, and choose which office pages office admins, quality managers and reviewers see, in Settings › Company › Role permissions. Owners always see everything, auditors always see what this table says, and nobody approves work they did.
Owners, office admins and quality managers who also do calibrations have Works in the field switched on (Settings › Company › Users). They then appear on the Jobs board and can be dispatched like a technician, and see their jobs in the technician app.
Office add-ons (Settings › Company › Users) give a technician parts of the office app without changing their role, for example a senior technician:
- Review: Review, In progress, Jobs, Scales and Customers; reviews and approves other people's jobs.
- Placed-in-service: Government reporting (placed-in-service and USDA P&S test reports), Scales, Customers and Weights & measures; prepares and sends the reports. A reviewer can be given this one too.
A change to someone's add-ons takes effect the next time they sign in.
How the work flows
- The office sets up the customer, its locations and its scales, with the tests each scale gets.
- The office schedules a visit and assigns it to a technician. (Or a technician asks for one, and the office accepts it.)
- The technician opens the job on their phone at the customer, tests each scale, prints its sticker, and finishes the job.
- CertaCal scores every calibration from its record, and a reviewer audits a sample of the job's scales (at least 10%, at least one, always including any that scored under 80%), decides anything flagged, and approves the job once it averages at least 80%. That issues the certificates. If something's wrong, scales go back to the technician to redo.
- When the job is approved, the customer is emailed their certificates and a health report.
- For legal-for-trade scales that were installed, repaired, moved or removed, a placed-in-service report goes to weights and measures.
- CertaCal sets each scale's next due date, and the cycle starts again.
Calibration basics
This chapter explains the ideas behind every screen in CertaCal. If you are new to scales and calibration, read it before anything else. Experienced staff can skip to the next chapter.
What a calibration is
A calibration answers one question: when a known weight is put on this scale, does the scale show the right number? We place certified test weights on the scale, read the indicator, and compare the reading with the weight we know is there.
The difference between the reading and the true weight is the error. Every scale is allowed a small error, called the tolerance. If the error is inside the tolerance, that point passes. If it is outside, it fails.
We write down what we found, adjust the scale if it needs it, test again, and give the customer a certificate that records all of it.
The words you will see every day
| Term | What it means |
|---|---|
| Capacity | The most the scale is built to weigh, for example 5,000 lb. |
| Division (d) | The smallest step the indicator shows, for example 1 lb or 0.1 lb. Also called the scale interval or graduation. |
| Number of divisions (n) | Capacity ÷ division. A 5,000 lb × 1 lb scale has 5,000 divisions. |
| Accuracy class | How precise the scale is designed to be: I, II, III, III L or IIII. Most shipping, floor and truck scales are Class III or III L. Lab balances are Class I or II. |
| Tolerance | The largest error allowed at a given load. It is counted in divisions (1 d, 2 d, 3 d...) and grows as the load gets heavier. |
| Error | The reading minus the true (applied) weight. A reading of 1,001 lb with 1,000 lb applied is an error of +1 lb. |
| As Found | The readings before you adjust or repair anything. This is how the scale was performing for the customer. |
| As Left | The readings after your adjustments. This is how you are leaving it. |
| Test weights (reference standards) | Your company's certified weights. Each weight is traceable to national standards through a lab certificate. |
| Legal for trade | A scale used to buy or sell by weight (a deli scale, a truck scale at a scrap yard). These are regulated by the state. |
Why As Found matters
The As Found readings tell the customer whether the product they weighed since the last visit was weighed correctly. If a scale fails As Found, the customer may need to look back at what they weighed. That is why you always record As Found before you touch anything, even if you can see the scale is off.
Where the tolerances come from
In the United States, scale tolerances come from NIST Handbook 44 (HB44), Specifications, Tolerances, and Other Technical Requirements for Weighing and Measuring Devices. The Scales Code in HB44 has a tolerance table (Table 6) that gives the tolerance, in divisions, for each accuracy class and load.
CertaCal does this arithmetic for you. For each test point it works out:
- How many divisions the test load is (load ÷ division size).
- Which band of the table that falls in for the scale's class.
- The tolerance in divisions, converted back to pounds or kilograms.
For example, a Class III scale with 0.1 lb divisions:
| Test load | Divisions | Maintenance tolerance |
|---|---|---|
| 0 lb | 0 d | 1 d = ±0.1 lb |
| 100 lb | 1,000 d | 2 d = ±0.2 lb |
| 300 lb | 3,000 d | 3 d = ±0.3 lb |
| 500 lb | 5,000 d | 5 d = ±0.5 lb |
Maintenance and acceptance tolerances
HB44 has two sets of tolerances:
- Maintenance tolerances apply to scales already in service. This is what almost every routine calibration uses.
- Acceptance tolerances are tighter (half the maintenance values for most classes). They apply to a scale that is new, newly installed, or just returned to service after major repair.
The office sets which one a scale is judged against (its tolerance basis). Some customers set their own tighter tolerances; the office can set those too. CertaCal shows the tolerance next to every reading, so you do not have to look it up.
The tests
The office decides which tests each scale gets. The technician app walks you through them in order. The common ones:
| Test | What you do | What it shows |
|---|---|---|
| Shift test (quadrants or corners) | Put the same weight on each corner or quarter of the platform and read it each time. | Whether the scale reads the same wherever the load sits (load cells matched, platform level). |
| Increasing load (build) | Add weight in steps, from zero up toward capacity, reading at each step. | Accuracy across the range (linearity). |
| Decreasing load (drop) | Take weight off in steps on the way back down. | Whether the scale follows the load down (hysteresis). Some customers ask for it; it is set per customer. |
| Zero return | Remove all the weight and check the scale returns to zero. | The scale isn't holding a false zero. |
| Repeatability | Put the same load on several times. | The scale gives the same answer each time. |
| Section test | For vehicle and truck scales: a test load on each section. | Each section weighs correctly. |
| Strain-load / substitution | For large scales where you can't bring enough certified weight: build a known load in steps using other material. | Accuracy above the weight you have with you. |
Each test shows the HB44 reference and a recommended load (for example, a shift test near one-third of capacity). You can use a different load if you don't have the weights with you. The app warns you when a load is below the recommendation; it is only a warning.
Test weights and traceability
Our weights are only useful if we can prove they are right. Every test weight is calibrated by an accredited lab, which issues a certificate with an expiry (recertification) date. That chain — our weights to the lab's standards to national standards — is called traceability.
When you record which weights you used, the certificate you issue is traceable. If a weight's certificate has expired, CertaCal warns you. To start, it doesn't stop you working, but the office has to explain it before the customer's certificate can go out. A company can choose to block it instead (Settings › Calibration › Company policies): then a calibration can't be sent until it's on current weights.
Legal-for-trade scales and placed-in-service reports
When a legal-for-trade scale is installed, repaired, moved, or removed, the state weights-and-measures office must be told. The form is a placed-in-service report. In California it goes to the county sealer; in Arizona to the state; other states have their own office and deadline, which the office sets up in CertaCal. CertaCal builds these reports automatically from your calibration and the office sends them.
Weights-and-measures inspectors may put a tag on a scale:
- Red tag — out of service. It can't be used until repaired and released.
- Blue tag — stop-sale / stop-use order.
- Yellow tag — a warning to fix something.
If a scale has a tag, you record it in the app, with the tag number and who approved putting it back in service.
Legal-for-trade scales also carry an NTEP (or California CTEP) Certificate of Conformance number — the CoC — on the data plate. It proves the model was type-approved. CertaCal asks you for it the first time you test the scale if the office doesn't have it.
Uncertainty (in short)
No measurement is perfect. Measurement uncertainty is an estimate of how far off our own measurement could be, from the weights' uncertainty, the scale's resolution and so on. ISO/IEC 17025-accredited certificates report it. CertaCal calculates it from the weights you pick; you don't have to work it out by hand.
The office app
The office app is where the company runs the business side of calibration: customers, their scales, the schedule, reviewing the technicians' work, the reports to weights and measures, test weights, and settings. It runs in a web browser on any computer. You don't install anything.
CertaCal is designed for ISO/IEC 17025:2017, the standard for the competence of calibration laboratories, and for 21 CFR Part 11 for your FDA-regulated customers' records (Help › Compliance statement). It keeps the records an assessor asks for: controlled procedures, traceable test weights, independent review before a certificate is issued, certificates with everything 7.8 requires, and an audit trail of every change. Accreditation itself belongs to the company: CertaCal supports it but can't grant it.
Signing in
- Open a web browser and go to the CertaCal address the office gave you, followed by
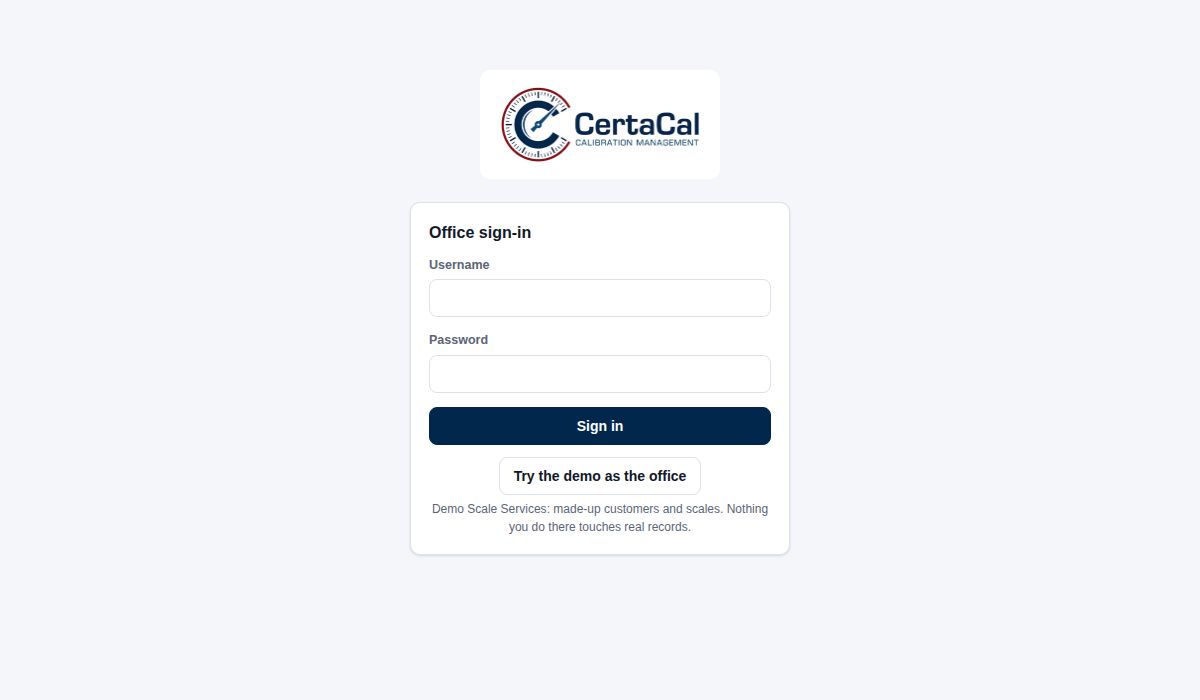
/office/(for examplehttps://yourcompany.certacal.net/office/). It works on a computer, a tablet or a phone. - Type your username and password and click Sign in. Usernames are first initial and last name (for example jsmith); capitals don't matter.
The company's web address (for example certacal.net) opens the CertaCal welcome page, with Log in and Try the demo buttons.
The first time an owner or office admin signs in to a new company, CertaCal opens Set up your company: the company's name, how certificate numbers look (see Settings › Certificates & reports › Certificate setup) what the job number is called on certificates, and the company's time zone and date format. Save and start opens the office; until then no other page opens for them.
If you forget your password, ask an office admin or the owner to set a new one for you (Settings › Company › Users → Reset password).
Your name and role are at the bottom of the menu, so you can tell at a glance whose account is open on a shared computer.
The demo company
Try the demo as the office on the sign-in page (and on the welcome page) opens a practice company: made-up customers, scales, test weights and jobs, some finished and waiting for review. Use it for training, or to show CertaCal to a prospective customer, without touching real records. At the demo's own address there is no username and password: the sign-in page has one link each for the office, the technician app and the customer portal. The demo goes back to the start every night.
The practice customers are in California, Arizona and Illinois. The Illinois one, a grain cooperative, shows Illinois's own placed-in-service forms: under Government reporting there's one for a new truck scale, marked as sent to the Illinois Bureau of Weights and Measures, and one for a floor scale adjusted on a routine visit, ready to send. The Bureau is on the Illinois tab of Government reporting › Offices, and the company's Illinois registration in Settings › Calibration › Agency & licenses.
- A DEMO MODE strip runs across the top of every page. Other visitors use the same demo at the same time and see what you enter, so don't enter real customer information.
- Certificates are stamped DEMO, and nothing is emailed: no customer emails, no placed-in-service reports, nothing sent to ERPNext or QuickBooks.
- Reset demo in the strip puts the practice company back to the start, ready for the next person.
The technician app has its own Try the demo as a technician button, signed in to the same practice company. The customer portal has Try the demo as a customer: one of the practice customers, with its scales, last year's certificates and a troubleshooting report. A service request made there shows up on the demo office's Jobs page. In the demo office, the Technician app and Customer portal links (click your name at the bottom of the menu) open each one signed in as the demo person.
CertaCal's administrator can switch the public demo off for the whole site. It resets itself every night.
Your training company
Your company has its own training company, at your company's address with -training after its name: for example acme-training.certacal.net for acme.certacal.net. Click your name at the bottom of the menu and choose Training company to open it.
- Sign in there with your usual username and password. You get the same role as in the company; nobody needs a new account.
- It's a copy of your company's own setup: your scale types and tests, your work instructions (SOPs), tolerance rules, checklists, comment templates, certificate layouts and settings, with made-up customers, scales and two years of history. New technicians can learn your procedures without touching real records.
- A striped amber bar runs across the top of every screen: Training company: practice only. Nothing here is sent to customers. It can't be closed, TRAINING shows beside Office in the menu and at the start of the browser tab's name, and Go to <your company> in the bar takes you back to the real one. Certificates are stamped TRAINING, and nothing is sent: no customer emails, no placed-in-service reports, nothing to ERPNext or QuickBooks.
- Practise here, not in your company: practice work in the real company is real work, and it's put right by voiding or amending it, never deleted.
- The owner, an office admin or the quality manager can click Reset training company in the bar: everything done there is cleared, your setup as it is that day is copied in again, and the sample visits are dated from that day.
- Only your company's people can sign in there.
Finding your way around
The dark bar down the left side is the menu. It is the same on every page, grouped under Work, Records, Compliance and Business; you see only the items your role uses.
| Menu item | What's there |
|---|---|
| Home | What needs attention today, and the headline numbers. |
| Jobs | The schedule board, job requests from technicians and customers, and locations that need a visit booked. The In progress tab has the visits technicians are working on now. |
| Review | Finished jobs waiting for review, with the program's quality score and the scales to audit. Approving a job issues its certificates. |
| Customers | Every customer account, its locations and its scales. |
| Scales | Under Customers: every customer's scales in one list. Search, filter by due date or status, add a scale. |
| Test weights | The company's weight kits and their certificates, recalls and out-of-tolerance reviews. |
| Government reporting | The reports that go to county or state weights and measures (placed-in-service) and, for scales under the Packers & Stockyards Act, to USDA. The Offices tab lists the offices they go to, for every state you work in. |
| Reports | Business and quality reports: calibrations due, scales tested, fails, response time, weights, service agreements, job quality scores, nonconforming work, a full scale export. |
| Quotes | Service agreement quotes for customers and prospects, and the prospects themselves (while quotes are on). |
| Money | What closed jobs billed by month, technician and customer, split into flat-rate labour, hourly labour and parts (owners and office admins). |
| Settings | Users, agencies and licenses, certificate wording and review settings, tests, work instructions, checklists, lists, and integrations (API, webhooks, QuickBooks, ERPNext). |
Small numbers next to a menu item are counts that need you: red means something is late or wrong (overdue scales, weights without a current certificate, job requests), grey means work is waiting (jobs to review).
Click your name at the bottom of the menu for:
- Help: the guide for your role, in a new tab (search it for any word, such as "shift test" or "merge"). Every guide is also listed at
/help/on the CertaCal address. - Technician app: the phone app in the same browser, useful for seeing what the technician sees.
- Terms.
- Appearance: Light, Dark or Same as this device (the default, which follows your computer's or phone's own light or dark setting). Your choice follows you to every device you sign in on, in the office, the technician app and the customer portal. In the demo, which everyone shares, it stays on the device you chose it on.
- The version, e.g. CertaCal 2026.10.20 · 43f0e4c. Click it to copy it when you report a problem.
- Sign out.
When CertaCal has been updated since the page was opened, a bar at the top says A new version of CertaCal is ready; click Update.
Notices from CertaCal
Now and then a notice from CertaCal shows across the top of the page: planned maintenance when CertaCal will be unavailable, a new feature, or an important change. Close an ordinary notice with × and it stays closed, on every computer and phone you use. A notice marked Important (maintenance, for example) can't be closed; it goes by itself when it ends.
The Home page
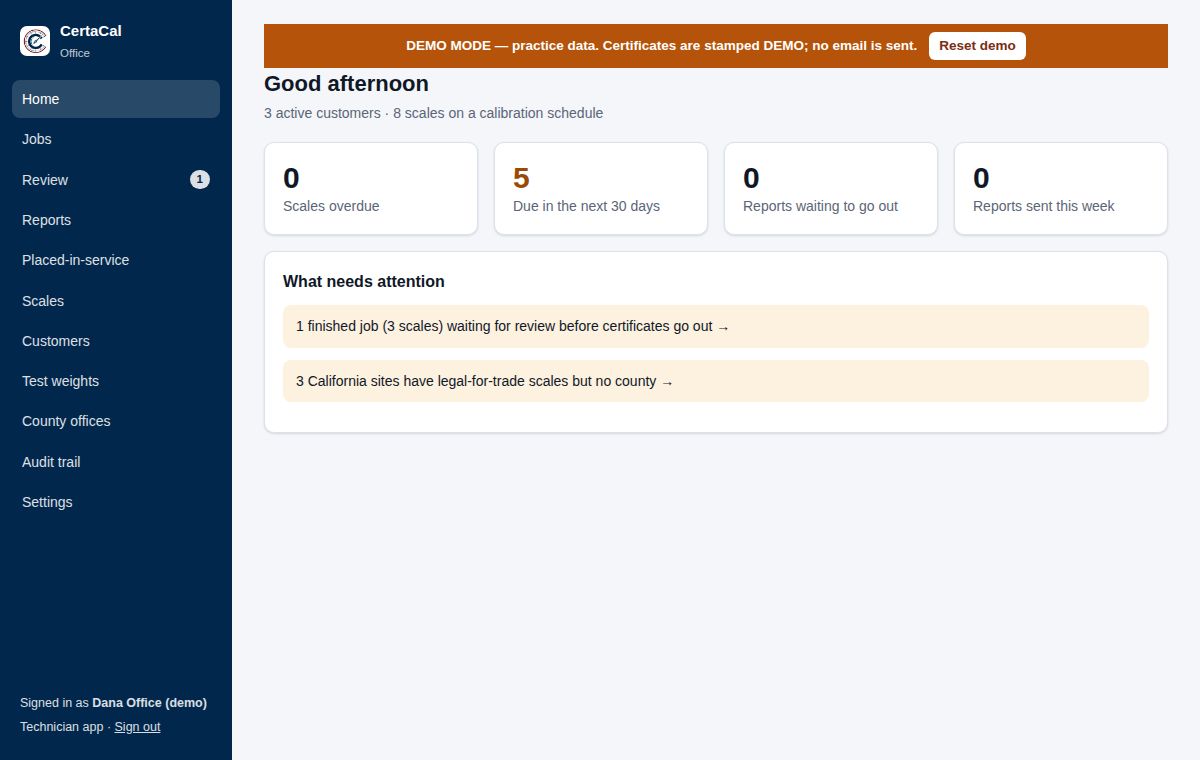
The four boxes at the top are the headline numbers: jobs overdue and jobs due soon (in the next 30 days, or your company's own due-soon days) (one job per location, with the number of scales in brackets), placed-in-service reports waiting to go out, and reports sent this week. Click a box to see the list behind it.
Tasks, above it, lists what the office must do by a date: the reference standards and test-weight kits to send for calibration before they're due (see Test weights), and each scale that failed, to follow up within two days with the customer, a repair or a quote (it opens the scale). Yours come first, then the rest with who they're for. Done ticks one off (it's kept in the audit trail). A new due date makes a new task.
What needs attention is your to-do list, in a tile for each area of work: Field work, Review & sending, Government reporting, Weights & standards, Quotes & agreements, Quality (open NCRs) and Records & setup. Each line is a count and what it's of; click it to open the page where you deal with it, or point at it for more. The colour of the count says how urgent it is: red for overdue or broken, amber for waiting on you, blue for information, green for good news. Tiles with red come first. An area with nothing waiting shows as a green all clear below the tiles. You only see the areas your role can open. It includes:
- job requests from technicians and customers, and scales technicians added in the field;
- finished jobs waiting for review, and approved jobs whose email to the customer failed;
- placed-in-service reports that are late, due today, missing information, or ready to send;
- test weights without a current certificate, weights due for recertification, and weights that came back from the lab out of tolerance;
- reference standards that came back out of tolerance, and test weights or reference materials overdue for an intermediate check;
- service agreements due for review or ended without renewing;
- legal-for-trade scales with no CoC number, and California locations with no county.
When everything is handled, it says "Nothing waiting."
How saving works
Most fields in the office app save by themselves when you leave them: type a change, then click somewhere else or press Tab. A small message at the bottom of the screen says "Saved". Switches and drop-down lists save the moment you change them.
Longer pages (a scale's details and tests, a customer's page) also have a Save bar at the bottom. Clicking it saves the field you are still in and confirms that everything is saved. Use it before you leave the page if you're not sure.
Forms that create something new (Add a customer, Add a scale, Schedule a visit) have their own button at the bottom, and nothing is created until you click it.
What your role lets you do
What you see in the menu, and what you can change, depends on your role. A page you can't use isn't shown.
- Reviewers see the review side of the office: Home, Review, In progress, Jobs, Scales, Customers, Test weights and Insights. They can audit scales, approve or send back jobs, approve or return single calibrations, and re-send job packages. Everything else is view-only.
- Office admins, quality managers and owners see and can change everything in the office app. Approving procedures, tolerance rule sets, company policies, certificate wording and amendments is for owners and quality managers.
That's CertaCal's default. The owner can change who may approve each of those, name technical managers who get approvals of their own, and choose which pages office admins, quality managers and reviewers see, in Settings › Company › Role permissions. Owners always see every page; auditors keep what they see; Home is always there; auditors never approve. The same page sets whether people may approve their own work (by default, someone else approves it). A change reaches people already signed in within about 15 minutes.
- Technicians use the technician app. The office can give a technician the Review add-on (Review, In progress and Jobs, to review other people's work) or the Placed-in-service add-on.
- Auditors see every office page except the Company settings (apart from its Audit trail), the Connections and Your CertaCal account settings and the management-only reports (Job quality scores, Your figures against the industry), and change nothing.
Exporting to Excel or CSV is for office admins, quality managers and owners.
The audit trail
Open Settings › Company › Audit trail (auditors see it there too). CertaCal records every sign-in (including refused ones) and every time anyone adds, changes or removes anything, from the office or the technician app. Browsing isn't recorded. Each entry says who, when, from which app, what happened, and, for a change, each field's value Before and After.
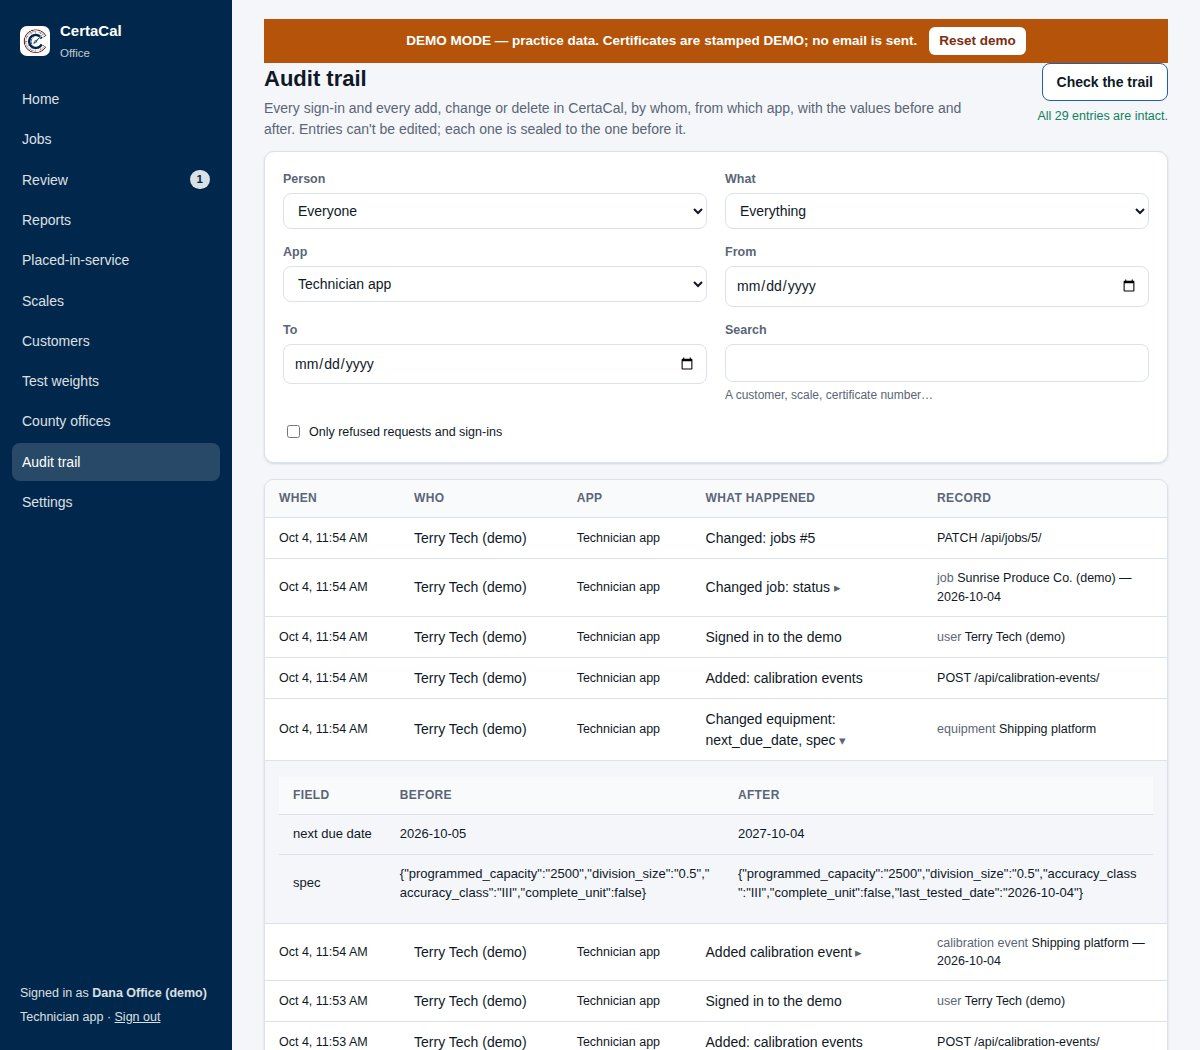
- Filter by Person, What (records added, changed or removed; reviews and status changes; sign-ins), App, dates, or Search for a customer, serial number or certificate. Only refused requests and sign-ins shows attempts that were turned away.
- A scale's and a customer's page each have a Change history button that opens the trail for just that record.
- Entries can't be edited or deleted. Each one is sealed to the one before it, so changing or removing an old entry breaks the chain. Check the trail re-reads every entry and confirms All N entries are intact, or names the first one that was altered.
Customers and locations
A customer is the company that pays us. A customer has one or more locations (sites): the addresses where their scales are. Every scale belongs to one location. Getting this right matters, because:
- the technician's job is for one location;
- the location's state (and in California its county) decides where placed-in-service reports go;
- the location's serviced by office is the office printed on its certificates and stickers.
The customer list
Click Customers in the menu.
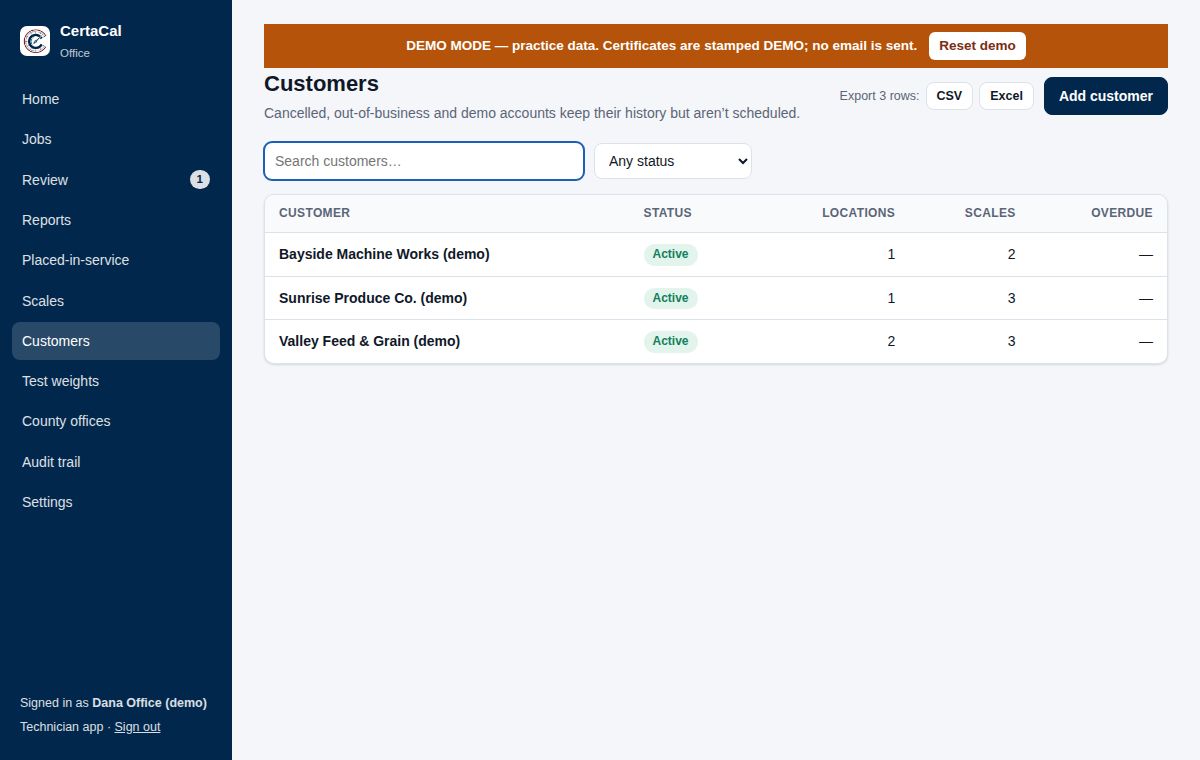
Type in the search box to find a customer by name. The status filter picks Active, Inactive, Contract cancelled, Out of business or Demo account customers. The list shows how many locations, scales and overdue scales each customer has. Click a name to open the customer.
Adding a customer
- Click Add customer (top right of the customer list).
- Account: the company name (required), the owner's email, the billing address, and whether they want a decreasing-load (drop) test on their scales.
- First location: if the scales are at the billing address, leave Scales are at the billing address switched on. Otherwise switch it off and enter the location's name, address, state, county, and on-site contact.
- Pick Serviced by: the office that goes there.
- Click Add customer.
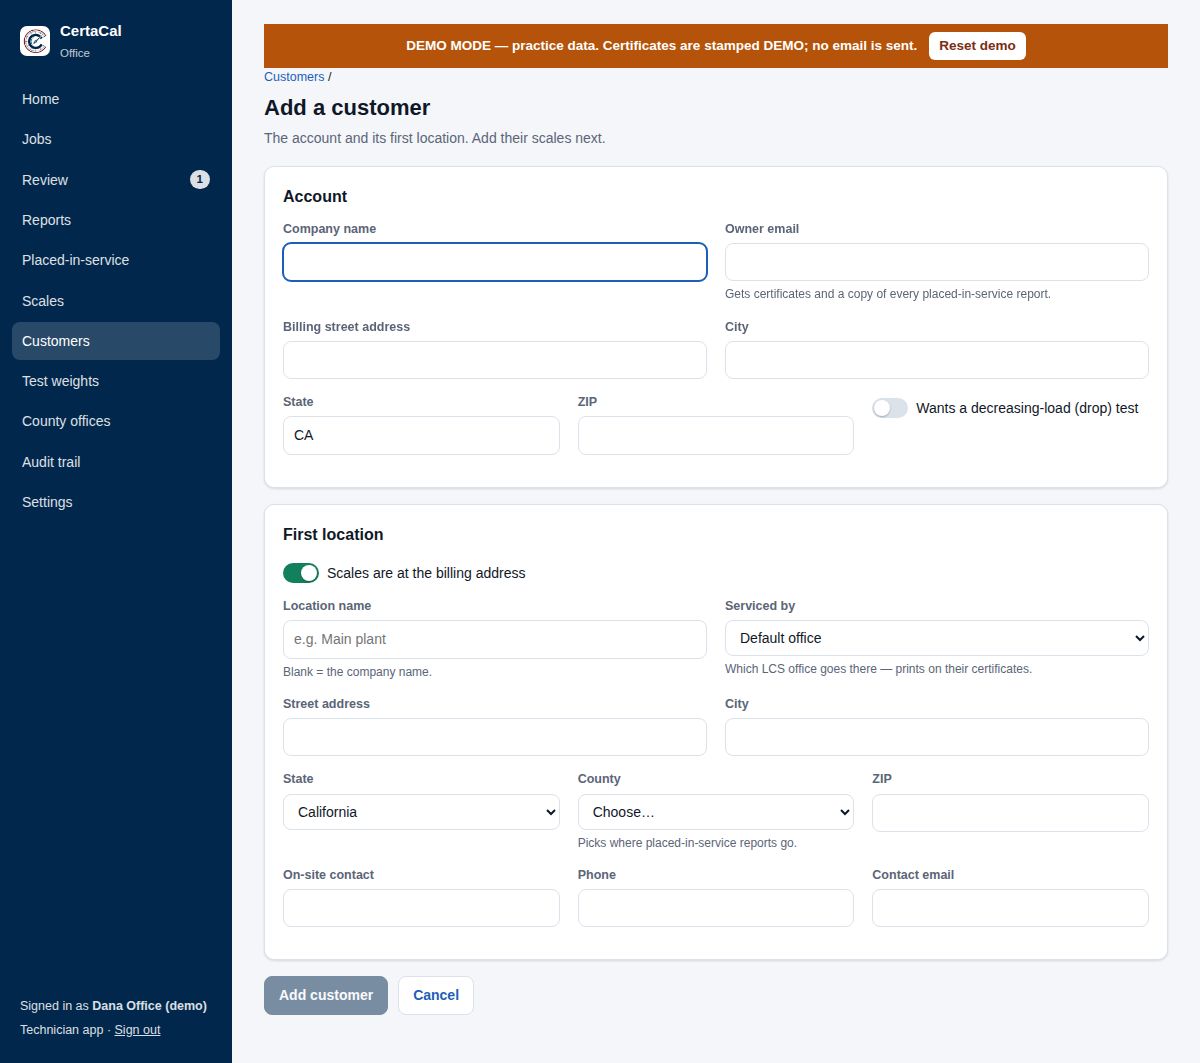
CertaCal opens the new customer's page. Add their scales next (see the next chapter).
The customer page
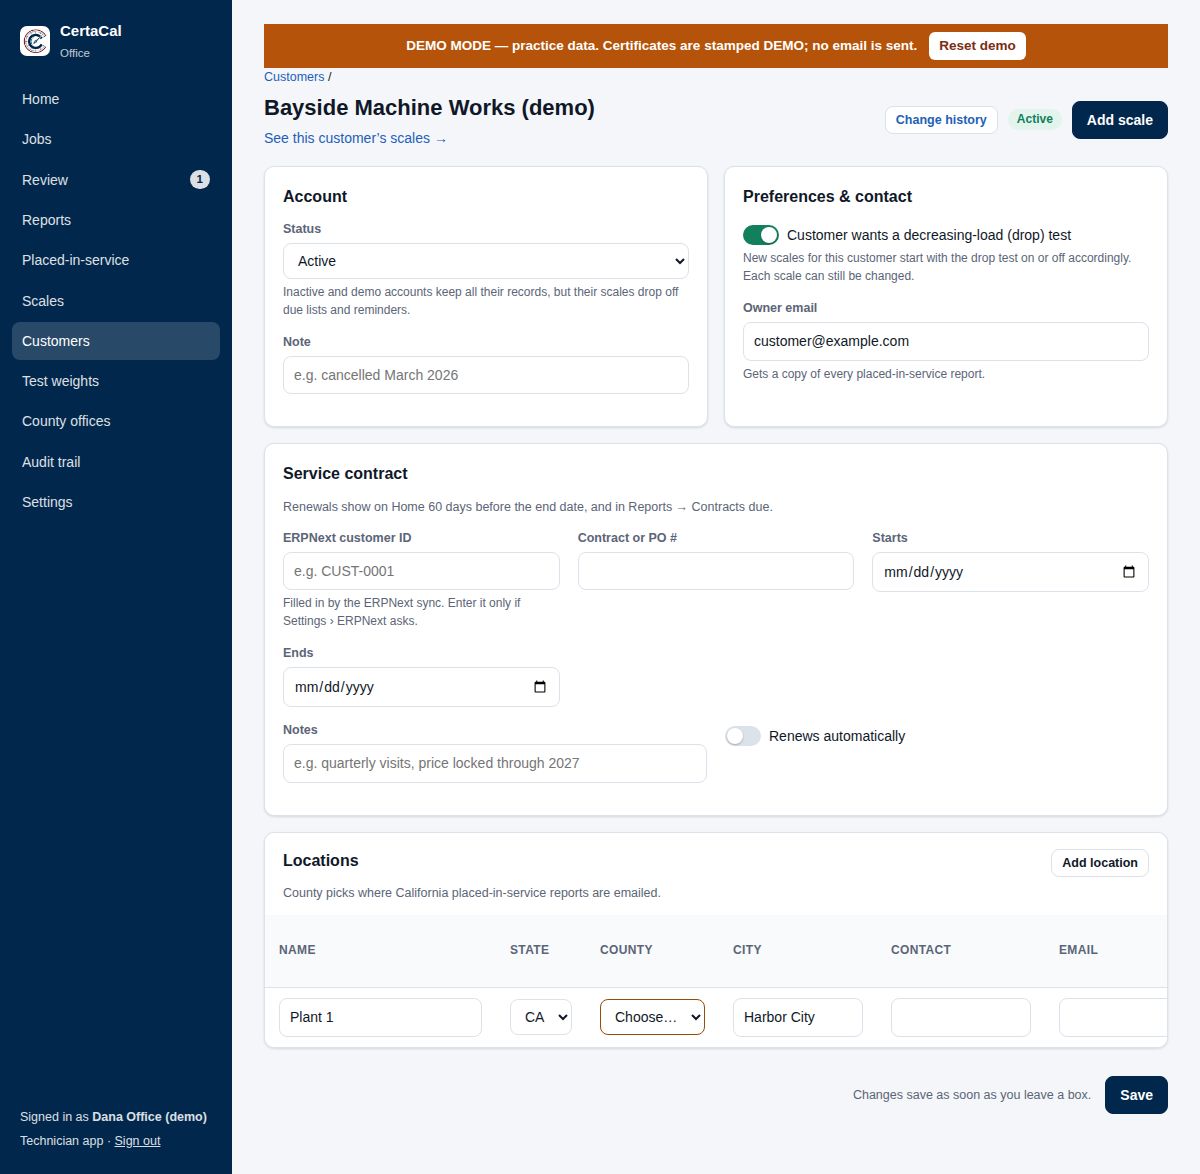
Account
- Status. Active customers' scales are scheduled. Changing it to Inactive, Contract cancelled, Out of business or Demo account keeps all their records but takes their scales off due lists and reminders. CertaCal asks you to confirm. Setting a customer Inactive (or Contract cancelled, or Out of business) also sets their active, on-call and on-hold scales to Inactive, with a note on each; setting the customer back to Active puts those scales back as they were. Rental stock and scales waiting for office review aren't changed. Add a Note saying why ("cancelled March 2026").
Preferences and contact
- Customer wants a decreasing-load (drop) test. New scales for this customer start with the drop test on or off to match. Each scale can still be changed on its own.
- Devices found on site. Contract review for scales and devices a technician finds that weren't on the job. Test under our agreement (the default): the technician tests them on the agreed terms and you accept them on Review. Ask first: the technician tests one only after the customer's contact on site approves it (their name is recorded with the device, and in the audit trail) or after you accept it; otherwise it's recorded as not inspected.
- Email certificates to this customer. Off: the visit's certificates are still issued and in the customer portal, but nothing about the visit is emailed, and neither are amended certificates. The job on the Review page says Not emailed. Due reminders and portal invitations still go to the customer's portal users: they're separate. Only the owner or an office admin can change this.
- Hold for payment. Company's choice follows Settings › Certificates & reports › Emails to customers; Hold until released or Don't hold overrides it for this customer. A held visit's certificates aren't emailed or shown in the portal until the owner or a reviewer releases them on the Review page. Only the owner or an office admin can change this.
- Send the health report. Company's choice follows Settings › Certificates & reports › Emails to customers; Yes or No overrides it for this customer. Yes with certificates not emailed sends the health report on its own. Only the owner or an office admin can change this.
- No photos allowed at this customer's sites. For a site that allows no cameras. Technicians can't take or upload photos of the customer's equipment, nothing asks them to (not even a new scale's tag photos), and a missing photo doesn't cost points on the job's quality score. It overrides the photo settings on scales and technicians.
- Owner email gets a copy of every placed-in-service report.
- Other emails: more people at the customer (quality, the plant manager, accounts) who get the visit's certificates, amended certificates and the placed-in-service copies, alongside the owner email and the location's contact. Type or paste them separated by commas.
Service agreements
Shown when an owner has switched service agreements on (Settings › Company › Service agreements). A service agreement covers the whole customer or one location; where a location has its own, it wins over the one for all locations. Add agreement starts one for all locations; the links under the list start one for a single location. Pick what it covers and its start date, then fill in the agreement:
- Term: contract or PO number, start date, length in months (blank for open-ended), end date (start plus the length unless you set it), Renews automatically, and Remind us to review it on (by default the number of days before the end set in Settings). Reviewed records today and clears the reminder; Renew for another term moves the end date and the reminder on by the length. An agreement that renews automatically does that by itself when its term ends.
- Visits: how often the covered devices are done (for example every 3 months). Their due dates follow the agreement instead of their own intervals, from their last calibration; blank keeps each device's own. Make the next visit's job makes an unassigned job for each location when its devices come due within the days you set, unless the location already has an open job.
- Prices: Service (flat per visit), Labor and Travel labor (per hour or per visit; per hour bills the technicians' on-site and drive hours from the Customer Service Report), Truck charge (per visit) and three more lines named in Settings. A blank line isn't billed. See QuickBooks Online in the Settings chapter.
- Contacts and addresses: the service contact (written on jobs the agreement makes) and the accounting contact (QuickBooks sends the invoice to this email). The billing and service addresses come from the customer and the location.
To bring many in at once from a spreadsheet, use Settings › Import records › Service agreements (see the Settings chapter).
The Home page reminds you when an agreement is due for review or has ended without renewing; Reports › Service agreements lists them.
Locations
The table lists every location with its street, city, state, county and ZIP, its contact and (for Arizona) its BMF number. Edit a cell and click away to save it. Placed-in-service reports need the location's street address and city, and in California its county.
Billing address
The customer's billing address, under Billing address on the customer's page, is printed on service agreements, and on certificates when your certificate layout includes it (Settings › Certificates & reports › Forms & certificate layouts › Certificates). Edit a field and click away to save it.
To add a location, click Add location, fill in the name, address, state, county and contact, and click Add location.
Scales
Below the locations is the list of the customer's scales. Add scale at the top of the page starts a new scale with the customer already picked.
At the bottom of the page, click Save if you want to be sure your last change is saved. Change history at the top opens the audit trail for this customer.
Merging duplicate customers
The same company is sometimes on file twice ("Acme Foods, Inc." and "Acme Foods Inc"), often from the import. When CertaCal finds customers whose names match once commas, capitals and endings like LLC or Inc are ignored, the customer's page shows a yellow box: Looks like the same customer, listing each one with its scales and jobs, and which locations move across or join a matching location here.
- Open the customer you want to keep (usually the one with the most scales and the correct name).
- Check the list in the yellow box really is the same company.
- Click Merge it into this customer (or Merge them…) and confirm.
Their scales (with all their calibrations), jobs, placed-in-service reports and locations move to this customer, and the duplicates are removed. A location with the same street and city as one already here is joined into it. Anything blank on this customer (email, billing address, contract) is filled in from the duplicates. The audit trail records every step.
Jobs
At the top of a customer's page, Jobs lists every CertaCal visit for them, newest first: the date, location, status, how many scales were calibrated (of how many on the job) and how they came out. For a closed job, Health report opens the Equipment Health Report and Download all saves the health report, every certificate (PDF and digital certificate) and the job's troubleshooting reports in one .zip, the same download the customer gets in the portal. Click a job to see each scale on it with its result, review status and certificate; scales not done yet show Not done.
Past visits (before CertaCal)
At the bottom of the customer's page is a list of their jobs from the old system: date, how many scales, and how many were out of tolerance on arrival or left out. Health report rebuilds that visit's one-page health report from the imported readings, with each scale's reliability up to that visit. The old system's pass/fail calls stand.
Use the newest one to talk the customer through the condition of their scales before the first visit in CertaCal.
Quotes
Quotes in the menu is where you write service agreement, calibration and repair quotes, for customers and for prospects who aren't customers yet, send them as a PDF from your own email, and turn an accepted one into the customer's service agreement or a job. It shows while quotes are on (Settings › Company › Quotes). Owners and office admins write and send quotes; quality managers and auditors can read them.
Writing a quote
Click New quote, pick What it's for (a service agreement, a calibration or a repair; see Calibration and repair quotes for those) and who it's for: A customer (and one location, or all of them), A prospect, or A new prospect (type their details in). The quote starts from your price list:
- Each service visit: the flat rate per visit, and any extra charges you add. Each quote's flat rate is entered on the quote: a new quote starts with it blank and highlighted, and it can't be sent until you enter it (for example a weight truck). What the flat rate includes (truck and travel, time on site, reports, the customer portal, or your own list) is printed as Included, at no charge.
- Service agreement: visits a year (1, 2, 3, 4, 6 or 12), the length in months (blank for open-ended), the start date (blank: the day it's accepted), Renews automatically, and tax. The year's total is the price per visit times the visits a year, plus tax.
- Equipment covered: for a customer, its active devices at the location; remove any the agreement won't cover. For a prospect, type their devices in: description, kind of device, capacity, location and how many.
- Notes and Terms are printed on the quote; the terms come from Settings and can be changed for one quote.
Change the lines, then Save the lines. Preview PDF shows the quote as the customer will see it.
Sending, revising and the answer
Send asks for the address (the prospect's email, the location's contact, or the customer's email) and emails the quote from your company's email with the PDF attached; your office copy (Settings › Certificates & reports › Emails to customers) gets a blind copy. Sending dates the quote and sets Good until from the number of days in Settings, and the quote is then fixed as it went. To change a sent quote, click Revise: you get a new revision with the same number (for example Q-0012 rev 1) to change and send; sending it closes the earlier one.
The customer's answer
While Customers can accept quotes online is on (Settings › Company › Quotes, on unless you switch it off), the quote email has a link. It opens the quote, with your company's name and contact and nothing else, and the customer or prospect can:
- Accept: type their name and title, sign in the box with a finger or mouse, and tick I accept this quote and its terms.
- Decline: say why, if they want to.
Customers with a portal account also see their quotes under Quotes in the customer portal (for the locations they see) and can answer there. The link works until the quote's Good until date, and only once: after an answer, or once a newer revision replaces the quote, it says so instead. Each revision has its own link.
When they answer, the person who prepared the quote gets an email (else your company's office address), Home shows quotes answered by the customer since you looked, and Quotes marks it New answer. The quote page shows who answered, their title, how (the emailed link or the portal), when and from which address, and the signature. An acceptance does the same as recording it yourself (below), and the PDF becomes the accepted copy, with an Accepted box carrying the name, title, date and signature.
If CertaCal can't finish an acceptance by itself (a prospect has the same name as one of your customers, or service agreements are switched off), the acceptance is still recorded and the quote shows To finish: click Finish it, choose the customer (or make a new one), and the agreement or job is made then. Home counts these.
You can also record the answer yourself, for a customer who answers by phone or email:
- Accepted makes the customer's service agreement from the quote: the location, price per visit, visits a year, length and renewal, with the quote number as its reference, so nothing is typed twice. Service agreements must be switched on (Settings › Company › Service agreements).
- Declined records why, if you know.
- Expired: a sent quote past its Good until date becomes Expired by itself overnight.
QuickBooks estimates
When QuickBooks through Make is set up and Accepted quotes is on (Settings › Integrations › QuickBooks; on by default), each accepted quote goes to your Make scenario as a QuickBooks estimate: its priced lines on the products/services you named (Service, Labor, Travel labor, Truck charge, Materials; an agreement quote for a year of visits), the customer, and the quote number in the memo. The guide QuickBooks through Make has the estimate scenario. QuickBooks works out sales tax with its own tax settings; the quote's tax is noted in the memo. The quote page shows the estimate's number once Make has written it back, or why it couldn't be sent, with Try again; one that couldn't be made is also in Needs attention. A prospect's quote goes once the prospect is a customer.
Calibration and repair quotes
A calibration or repair quote is one piece of work. Pick how it's Priced:
- One price for the work: a single line for this job's flat rate, blank until you enter it, and any other charges you add. It prints as a quote with a total.
- Time and materials: an estimate. It starts with an hour of labor at your labor rate, travel (hours, or miles at the per-mile rate) and the truck charge from the price list, and its minimum charge. Change the estimated hours and miles, and add materials: pick a part from your materials list (its price fills in) or type it with its part number, quantity and price each. The total is labor, travel, truck and materials, or the minimum charge when that's more, plus tax. It prints as an Estimate with an Estimated total, and with your time-and-materials terms: the work is billed at the actual time and materials.
For work that needs an overnight stay, Add per diem adds a line of days away at the price list's Per diem, a day (Settings › Company › Quotes). The invoice bills the quoted days.
For a customer, tick the devices the work is on when you start the quote; for a prospect, type them in on the quote.
Accepted makes a job request for those devices, on the Jobs board for you to schedule like any other request. A time-and-materials quote's estimate goes with it: the quoted parts are already on the job's Customer Service Report, marked as quoted, for the technician to confirm or change, and the report shows the estimate to compare with. On that job every part needs its price, because the invoice bills them.
QuickBooks (see Settings › Integrations): a job from a quote bills the quoted price as one line, or, for time and materials, what was recorded at the quoted rates: the technicians' on-site hours as labor, their drive hours (or the quoted miles) as travel, the truck charge, the quoted per diem days, one line for each part on the service report, and the rest of the minimum charge if the total comes to less.
Requests from the field
A technician on site can tap Request a quote on a scale (or for the whole visit) in the technician app: what it needs, photos, and the parts it takes, each with its price. It arrives as a draft time-and-materials repair (or calibration) quote, marked Requested by the technician, with their notes and photos. Home lists the requests waiting, and Quotes shows them under Requested from the field.
Each part the technician added says Added in the field by them. Check each one (change it if needed) and tick Checked, then Save the lines; a quote can't be sent while a line from the field is unchecked. Then add the estimated hours, travel and anything else, and send it as usual.
How quotes are doing
Reports › Quotes shows quotes made, sent, accepted, declined and expired by month, with their totals and the share accepted, or the open quotes and how long each has waited (see Reports and exports).
Prospects
A prospect is a company you're quoting that isn't a customer. It's kept apart from your customers: it isn't in the customer list, the Scales list, the customer portal, due reminders, QuickBooks or anything you're billed for. Quotes › Prospects lists them with their contact, address, how they heard of you and notes, and each prospect's quotes.
When a prospect's quote is accepted, the prospect becomes a customer: CertaCal makes the customer and its first location from the prospect's details, offers to add the devices typed on the quote as equipment (those with a kind of device; they're marked Added in the field - needs office review so you can complete them), then makes the service agreement. If a customer with the same name already exists, CertaCal asks whether to use it or make a new customer; it never makes a duplicate on its own.
A prospect can also be turned into a customer without a quote (Convert to customer), or marked lost with the reason (Mark lost; Reopen brings it back).
Tax is each quote's own, because it depends on where the work is. Enter the rate beside the total, or tick No tax. A new quote takes the rate of the last quote for the same location (or the same prospect) and says which quote it came from; otherwise it's blank. A quote can't be sent until it has a rate or No tax is ticked.
The customer portal
The customer portal lets your customers sign in to see their own scales, due dates and calibration certificates, at your site's address followed by /portal/. It's off until you switch it on.
Switching it on
Settings › Connections › Customer portal:
- Portal on / off: the whole portal. Off: nobody can sign in to it, and no reminder emails go.
- What customers can do (seeing scales, due dates and certificates is always included), each on or off:
- Ask for service: they can ask for a visit; it shows under Jobs → Requests, marked Customer portal.
- Due-date reminder emails: one email per person when their scales come due, on the schedule in Settings › Certificates & reports › Emails to customers › Due dates & reminders (one reminder 30 days before unless you change it). Each email has a link to stop them, and each person can switch them off under Account.
- Scale health summary: a summary at the top of the portal of how the customer's scales stand after their last reviewed calibration (in good shape, out of tolerance, adjusted, worth watching, not inspected), each count opening the scales behind it. A customer can be set to Always show or Never show it instead, on their page under Portal users.
- Customers manage their own people: a portal administrator at the customer can invite and switch off colleagues, within their own locations.
- Sign in with ERPNext (below): only once ERPNext is linked.
Inviting a customer's people
On the customer's page (Customers → the customer), Portal users:
- Click Invite someone, and enter their name and email.
- With more than one location, tick the locations they see (none ticked: all of them). A plant manager, say, sees just their plant.
- Tick Portal administrator if they should invite and manage their colleagues.
- Click Send invitation. They get an email with a link to choose their password (good for as many days as Settings › Company › Security says, 7 unless you change it; Resend sends a new one). Their username is their email address.
The list shows each person's locations (click to change them), whether they're an administrator, whether they get reminders, when they were last active, and Access on or off. Portal access at the top switches the whole customer off or on; inviting someone switches it on. Someone you switch off stays off: the customer's own portal administrator can't switch them back on. A portal administrator can only invite addresses at their own email domain.
Customers only ever see their own scales (not ones a technician added in the field until you've checked them), calibrations that have been approved, and the certificates for those. When a scale moves to another customer (a rental placed with someone new, a resale, a correction), its new customer sees only the calibrations from then on: the earlier certificates carry the earlier customer's name.
Customers' auditors
A customer's own auditor (a certification body, their customer, a regulator) can get read-only access until a set day, with their own sign-in: never an anonymous link. On the customer's page, Auditors:
- Click Invite an auditor, and enter their name and email.
- Choose the last day of access (required; at most the longest access set in Settings › Connections › Customer portal, 90 days unless you change it).
- Tick the locations and, if you like, just some equipment (none ticked: everything at those locations).
- Click Send invitation. The email (its wording is in Settings › Certificates & reports › Emails to customers, Auditor invitation) says who invited them, what they can see and until when.
An auditor sees the chosen equipment, each item's calibration history, approved certificates (never preliminary reports), amendments and the replaced copies, the certificates of the test weights and standards used and what those were calibrated against, and your accreditation as the certificate printed it, with your certificate of accreditation and scope document as in force on the calibration's date (Settings › Certificates & reports › Accreditation scope › Accreditation documents). They can't see visits, quotes, prices or service requests, ask for anything, or change anything: the server refuses it, whatever the screen shows. Extend, End now and Resend are on each row. The day after the last day they can't sign in, and anything they already had open stops working.
Below the list, What this customer's auditors opened shows every scale, certificate and standard's certificate each auditor opened, and when. The customer's portal administrator sees the same list in the portal.
Customers may invite their auditors (Settings › Connections › Customer portal, off unless you switch it on) lets the customer's portal administrator invite, extend and resend themselves. Off, only your office invites; the customer's administrator can still see their auditors and what they opened, and end an auditor's access.
Requests from customers
A customer's request shows in Jobs → Requests with Customer portal next to their name, and the scales they ticked already on it. Accept it (schedule it) or decline it with a reason; the customer sees the date, or your reason, under Service requests in the portal.
Sign in with ERPNext
Once the ERPNext connection is set up and on (Settings › Connections › ERPNext), customers who use your ERPNext customer portal can get into the CertaCal portal with their ERPNext account, without a second password. Settings › Connections › Customer portal → Sign in with ERPNext shows the exact addresses to use:
- In ERPNext, open OAuth Client and add one: App Name CertaCal; Grant Type Authorization Code; Response Type Code; Scopes
openid all; Redirect URIs and Default Redirect URI the address shown in CertaCal; keep Skip Authorization ticked. - Copy its App Client ID and App Client Secret into CertaCal, and switch Sign in with ERPNext on.
- In ERPNext's Portal Settings, add a menu item (or a button on a Web Page) for customers, linking to the start address CertaCal shows.
ERPNext decides who belongs to which customer: the ERPNext Contact with the person's email must be linked to an ERPNext Customer whose ID is on the CertaCal customer (ERPNext customer ID), and that customer's Portal access must be on (inviting one person, or the switch on the customer's page). Someone with no portal account yet gets one automatically, seeing all that customer's locations; limit them afterwards like anyone else. Anyone CertaCal can't match is told to contact you.
Scales
Everything CertaCal does starts from the scale record: what it is, how big it is, how precise it is, which tests it gets, and when it's due. A technician can only test a scale well if the office has set it up well.
The scale list
Click Scales in the menu.
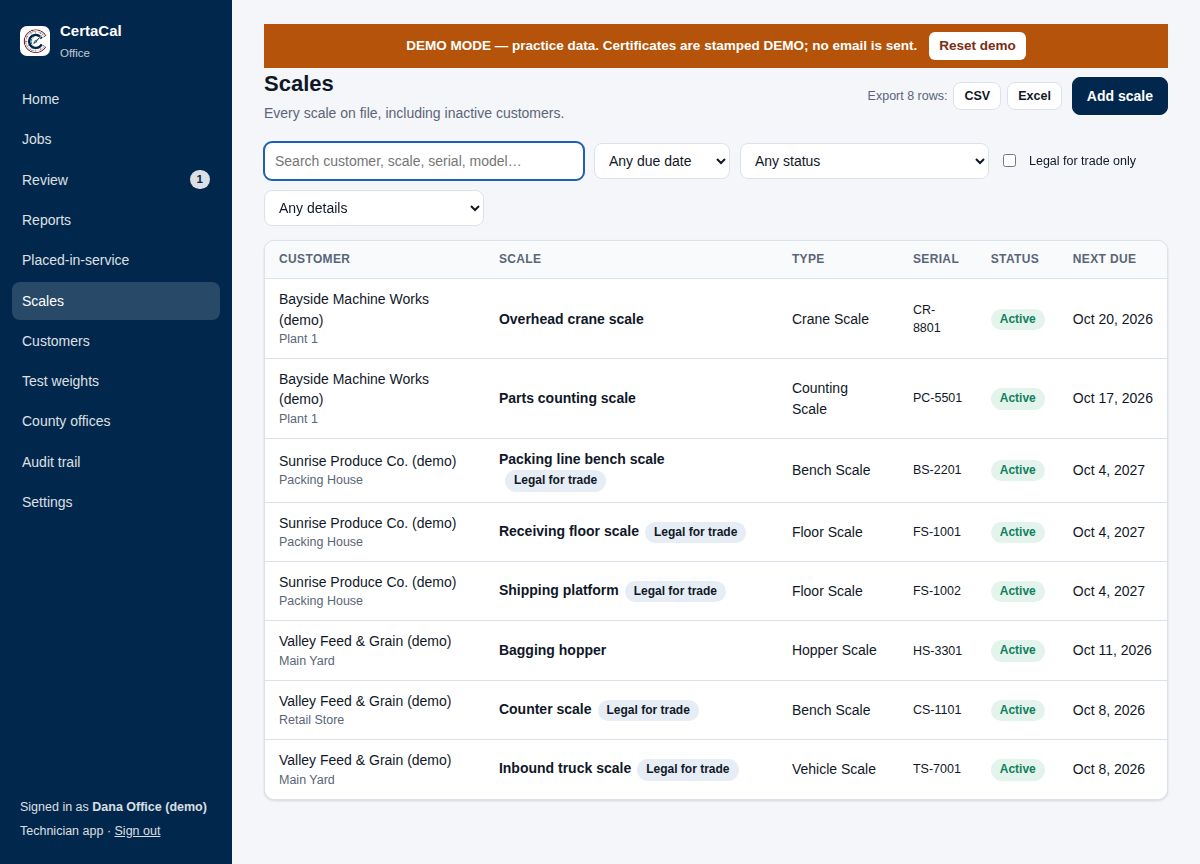
- Search finds a scale by customer, name, serial number or model, or by the number of a certificate issued for it.
- Find a certificate lists every certificate CertaCal has issued, newest first. Type the number printed on a certificate (part of it is enough) to see whose scale it is and open the PDF.
- Due date filter: Overdue, due soon (within your company's due-soon days, 30 unless changed in Emails to customers › Due dates & reminders), no due date.
- Status filter: Active, On hold, Added in the field, and the rest (see Scale statuses below).
- Details filter: Missing base information lists the scales with no base make or model that aren't marked as a complete unit. Work through it a customer at a time; Export gives the same list in Excel, with the base columns.
- A Legal for trade badge marks scales used to buy or sell by weight.
- Visit: Booked with the date and technician, or a Schedule button. Tick scales to schedule several at once (see the Jobs chapter).
The red number next to Scales in the menu is how many are overdue. Only active scales of active customers are scheduled, so those are the only ones that can be overdue.
Adding a scale
Start from the customer's page (Add scale fills in the customer for you) or from Scales → Add scale.
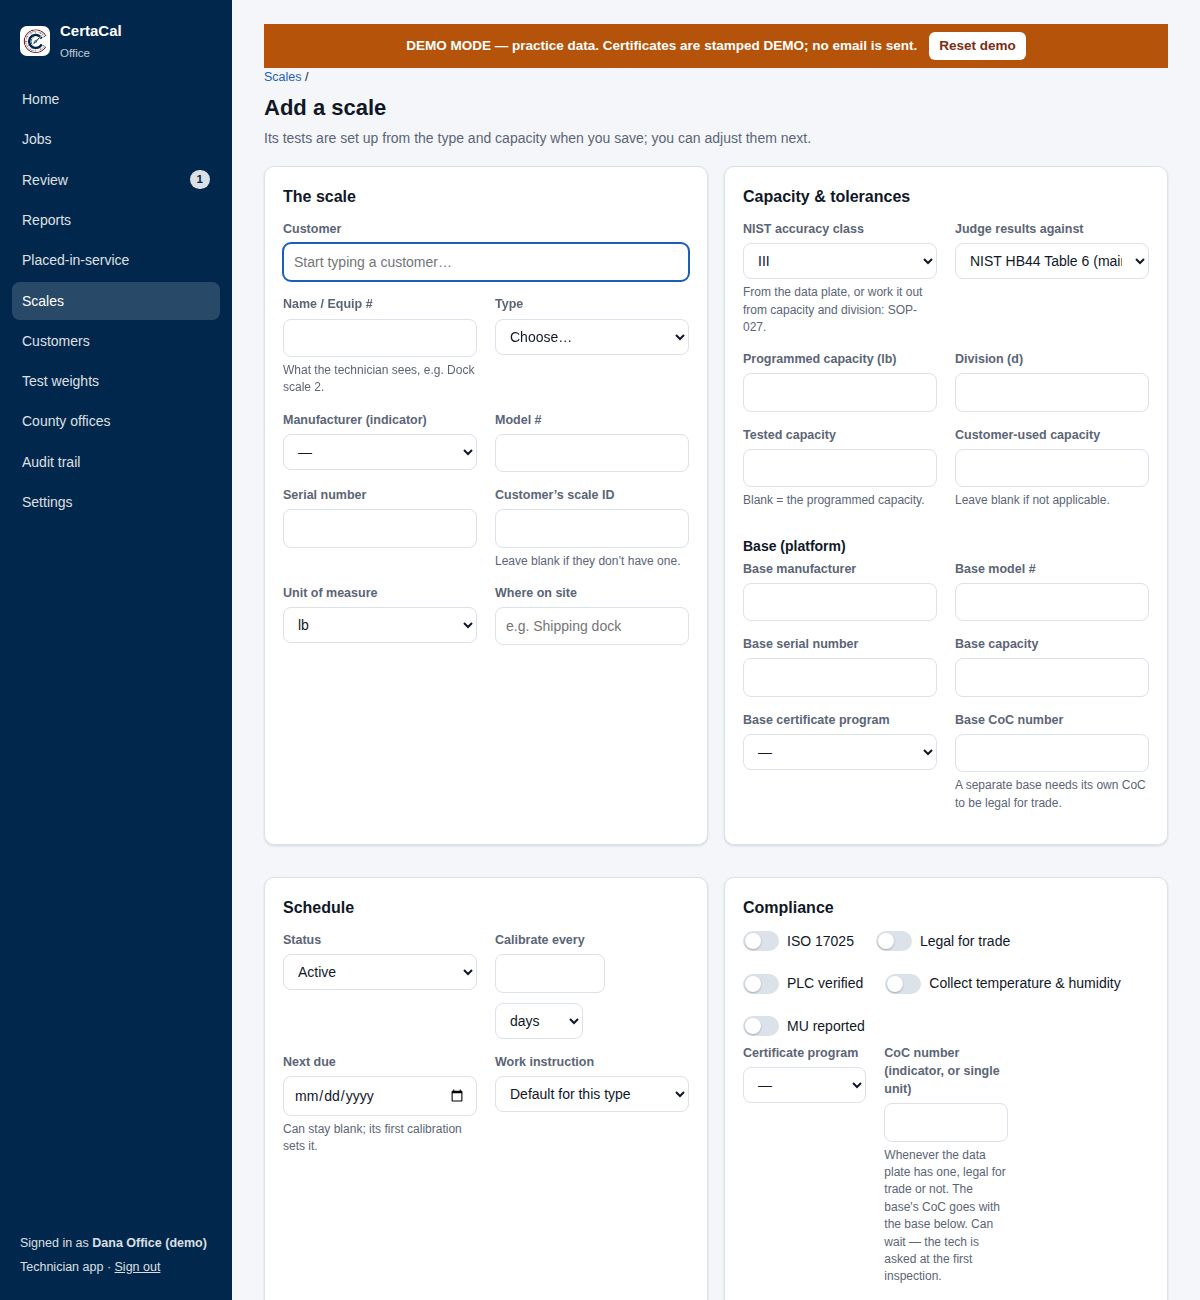
The scale
| Field | What to enter |
|---|---|
| Customer, Location | Who owns it and where it is. The location decides the county and the servicing office. |
| Name / Equip # | What the technician sees in the app, e.g. "Dock scale 2". Use the customer's own name for it if they have one. |
| Type | Balance, bench, floor, tank, vehicle, crane, counting… The type decides which tests are offered, the default calibration interval, and how the scale is usually built. Not in the list? Pick + New type… and type its name; it's added to Settings › Calibration › Types & units. |
| Manufacturer (indicator), Model #, Serial number | From the indicator's data plate. Pick + New manufacturer… if it isn't in the list. |
| Customer's scale ID | Their asset tag, if they have one. |
| Unit of measure | lb, kg, g… |
| Where on site | "Shipping dock", "QA lab". |
Capacity and tolerances
| Field | What to enter |
|---|---|
| NIST accuracy class | I, II, III, III L or IIII (see Calibration basics). Most industrial scales are III or III L. |
| Judge results against | Normally NIST HB44 Table 6 (maintenance). Use acceptance for a new or just-rebuilt scale, Customer defined when the customer sets their own tolerance, or Manufacturer specification. |
| Programmed capacity | The capacity set in the indicator. |
| Division (d) | The smallest step the indicator shows. |
| Tested capacity | Only if you test to less than full capacity. Blank means the programmed capacity. |
| Customer-used capacity | Only if the customer uses a smaller range than the scale can do. |
| Base (platform) | Manufacturer, model, serial, capacity and CoC of the platform or load cells, when they're a separate component. For a single-unit scale (bench scale or balance; base and indicator share a serial number), switch on Single unit (no separate base) instead. |
Tested as a coarser division
Some scales that aren't legal for trade are programmed to show far more divisions than their class allows. A Hardy indicator is built for 10,000 divisions but is often set to hundreds of thousands. The display reads that fine, but the scale isn't reliable at that resolution. These are tested at the class's maximum resolution.
On the scale's page, under Tolerances, CertaCal says when a scale is past its class's maximum (Class III and III L: 10,000 d; Class II: 100,000 d; Class IIII: 1,200 d) and suggests a Test as division: capacity ÷ the maximum, rounded up to the next 1, 2 or 5 step. A 500 g × 0.01 g Class III balance (50,000 d) is tested as 500 g × 0.05 g (10,000 d). Click Use to take the suggestion, or type another.
- The technician still records the readings as the display shows them; only the tolerances use the coarser division.
- The certificate shows both: what the scale displays and what it was tested as.
- A technician can set or change it on the calibration. The reviewer sees "Tested as …" on the Review page, and approving saves it to the scale.
- A legal-for-trade scale is always tested at its displayed division.
Schedule
- Status: normally Active.
- Calibrate every: how often, in days, months or years. The type's default fills in.
- Next due: can stay blank. The first calibration sets it. Each routine calibration moves it on by the interval; a repair leaves it alone unless the technician restarts the interval, and a technician can type a different next due date on the calibration.
- Work instruction: leave it on Default for this type unless this scale needs a special procedure.
How it's built
Pick one under How it's built, capacity & flags on the scale's page (and when adding a scale). A new scale starts on what's usual for its type (set per type under Settings › Calibration › Types & units):
| Choice | For | What's recorded |
|---|---|---|
| Single unit | Balances (always), and bench and counting scales built as one device | Nothing about a base. One CoC covers the scale. No base tag photo. |
| Indicator and base | Floor, bench, vehicle and other scales on a separate base or platform | The base's manufacturer, model, serial number, capacity and its own CoC; on a vehicle or axle-load scale, also its CLC (concentrated load capacity, from the base's data plate, in the scale's unit), and its Load supports (how many load cells or supports it stands on). The technician photographs the base's serial tag. |
| Load cells | Tank, hopper, vessel, silo and bin scales | The junction box's serial number (or that it has none or can't be read); the number of load cells, their manufacturer, model and the capacity of one cell; each cell's serial number, or Can't read for an old cell; the cells' CoC. The scale's capacity is the number of cells times one cell's capacity, worked out for you. The technician photographs the junction box's tag and one load cell's tag. |
For a legal-for-trade scale, the second CoC is the base's or the load cells'. The certificate's platform (load receiver) fields show the base, or for load cells the cells (for example "4 x RL20000 (750 lb each)") and the junction box serial.
Compliance
- ISO 17025: the calibration is inside the company's accredited scope.
- Legal for trade: used for commercial trade. These get placed-in-service reports when they're installed, repaired, moved or removed.
- PLC verified, Collect temperature & humidity, MU reported: switch on when the customer needs them.
- Certificate program (NTEP or CTEP) and CoC number: from the data plate. An indicator and a base that are separate components each need their own NTEP or CTEP CoC; if either has none, the device can't be legal for trade. The exception is a single-unit scale, where the base and indicator have the same serial number: one CoC covers it. The indicator's CoC goes here and the base's under Base; has no CoC records that a part has none, and CertaCal then won't let the scale be marked legal for trade (the Review page flags it if it already is). Placed-in-service reports show both numbers. Enter the CoC whenever the scale has one, legal for trade or not (these two fields show on every scale). It can wait; the technician is asked for it at the next inspection.
- Owner's device ID: checkstand, lane or pump number, for placed-in-service reports.
Finish with Save and set up tests (opens the new scale on its tests) or Save and add another (keeps the customer and location picked, for entering a whole site).
The scale page
Every scale has three tabs.
Details
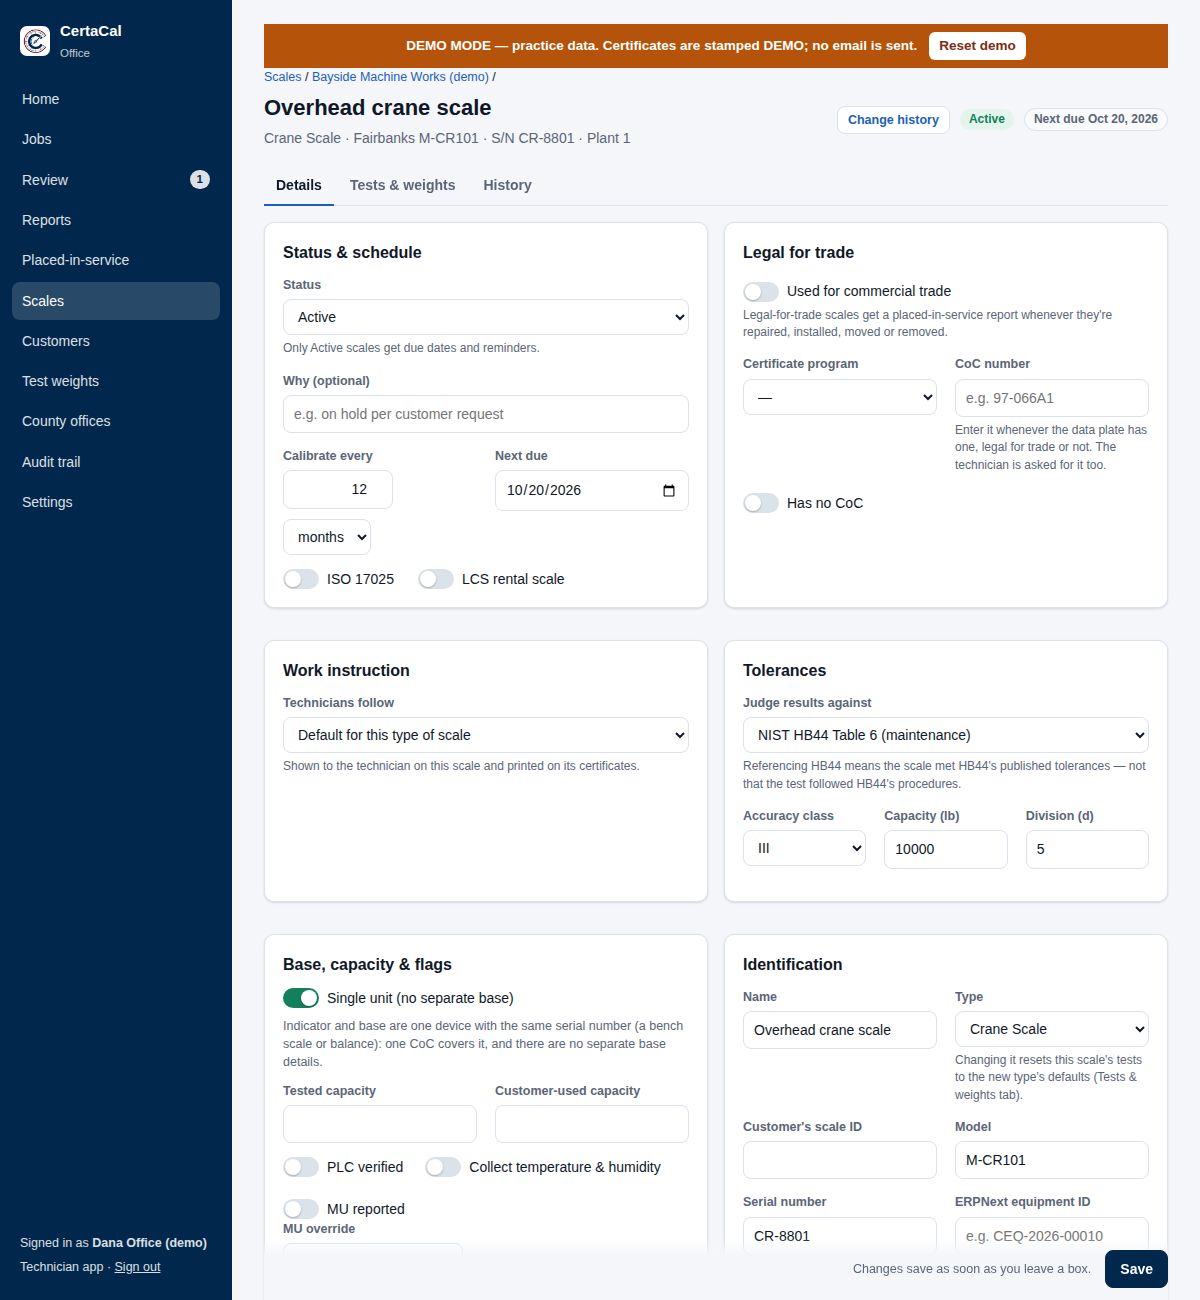
The newest photo of the scale is at the top right; click it to see it full size. Under Photos, Photo required on every calibration makes every technician take at least one photo to complete a calibration of this scale. Otherwise a photo is optional unless the technician's own setting requires one, and none can be taken if the customer allows no photos. The badges next to it show the status, whether it's legal for trade, and when it's next due (red if overdue). The details are grouped into boxes: Status & schedule, Legal for trade, Work instruction, Tolerances, Base & capacity, Identification. Change any field and click away to save. The Save bar is at the bottom.
Type (under Identification) changes what kind of scale it is, for example a scale entered as a vehicle scale that is really a floor scale. Changing it resets the scale's tests to the new type's defaults (see Tests & weights) and switches off tests the new type doesn't use; calibrations already recorded are not changed. The certificate layout follows the type.
Tests & weights
This is where you choose the tests this scale gets and the loads the technician should use.
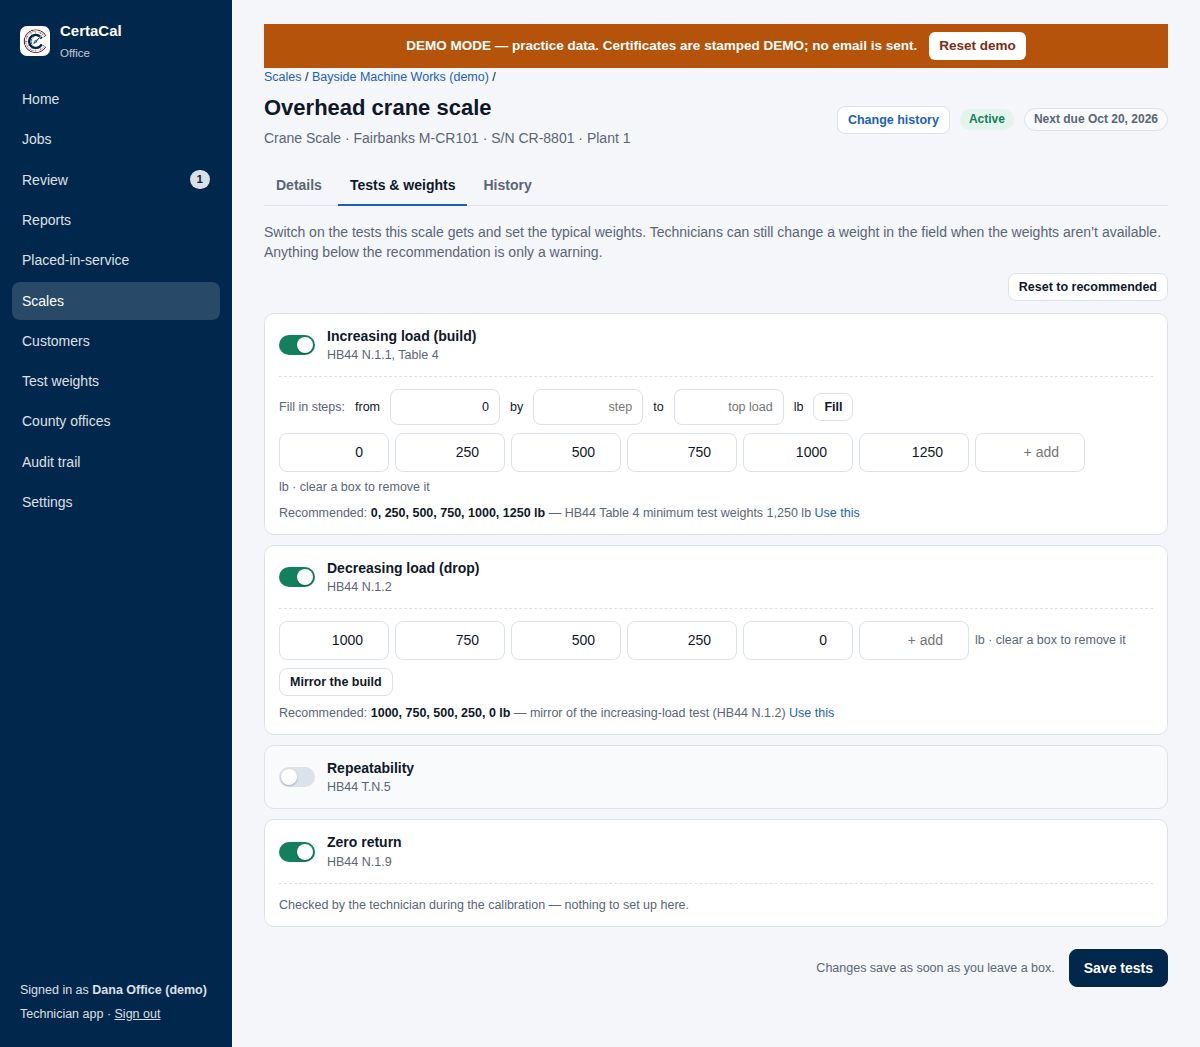
- Switch each test on or off with the switch next to its name. The HB44 reference is shown under the name.
- Each test shows CertaCal's recommended load (from HB44 and the scale's capacity). Click Use this to take it.
- Shift test: set the weight and the number of positions (4 quadrants, or the number of corners or sections). CertaCal suggests a load from one of your weight sets in the scale's own units (never pound weights on a gram scale, never two sets on one test), no more than one-third of capacity for quadrants or one-quarter for corners, made with the fewest weights: a 1000 g scale gets 300 g (200 g + 100 g) for quadrants, 250 g (200 g + 50 g) for corners. Where the scale offers both, the one your set makes more easily is switched on.
- Tanks and hoppers: the corner test is the technician's choice (The technician decides… is ticked): corners often can't carry a quarter of capacity, so the technician decides whether it's done and with how much weight, and there's no recommended load. A tank or hopper that's legal for trade gets a normal corner test; untick the box to require it on any scale.
- Increasing load (build): use Fill in steps above the loads, from 0 by the step to the top load, then Fill. Or type loads into the boxes; + add adds a box and clearing a box removes it.
- Decreasing load (drop): Mirror the build copies the build loads in reverse.
- A Below recommended badge means a load is lower than HB44 suggests. It's a warning, not a block. The technician sees it too.
- Section test on a vehicle scale: the recommended load is 12.5 % of capacity but never more than the base's CLC (HB44 N.1.3.3.1(a)). In Australia (NITP 6 5.2) a scale on more than four supports is tested at 1/(n−1) of Max at each of its n supports, one position per support, once Load supports is filled in; a tank or hopper at one-tenth of Max at each load cell. A load above the CLC gets a warning, like a load below the recommendation, and the Review page shows the test as above the CLC.
- Reset to recommended replaces the whole setup with CertaCal's recommendation.
Changes save as soon as you leave a box. Click Save tests at the bottom to be sure.
History
Error over time, above the list once the scale has two or more calibrations with load tests, charts how far it read from each test load when it was found, visit after visit. Each load is a line, and each error is shown as a share of that load's tolerance, so the shaded band (-100% to +100%) is within tolerance for every load. A line heading for the edge is a scale drifting: a shorter interval or a repair can catch it before it fails. Hover a visit for the errors in the scale's unit (as found and as left) and the tolerance; Show the numbers gives the same as a table. Only the load test counts (shift, section and repeatability readings are at other positions), at most the six loads tested most often over the last twelve visits.
Every calibration of this scale, newest first: date, technician, result, certificate, a button to reprint its sticker, and Photo 1, Photo 2… for the photos the technician took. Calibrations brought over from the previous system are marked Imported. They are read-only and have a button for the original certificate PDF.
When the scale keeps needing adjustment or failing, a note at the top says it's a Problem scale and why (see Problem scales under Reports and exports), with Start a quote for a repair quote. If the office hid it from the list, the note says why and until when.
Each test shows its result, and a test with a strain or substitution load shows what it was, for example "Certified test weights 10,000 lb + substitution load 30,000 lb (material: sand)".
Certificate opens the issued certificate. An amended certificate shows its revision, and Rev. 0 (replaced) opens the withdrawn copy, which is kept for the record.
Certificates from another company. When a scale was calibrated by someone else (the customer's previous service company, the manufacturer, a lab), keep that certificate with the scale: on History, click Add a certificate from another company, enter the date, who calibrated it, their certificate number and the result, choose the PDF (or photos of the paper, a page each), and click Add the certificate. It shows on the history marked Other company, with a Certificate button that opens the PDF. It's read-only, isn't reviewed and gets no CertaCal certificate or sticker. Leave Count it for the due date ticked to move the scale's next due date from that calibration (if it's the latest one).
CertaCal reference data. Owners and quality managers see a CertaCal reference data box on a scale's details: for its make and model (or its kind, when there's no figure for the model), the share of calibrations found in tolerance across many companies' records, the interval that keeps 90 % in tolerance, and this scale's own interval, with a note when this scale's is longer. Suggested for this scale combines the two: the make and model's rate of going out of tolerance, adjusted by this scale's own record (each interval it was found in or out after). A scale with a long record mostly speaks for itself; a new one mostly follows its model. It's in whole months, never under 1 or over 60, and isn't shown when nothing of the model has been found out of tolerance yet. It's a guide, not a rule; see Reports › Your makes and models against CertaCal reference data.
A customer's own standards. Sometimes a customer's standards do the work, say its own 500 lb weights, so it doesn't pay for the weight truck. Give the device a type marked Standards (Settings › Calibration › Types & units); its page then shows Customer's standard. Its certificate is what the customer's calibrations are traceable through:
- when we calibrate it, the certificate we issue becomes its standard automatically;
- when an outside lab calibrated it, add that lab's certificate on History as above, with the Due date on their certificate.
Technicians see it as a standard only on that customer's calibrations, with the usual warning once it's out of date, and the certificate names it with the certificate it was on. Each new certificate replaces the last; calibrations done earlier keep citing the one that was current then.
A customer's standard is found out of tolerance when its as-found result is outside the tolerance: on our calibration, from the as-found readings; on an outside lab's certificate, from the Largest as-found error and Tolerance you enter with it (shown under As found for a customer's standard), or the Found out of tolerance tick when the certificate gives no error. Adjusted alone doesn't mean it was out. The calibrations it was used on under its previous certificate then get a customer-impact review under Test weights › Found out of tolerance, and the Customer's standard box links to it. On its first certificate here the review is on file, closed at once: no calibration could have used it.
Change history (top of the scale's page) opens the audit trail for this scale: every change to its details and setup, by whom and when, with the values before and after.
Amending a certificate
When an issued certificate has a mistake in its details (a serial number, asset tag, customer name or location):
- Fix the details first, on this scale's page or the customer's page.
- In History, click Amend… on that calibration.
- Say why it's being amended and what was corrected (for example "Serial SN-12345 → SN-12354").
- Click Request amendment. The Quality Manager approves it on the Review page. If you are the Quality Manager or the owner, Approve now reissues it straight away, unless you did or helped on that calibration: then someone else approves it, unless your company lets people approve their own work (Review, "One-person companies").
The certificate keeps its number and is reissued as revision 1 (then 2, and so on). It prints a notice saying what it replaces, the reason and who approved it, and carries a new issue date. The readings are unchanged; a wrong reading can't be amended, so recalibrate instead. If the customer already had the original, they're emailed the new revision. Scanning the old copy's QR code says it has been replaced. Every amendment is listed in Reports → Certificate amendments (the amendment register).
ERPNext equipment ID (under Identification) is the scale's Customer Equipment record in ERPNext. The ERPNext sync fills it in; enter it by hand only if Settings › Connections › ERPNext asks.
Thermometers, viscometers and other devices
Devices that aren't scales are added the same way (Add scale, then pick their type). What the page asks for follows the type's kind (Settings › Calibration › Types & units):
- Unit: °F or °C for a thermometer; cP, mPa·s, psi, %RH and the like for other devices. A metal detector or a magnet has no unit (a magnet's Gauss and pull carry their own).
- Range or full scale, and resolution instead of capacity, division and accuracy class: a thermometer's range low and high, another device's full scale, and the smallest step it shows.
- Judge results against: the manufacturer's tolerances, the customer's, or a tolerance rule for what the device measures (a temperature rule for a thermometer). HB44 isn't offered: it has no code for these devices.
- Only scales have How it's built, CoCs and Legal for trade.
- A hygrometer (unit %RH) is judged by its tolerance rule (an amount in %RH, from the manufacturer or the customer). With none, its certificate reports the errors with no statement of conformity. For a thermo-hygrometer, enter its Temperature channel tolerance and its unit.
- A moisture analyzer is a scale type with Moisture analyzer ticked (Settings › Calibration › Types & units; a type named "moisture" is one unless unticked). It's weighed like a scale, against its tolerance rule (the manufacturer's weighing limit) or ±0.05 % of the test load. Enter the manufacturer's Heating warning limit and Heating control limit on its page; with none, ±3 °C applies. Add its temperature kit (an instrument) under Test weights › Other reference standards, and the reference substances technicians use when troubleshooting (reference materials with a certified value and tolerance, such as sodium tartrate dihydrate 15.5 % ±0.5). A reference-substance check isn't part of a routine calibration. It gets the measurement certificate, with the heating check (and a reference-substance check when one was done); HB44 statements print only when it's legal for trade.
Flow meters are recognised by a volume or flow unit (gal, L, ft³, gpm, L/min) or a type named Flow meter; calipers, micrometers and height gauges by a length unit (in, mm) or their type's name. The technician records test drafts for a flow meter and gauge-block readings for a caliper or micrometer, and each is judged by the device's tolerance rule: for a meter, a rule in % of the reading (the volume delivered), for example the code's maintenance tolerance or the maker's accuracy; for a caliper or micrometer, the manufacturer's or customer's tolerance, often a fixed amount for each size band. With no rule, results print with no statement of conformity. The technician records on each test whether the meter is commercial (sold or billed by volume) or industrial.
Pipettes, burettes and glassware are recognised by their type's name (Pipette, Burette, Volumetric flask, Measuring cylinder), in µL or mL. Their page has a Volumetric instrument card:
- Kind: a piston pipette or burette, a glass pipette or burette, a flask or a cylinder. Blank follows the type's name ("Burette" is a piston burette unless the name says glass).
- Nominal volume: the test volumes are worked out from it, so it must be filled in.
- Adjusted Ex (to deliver) or In (to contain); for glassware its Class and Material (the material sets the correction to 20 °C).
- Manufacturer's limits: a systematic limit, and for a piston instrument a random limit. When they're filled in, they're used instead of your company's tolerance table.
The technician weighs each delivery and CertaCal works out the volume at 20 °C. The certificate prints the mean, the systematic and random errors and their limits at each test volume, with the air conditions and the balance. For glassware, enter the Neck diameter at the mark to include the meniscus in the uncertainty budget.
The uncertainty follows EURAMET cg-19: a line per component, and k from the effective degrees of freedom (Welch–Satterthwaite) for about 95 % coverage. Ten readings usually give k of about 2.3, not 2. The value of each component (the water temperature's uncertainty, the balance's resolution, evaporation and so on) is a number in the test catalog (Settings › Calibration › Test catalog, Pipettes & volumetric glassware); the balance's comes from its certificate. When the certificate shows uncertainty, it prints U with its k and ν_eff, and each volume's budget.
Weight sets
A set of test weights that's calibrated together (a customer's set, or one of our own kits) is added like a scale, with the type Weight set. Every weight in it is recorded on one calibration and listed on one certificate, the way the old weight calibration test report did.
- Add it from the customer's page: Add scale, type Weight set. Give it a name (e.g. "25 kg set LCM01–LCM15") and its case or set ID as the serial number.
- On its page, under Weights in this set, list each weight: its ID as stamped or tagged, nominal value and unit, class and make. Click Save weights.
- Tolerance (mg) fills itself in (shown in grey) when the weight's class and size are in the class tables: OIML R 111 (E1–M3), ASTM E617 (000–7), Class F (checked as ASTM E617 Class 6) or HB 44 (Settings › Calibration › Test weight tolerance table). For any other class or size, type the tolerance.
- If the set is one of our own kits, pick it under One of our own test-weight kits?. Copy the kit's weights fills the list from Test weights.
The technician records each weight's correction (conventional mass minus nominal) As Found and, if adjusted, As Left, with its uncertainty, all in mg or g. CertaCal judges each weight by a guard-banded decision rule: it conforms when |correction| + U is within the tolerance and doesn't when |correction| − U is outside it. In between, or when U is more than a third of the tolerance, the certificate makes no statement for that weight.
Each weight stands on its own. A weight that fails is reported as failed ("19 of 20 weights in tolerance; out of tolerance: LCM20"), and the rest of the set passes. Then:
- Repaired: the technician calibrates just that weight on a new calibration of the set (the other weights are left blank) and it gets its own certificate.
- Replaced: add the new weight under Weights in this set (and, for one of our kits, under Test weights), remove the old one, and calibrate the new one on its own.
- Removed: take it off the list. For one of our kits, it's already marked out of service under Test weights, with its impact review open.
When the certificate of one of our own kits is issued, it's recorded on the kit's weights under Test weights with the PDF, and a weight found out of tolerance opens its customer-impact review there.
Moving scales to another customer
For a scale filed under the wrong customer, or two customer records for the same business: pick the scales on the scale list and click Move to another customer (or Move to another customer at the top of one scale's page). Choose the customer and, if it has more than one, the location; with none chosen it goes to the customer's main location.
- The scale keeps its calibrations and certificates. They move with it, so they show in the new customer's portal and no longer in the old one's. Certificates already issued keep the name printed on them.
- It comes off the old customer's open visits. A scale with readings already recorded on an open visit isn't moved until that visit is finished.
- Each move is in the scale's audit trail.
- A scale the customer sold to someone else is better retired and added again under the new owner, so the old owner keeps its history.
- With visits booked in ERPNext, move it to the same customer there too (its equipment record there).
Scale statuses
| Status | Means | Scheduled? |
|---|---|---|
| Active | In use and on a calibration schedule. | Yes |
| On call | Only calibrated when the customer calls. | No |
| On hold | Temporarily not scheduled (customer asked, scale down). | No |
| Rental – in stock | One of the company's rental scales, on the shelf. | No |
| Inactive | No longer serviced, but kept on file. | No |
| Out of service | Broken or red-tagged. | No |
| Retired | Gone for good. | No |
| Added in the field – needs review | A technician added it on a job. See below. | No, until accepted |
Use the Why box under the status to say why ("on hold per customer request").
Scales added in the field
Sometimes a technician finds a scale at a customer that isn't on the job, or isn't in CertaCal at all. The technician can add it from the job in the app.
For a first visit to a new customer, set up the customer and location, then schedule the job with no scales on it. The technician adds every scale on site. It arrives in the office with the status Added in the field – needs review, and the Home page lists it.
A field-added scale can be tested on that visit, but its calibration can't be approved and it isn't scheduled until the office checks it.
With the ERPNext connection on, a scale that's on a Service Order but not yet in CertaCal arrives the same way: it's put on the visit as a new scale (marked From ERPNext), the technician checks its details against the data plates, fills in the rest (class, division, base) and photographs its tags, and the office accepts or merges it as below. Settings › Connections › ERPNext lists it under Needs a link until then.
When you accept a scale a technician added on a visit booked in ERPNext, CertaCal creates it in ERPNext as the customer's equipment and puts it on the Service Order. If ERPNext already has that serial for the customer and maker, the scale is linked to that record instead of copied. A scale you merge into one already on file sends nothing. If ERPNext can't be reached after several tries, the scale is listed under Needs a link in Settings › Connections › ERPNext.
- Open the scale (from the Home page link, or Scales with the status filter Added in the field).
- Check its details against the technician's photos at the top of the page: the indicator's serial tag; the base's serial tag, or for a tank or hopper the junction box's and a load cell's (none for a complete unit); where it is; and the device itself. Anything missing is listed under the photos, and on the Review page. With AI reading set up (Settings › Connections › AI reading), Check the tags with AI reads the tags and sets each value beside what was entered, marking what Differs; check those against the photos. It only suggests: you decide what goes on the record. Fix anything the technician couldn't know (the class, the customer's name for it, the work instruction).
- Then either:
• click Accept as a new scale if it really is new. It becomes Active and is scheduled; or
• click It's a scale we already have…, pick the scale on file, and click Merge. The technician's calibration moves onto the scale on file and the duplicate is removed.
Changes technicians send from the field
A technician on site can correct a scale that's already on record: its name, type, make, model, serial number, class, capacity, division, how it's built, legal for trade and CoC numbers. Each change comes with the technician's reason. Your company can let some details apply at once, or keep some from the field (Settings › Field work › Field rules); a change that applied at once shows in the scale's list of changes as accepted, under the technician's name. Capacity, division, class, unit and legal for trade always wait for you. Otherwise nothing on the record changes until you accept it, and the scale's calibrations can't be approved while a change waits (Review marks them Scale change to decide).
Open the scale: the box at the top shows who changed it, why, and each field as it is on record next to the technician's change.
- Accept the change applies it, then judges the scale's calibrations that have no certificate yet again against the corrected record.
- Reject… keeps the record as it is. Say why: the technician sees it on the job.
A change the record can't take (for example legal for trade without a CoC) is refused when the technician sends it, with the reason, so it doesn't reach you.
Jobs: scheduling and dispatch
A job (or visit) is one trip to one customer location, with the list of scales to do there. It has a lead technician and, when more than one goes, a crew. The office schedules and dispatches jobs. A job shows in the lead's and the crew's technician apps as soon as they're assigned. The lead finishes it, or anyone on the crew if your company chooses (Settings › Field work › Field rules).
A job moves through these stages:
| Stage | Means |
|---|---|
| Requested | A technician, or a customer through the customer portal, asked for this job. The office hasn't decided yet. |
| Scheduled | Booked for a day, with or without a technician. |
| In the field | The technician has started work on it. |
| Awaiting review | The technician finished it. The job is in the Review queue. |
| Closed | The job has been reviewed and approved and the customer's certificates have been emailed. |
The Jobs board
Click Jobs in the menu.
The board shows one week: a row for each technician, and for each owner, office admin or quality manager with Works in the field switched on (Settings › Company › Users), plus one for Unassigned; a column for each day. Anyone with a row can be given a visit, and sees it in the technician app. Each card is a visit: the customer, how many scales are done out of how many, and the stage.
- Week, 2 weeks and Month (next to the arrows) change how much the board shows. The board remembers your choice on this computer.
- Week: a row for each technician, a column for each day.
- 2 weeks: the same, for two weeks; cards show only the customer's name (point at a card for the rest; a red edge means not finished on its day). A heavier line marks the second Monday. With Saturday or Sunday shown, Needs scheduling moves into a drawer to give the days room: click Needs scheduling above the board to open it.
- Month: a calendar of five weeks, one box per day, listing each visit's customer and the technician's initials (— for unassigned). +3 more or the date opens that week in Week view. Drag a visit to another day to move it (the technician stays the same). Double-click a day to schedule a visit for that date, for example when a customer asks for a date ahead and nothing there is due yet.
- Saturday and Sunday: the board shows Monday to Friday; tick either to add that day to every view. The board remembers them on this computer. If a hidden Saturday or Sunday has visits in the dates shown, a note above the board says how many, with a button to show that day, and the shown day next to it (usually Friday) is tagged on that technician's row, e.g. +2 Sat. Click the tag to show that day. A visit not finished on its day normally shows on today; on a hidden weekend day it shows on the last day shown instead.
- ← and → move back or forward by what's shown (one week, two weeks, or five weeks). Today jumps back to the current week.
- Office (top right, when you have more than one office): shows only that office's technicians, people with no office set, and anyone from another office who has a visit there that week. Unassigned visits and Needs scheduling show only that office's locations. The board remembers your choice on this computer. Set each person's office under Settings › Company › Users.
- One technician's schedule: click their name on the board, or pick them in the list next to Office. Only their visits show, in any view; in Month view a location you drop or click on a day is booked for them straight away. Click the name again, or Show everyone, to go back.
- Drag a card to another day, or another technician's row, to reschedule or reassign it (the row you drop on becomes the lead).
- A visit also shows, with a dashed edge and Crew · lead …, on each crew member's row, so nobody is booked twice. Move it from the lead's row.
- Click a card to open the visit's details below the board.
Scheduling a visit
- Click Schedule a visit (top right).
- Start typing the customer and pick them from the list.
- Pick the Location, or leave All locations.
- Pick the Date and the Technician (or leave it Unassigned for now).
- Add scales due within: CertaCal adds every scale at the location that's due in that window. Overdue scales are always included.
- Add Notes for the technician: gate codes, contacts, access times. These are not printed on certificates.
- Click Schedule.
The visit appears on the board, and in the technician's app if you assigned one.
Needs scheduling
Needs scheduling is the panel beside the board. It lists every location with scales overdue or due soon that has no visit booked, with the city, how many scales are due (and how many overdue), the earliest due date and the servicing office. It stays in view while you scroll the board. On a narrow screen it's hidden: click Needs scheduling above the board to slide it out.
- Search by customer, location or city.
- Next 7 / 14 / 30 / 60 / 90 days sets how far ahead to look. Use 60 or 90 with Month view to book next quarter's visits.
- Sort by earliest due, most overdue, most scales, or customer name.
- Overdue only hides locations with nothing overdue yet.
To book a location, either:
- drag it onto a technician's day (or the Unassigned row), or
- click it, then click the technician's day. A bar above the board shows what you're booking; Cancel or Esc stops.
In Month view you drop or click on a day, and CertaCal then asks who's going?: each technician, with how many visits they already have that day, or Unassigned to decide later (assign them in Week view when it's closer).
The visit is booked with the location's overdue scales and those due in the window you picked. Days that have passed can't be booked. Schedule with details… opens the scheduling form with the customer and location filled in.
While you drag or have picked a location (or drag a visit), the board helps you choose:
- technicians from other offices fade, so the ones closest stand out;
- a day where that technician (in Month view, anyone) already has a visit at the same location is marked Already there, and one in the same city Same city, so trips can be combined.
Scheduling from the scale list or a scale's page
You can also schedule straight from Scales (for example from Jobs overdue or Jobs due in the next … days on the Home page):
- Click Schedule on a scale's row, or tick several scales and click Schedule them. Each location gets one visit; a location that already has a visit on that date gets the scales added to it.
- On a scale's page, click Schedule a visit at the top.
- Pick the date and technician, and whether to also add the location's other scales due within 30, 60 or 90 days. Scales already on another visit aren't added twice.
A scale that already has a visit shows Booked with the date and technician instead; click it to open that visit on the Jobs board.
Jobs in progress
Click Jobs in the menu, then the In progress tab. It lists the visits the technicians are working on (any visit with a scale finished and the job not yet finished), each closed to one line with a bar showing how much is done (for example 60% · 3 of 5 scales done). Click a visit to open it and see each scale: its result and when it was finished, Not done yet, Sent back, or Taken back by the technician.
If something on a finished scale is wrong, click Send back, say what needs to change and click Send back again. The technician sees it on the scale, marked Redo, and can fix it while still on site. Once the technician finishes the job it goes to Review, and sending a scale back then usually means a return visit, so check here during the day.
Technicians can also take back a scale they finished themselves (Reopen in their app) until they finish the job.
Visits not finished on their day
A visit whose day has passed without the technician finishing it stays on the board: it shows on today, in the technician's row, marked Not finished with the day it was booked for. Home lists how many there are. Have the technician finish it, or drag it to another day. It still counts as booked, so its location doesn't show under Needs scheduling.
The technician's app keeps it at the top of their job list, marked Needs finishing.
Changing a visit
Click the card on the board. The visit's panel opens.
- Lead technician and Date change as soon as you pick. The technician's app updates the next time it has signal.
- Crew: tick the other technicians going. Each sees the job in the technician app and records the scales they do; only the lead finishes the job. A crew member is never the one who approves the job. For a visit booked in ERPNext, the crew comes from the appointment's technicians (the crew leader is the lead).
- Notes for the technician save when you click away.
- Scales: the list of scales on the visit. Scales already done show Done. Click Remove to take one off.
- Add a scale to this visit: pick one of the customer's other scales at that location (or with no location yet) from the list and click Add. Use this when the customer asks for an extra scale, or a scale was left off. When the customer has none to add, the visit says so: the scale is usually on file under another customer (a duplicate) or another of its locations. Open it under Scales and use Move to another customer, or change its Site.
- Tasks: a list of things for the technician to do on the visit, ticked off in the technician app (offline too), each with an optional note. Type one and click Add task, or pick Add a task list… to add one of your company's task lists (Settings › Field work › Job task lists) in one go; the visit's copy is then its own. Edit, the arrows and Remove change it; you can also tick a task here. Tasks the technician added are marked Added in the field. The board card shows Tasks 3/5, the Customer Service Report prints them (the customer's copy without your notes), the customer's portal shows each task and whether it was done, and Home counts visits finished this past month with tasks not done. An accepted repair or calibration quote puts what was asked for, and each quoted part to fit, on its visit as tasks.
- Cancel visit (at the top, next to Close): for a visit booked by mistake or no longer wanted. It asks for the reason, which is kept with the job; a job is never deleted. A visit booked in ERPNext is cancelled there.
- Customer Service Report (if your company uses them): opens the job's CSR. Everything the technician filled in, the billing box and Accounting notes (office only), saved as you change them. Office PDF has everything; Customer copy is what the customer gets.
- Pre-print stickers prints a sticker for every scale on the visit before it's done, for the technician to put on as each scale is finished: dated the visit's day, each scale's due date, the assigned technician's name and license (assign the technician first), no QR code. Print a spare of each prints two of each; the spare can go to the customer as a replacement. If the visit moves to another day, print them again.
Once the technician has finished (and signed for the job), the visit is locked and the panel shows who signed, and the customer who acknowledged it if one did. A scale on a visit can't be approved until the technician has finished the visit, because their signature for the job goes on its certificate. Changes after that go through Review. A scale that's already been finished on a visit can't be calibrated again on the same visit unless the reviewer returns it.
Service tickets (manufacturers' hubs)
In a manufacturer's hub, each visit can carry the manufacturer's service ticket. Open the visit: under Service ticket, pick the form and Start the ticket, then type what you know (your service order and dispatch numbers, the asset, the failure reported, special instructions) and Save the ticket. A hub with its own ticket form uses it; one without gets CertaCal's three: light-capacity scales (Classes I, II and III), heavy-capacity scales (Class IIIL) and vehicle scales. The suggested form follows the visit's scales.
- Sections for some jobs only: a form can have sections that show only when you say so in the dispatch, such as a forklift scale's checks.
- Parts: the technician can't record parts until they've ticked that your service desk approved them, with who approved it. Tick Parts pre-authorized for this job (and say what) when you send it, and they can go ahead.
- Finishing: the job can't be finished until the ticket's required answers are in, and the site's contact signs for it. CertaCal then locks the ticket, adds the calibration results, the signatures and the technician's name, keeps a fingerprinted PDF (Open the ticket (PDF) on the visit), and emails it to the address on your form when it has one.
Your own ticket forms. Under Settings › Certificates & reports › Forms & certificate layouts, Form type Service tickets, the owner or an office admin makes the hub's own forms. New version starts a draft from any form, a standard one included, as your own copy; Start a new form starts one with just your job number and what CertaCal fills in. In the draft, set the title, header and footer lines, a banner, the address completed tickets go to, and your logo; then the sections, each filled in by you when you send the job, by the technician on site, or by CertaCal from the calibration (test results, in tolerance before and after, next due date, signatures). A section can show only when a yes/no you fill in is yes. Each field has a label, the kind of answer it takes and whether it's required. Approval rules hold fields back until the technician records your approval, unless you pre-authorized it when you sent the job. Publish checks the form and makes it the newest version: new jobs get it, and jobs already sent keep the version they had. Once you publish a form of your own, the standard three aren't offered any more. Retire stops offering a form; Use again brings it back.
The form can change until the technician starts filling it in. A hub's own form is set up by your CertaCal contact and belongs to your company only.
Visits booked in ERPNext
When the ERPNext connection is on (Settings › Connections › ERPNext), ERPNext is the master for dispatch. Every Service Appointment saved in ERPNext appears on the board straight away as its own visit, marked ERPNext, with the Service Order's customer, location and scales and the visit's date and crew leader. A customer, location or scale that CertaCal doesn't have yet comes across with the visit; new scales go on the visit as Added in the field: the technician completes their details and photos on site, and you accept or merge them (Scales chapter). A second visit on the same Service Order gets only the scales not done on the first.
Book, move and cancel visits in ERPNext: in CertaCal Schedule a visit is hidden, those fields are locked, cards can't be dragged, and a technician's job request is booked in ERPNext and then declined here with a note. Open in ERPNext on the visit's panel goes to the Service Appointment. You can still add notes and scales. When every scale is approved, the results go back to the Service Order: each scale's last calibration date and interval, the certificates and health report as attachments, and a comment listing the results.
While a visit is worked, CertaCal keeps ERPNext up to date: the visit's status (Scheduled, In Progress, Done, Closed, Cancelled) and how many of its scales are done. A scale counts as done once its calibration is saved and not sent back, or it's marked not inspected with a reason. Technicians see this in ERPNext's Tech App, which asks them for a reason if they complete a visit before CertaCal is done.
With the connection switched off, CertaCal schedules its own visits as described above.
Sending a job to a provider office
In a manufacturer's hub, some offices are provider offices: outside service companies that work your jobs (Settings › Company › Offices & stickers › Add an office › Provider office, with the provider’s company name; put its email in the office’s Email). Its people see only the jobs you send it, in the technician app.
- Open the visit and choose the office under Send to a provider office. One job goes to one provider. Your technician and crew come off it: the provider names its own.
- CertaCal emails the job to the provider office's email (and anyone who leads it): the customer, location, date, scales and your notes, with a link. Their reply comes to you.
- On the link, the technician doing it accepts it. Someone already in CertaCal picks their name and types their password. Someone new types their name, email, a password and their license number if they have one; that makes their technician account in the provider office (Settings › Users shows it). Or they decline, with a reason.
- You get an email either way. Accepted: the card shows their technician. Declined: the job is back on your board with their reason, to send to someone else. Until then the card says Waiting for the provider.
Your terms. What you pay a provider is yours to set. Under Settings › Company › Offices & stickers, fill in Your terms with this provider on its office: rates, travel, payment terms. Before sending a job you can also fill in Agreed for this job. Both go with the job: in the email, on the link and in the app. Accepting the job accepts them, and they stay with the job as sent even if you change the office's terms later.
Take it back on the visit returns it to you while the provider hasn't started, and tells them. Taking it back or sending it again ends the old link. A link also ends after 30 days.
A provider that wants to answer jobs in the app instead: tick Leads the office for one of its people in Settings › Users. Jobs waiting for them show at the top of their job list.
You can't name a provider's technicians yourself, or reassign a job that's with a provider. Making a new account through the link doesn't check who the person is: confirm new provider technicians as your procedures require.
A provider's paperwork
A job done by a provider office prints the provider's name, address and phone, with a line Serviced for your company's name, on its certificates (in every certificate layout), health report, Customer Service Report, troubleshooting report and stickers. Your logo isn't printed on them.
Placed-in-service reports are the provider's to file, not yours. A provider's job gets the provider's own report: filled in on the state's form like yours (the technician answers the state's questions in the app as usual), under the provider's name, registration number and technician's license, and never on your State reports list, your reminders or your sending. When the provider finishes the job, its office is emailed the filled report to file, with the weights & measures office, where to send it, the deadline, and anything still missing to complete before filing. Put the provider's own registration numbers on its office (Settings › Company › Offices & stickers › Provider's registration numbers, e.g. "CA 12345, NV 678"); its stickers carry them too, never yours.
The provider office also gets a copy of the certificates when your package goes to the customer, and its people can tap Email me a copy on a finished job.
Requests from the field
A technician's Request a job comes with the scales they ticked, listed by name (with serial number and due date) under what they asked for in Requests; Accept keeps those, or adds the location's due scales if they ticked none (the request says so). If your company schedules technicians' requests straight away (Settings › Field work › Technicians' requests), the job is on the board already, marked From the field, and Home lists it for a week.
A technician can also ask for more of the customer's scales on their job. The job card shows +N asked; open it and choose Add them or Turn down. With requests scheduled straight away, the scales are added without asking.
Review: approving jobs
No certificate goes out until someone other than the technician has checked the work. That check is review. With many scales on a job it isn't practical to read every one, so CertaCal reviews the job as a whole:
- CertaCal scores every calibration from its record: a quality score out of 100. The job's score is the average.
- A reviewer audits a sample: at least 10% of the job's tested scales, and never fewer than one. Every scale that scored under the minimum (80%) must be among those audited.
- Anything flagged is decided one by one: a scale with something to look at is approved or returned on its own.
- The reviewer approves the job once the audits are done, the flagged scales are decided and the job scores at least 80%. That approves and certifies the rest of the scales and emails the customer their certificates and a health report.
Reviewers, office admins, quality managers and owners can review, and so can a technician whose account has the Review add-on. Auditors never can. The person who approves is recorded as the approver. By default nobody approves their own work: if you did the calibration, or helped on it, the Review page says "Your own work — someone else reviews it." The owner can change that (see One-person companies below).
One-person companies
When one person does everything, there's nobody else to approve their work. The owner chooses how CertaCal handles that in Settings › Company › Role permissions, under Approving your own work:
| Choice | What happens |
|---|---|
| Someone else approves | The default. Your own calibrations, jobs and amendments go to someone else. |
| Only when no one else can approve (one-person company) | You approve your own work while nobody else active in the company may approve it. Hire or give the Review add-on to a second person and it stops on its own: the page then says, for example, "Ana can approve now, so your own work goes to Ana." |
| People may approve their own work | Anyone who may approve can approve their own work, whoever else is in the company. |
When you approve your own calibration, job or amendment, CertaCal first asks you to tick I have checked this again as the reviewer: readings, standards and certificate. That is a deliberate second look. The approval is recorded as Self-approved (one-person company), or Self-approved, in the audit trail, and the office shows Self-approved beside it. The certificate itself is unchanged. Sending your own work back to the technician needs no tick.
The tick can be turned off with Ask for a second-look tick when approving your own work, unless your certificates print your accreditation: then it is always asked.
> WARNING: ISO/IEC 17025 expects someone other than the person who did the work to review it where possible. If your certificates print your accreditation, or a scale is marked as within your ISO/IEC 17025 scope, choosing People may approve their own work asks you to say why, and the reason goes in the audit trail. Use it only if you don't work to ISO/IEC 17025.
Whatever the choice, auditors never approve, and automatic approval of clean calibrations and Approve the clean ones never approve the signer's own work.
The Review page
Click Review in the menu. The grey number next to it is how many jobs are waiting.
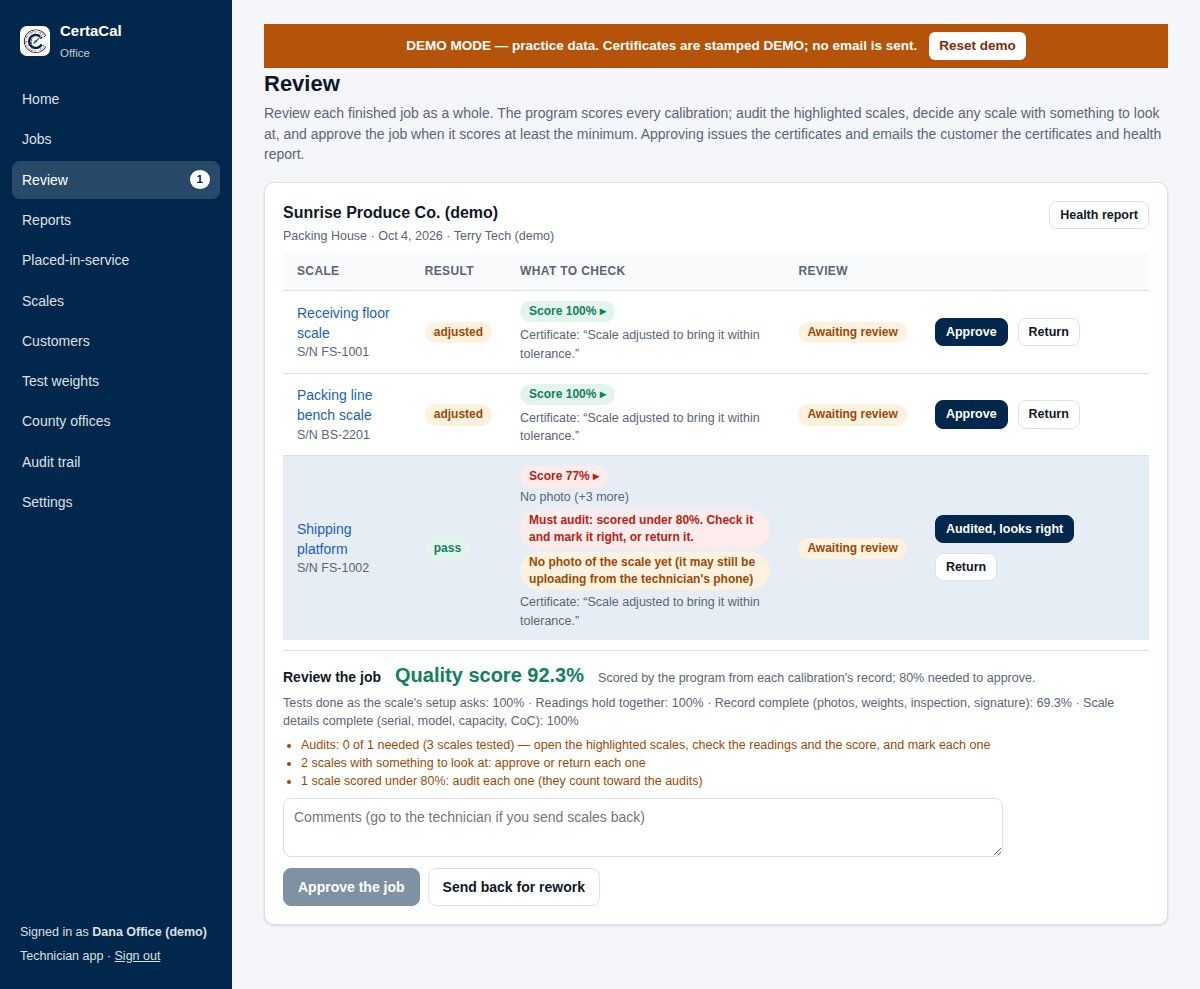
Finished jobs are listed one under another, each folded to one line: the customer, site, date, technician and number of scales, and on the right what the job is waiting for, such as 2 scales to decide, 1 audit left, Ready to approve, or for a closed job Held for payment or Sent. Click the customer's name to open the job (click again to fold it).
An open job shows its Health report button, then a row per scale:
| Column | What it tells you |
|---|---|
| Scale | The scale and serial number. Click the name to open the scale's history. |
| Result | pass, adjusted (passes, but the As Found and As Left readings differ), fail (still out of tolerance when left), or not inspected. |
| What to check | The program's Score for the scale (green, or red under the minimum; click it for the four lines and what lost points), then anything CertaCal wants a person to look at. Nothing to look at means it found nothing unusual. Audit this one or Must audit marks the scales to audit. |
| Review | Awaiting review, Audited, Approved (with the certificate number), or Sent back. |
Under the scales, Review the job shows the job's Quality score, the score on each of the four lines, and a checklist of what's left before the job can be approved.
How the program scores a calibration
Four lines of 25 points each, worked out from the record alone. These are CertaCal's starting values: what each line is worth, what the readings line loses and when readings count as copied are company policies (Settings › Calibration › Company policies, Quality score and Copied readings). A calibration is scored by the policies in force on its date, so approving new values doesn't change past scores.
| Line | What it checks | What loses points |
|---|---|---|
| Tests done as the scale's setup asks | Every test switched on in the scale's setup was recorded. | Each test left out (a share of the 25). |
| Readings hold together | The readings look real and add up. | Readings that look copied (−15); left further off than the company's As Left target with no note (−5 each, up to −10; the target is 1 division unless changed in Settings › Calibration › Company policies); a test load below recommended (−5); Adjusted or Fail with no note (−5). |
| Record complete | Photo (7), test weights used (6) on a current certificate (4), visual inspection (4), the technician's signature for the job (2), temperature and humidity where the scale asks for them (2). | Each part missing. |
| Scale details complete | Serial number, manufacturer, model, capacity, division, location, and the CoC numbers on a legal-for-trade scale. | Each detail missing (a share of the 25). |
Not-inspected and imported calibrations aren't scored. The job's score is the average of its scored scales, so one weak scale doesn't sink a good job: one scale at 50% and three at 100% average 87.5%, which passes. That 50% scale must still be audited.
Auditing scales
CertaCal picks which scales to audit, the same ones every time the page opens:
- every scale that scored under the minimum (Must audit: scored under 80%. Check it and mark it right, or return it.); then
- a fair random pick from the clean scales until the job's share is reached (Audit this one).
The checklist shows Audits: 1 of 2 needed (12 scales tested). For each highlighted scale, click Readings under its name: every test's As Found and As Left readings, the applied load, the error, the tolerance and pass or fail, with the conditions, the notes and the photos. A test with a strain or substitution load says what it was and how much, for example "Certified test weights 1,000 lb + strain load 2,000 lb (material)". That load isn't a test weight, so it's never checked for a certificate and never part of an impact review or a recall; check the photos show what the technician describes. Draft certificate shows the certificate exactly as approving would issue it, stamped DRAFT (for metal detectors, magnets and other devices with their own records, that's where everything shows). Check the readings against the photos and the scale's history, and check the program's score is fair. Then:
- Audited, looks right marks it audited. Undo takes that back.
- Send back sends it back to the technician (see below). That counts as auditing it.
Any scale you approve or return one by one counts as audited too. You can audit more than the minimum; the highlighted ones are the least you must do.
Approving or sending back the job
- Approve the job turns blue when the audits are done, every flagged scale is decided, no low-scoring scale is left unaudited, and the job scores at least the minimum. It approves and certifies every scale still waiting, closes the job and emails the customer. Add any comments first; they're kept with the review.
- Send back for rework returns scales to the technician. If the job scores under the minimum it can't be approved: sending it back returns every scale that scored under the minimum, each with its score and what the program found ("Quality score 55%: No photo; Not signed"), plus your comments. Used on a job that passed, it returns all the waiting scales.
Each decision is kept as a job review: who, when, the score and its four lines, each scale's score, how many scales were audited, and the comments. Reports → Job quality scores lists them, by job or as each technician's average.
Troubleshooting reports
A job with troubleshooting reports lists them in its box under Troubleshooting reports, with anything to check in red: a load cell that failed or is suspect, a failed check, a scale waiting on parts, or no calibration after the repair. Load cells are judged by the company's limits in Settings › Calibration › Company policies, as they stood when the report was saved. Report opens the PDF. To let a technician change a completed report, reopen it (set it back to draft) from the report; switch this list off under Settings › Certificates & reports › Troubleshooting.
What CertaCal flags for you
| Flag | What it means and what to do |
|---|---|
| Nothing to look at | The scale passed without adjustment, every test was at or above the recommended load, the weights were on a current certificate, nothing was rated Poor, and the scale is on file. Some of these the company can relax (Settings › Calibration › Company policies › Automatic approval: an adjusted scale, a field change to the scale's details, a scale added in the field, a Poor inspection item, a load below recommended, a P&S warning); the rest always count. Still read any notes before approving. |
| Weights: … | A test weight used was expired, had no certificate, or no weights were recorded. You can't approve normally. Either Send back it, or approve with a reason (see Approve anyway below). |
| Weights not suited to this scale: … | Weights heavier than the scale's capacity were recorded on it. The technician app leaves those out of a kit, so this comes from an older draft or app. Check what was really used, then approve the scale on its own or Send back it. |
| Load outside the recommendation | A test was done with less weight than HB44 recommends. Acceptable if the reason is sound (the customer only uses part of the range, weights not available); otherwise return it. A section test marked (above the CLC) put more weight in one place than the vehicle scale's base is rated for (HB44 N.1.3.3.1(a)): check that the CLC on the scale is right, and ask the technician why. |
| Check the readings: identical to the previous calibration | The As Found readings, errors included, are exactly what this scale read last visit. A stable scale can do that, but it is also what copied readings look like. Compare with the photo; ask the technician; return it if in doubt. |
| Check the readings: identical to another scale on this job | Two scales on the same visit drifted by exactly the same amounts at every point. Plausible for identical scales side by side; hard to explain for different models. |
| Check the readings: marked Adjusted but nothing changed | The result says the scale failed and was adjusted, but the As Found and As Left readings are the same. One of them is wrong on the certificate. |
| Left more than 1 division off | The scale passes As Left, but a reading is more than 1 division from the applied load. That passes HB44; the target is within 1 d. Check the notes say why it couldn't be brought closer; if they don't, ask the technician. |
| Photo required, none yet | The scale or the technician requires a photo. It may still be uploading from the technician's phone; check again later, or return it and ask for one. |
| Poor condition | The technician rated inspection items Poor. They print on the certificate and the health report. Check the wording makes sense to the customer. |
| New scale added in the field | The technician added this scale on the job. Accept it or merge it on the scale's page first (see the Scales chapter); then you can approve. |
| Not inspected, with a reason | The technician couldn't test it (not in use, no access, broken). There's no certificate or sticker. Accept keeps it due. If it's gone for good, change the scale's status too. |
| Certificate: "…" | The note that will print on the certificate. Check spelling and tone. |
| Uncertainty budget (…) | A pipette or piece of glassware: open it to see each test volume's budget, a line per component (repeatability, the balance's calibration and resolution, evaporation, water temperature and density, air density, the balance weights' density, and for glassware the expansion coefficient and meniscus), with its value, distribution, standard uncertainty and degrees of freedom, and U with its k and effective degrees of freedom. A note under Volumetric says when the balance has no certificate uncertainty, or glassware no neck diameter, so that line was left out. |
| For the office: … | The technician's internal note. Read it; it's not printed. Deal with anything they ask for (wrong setup, a customer request). |
How to audit a calibration
Work through these questions for each scale you audit or decide. If the answer to any is no, Send back it.
- Is it the right scale? Serial number, name and location match what's on file.
- Is the result believable? A scale that passed last year and now fails badly, or an adjusted result with no note, deserves a look at the history.
- Were the right tests done at sensible loads? Compare with the scale's test setup (Tests & weights tab).
- Were the weights traceable? No Weights flag, or a good reason recorded.
- Does the certificate note read well? It goes to the customer as written.
- For a legal-for-trade scale: is there a CoC number, and is any tag recorded with its number?
Deciding a scale on its own
A scale with something to look at (any flag other than Nothing to look at) is decided on its own before the job can be approved:
- Approve issues its certificate straight away. The Review column shows the certificate number.
- Send back asks What needs to change? Type it plainly; the technician sees it in the app next to the scale, marked Redo. Their new calibration comes back to Review. By now the technician has usually left the site, so a return usually means a return visit; problems found during the day are better sent back from Jobs › In progress (see the Jobs chapter).
- Approve anyway appears when the weights weren't all on a current certificate. You must say why it can still be issued (for example, "weight recertified 9/12, certificate not yet entered"). The reason is kept on the record.
- Accept (for a not-inspected scale) closes it without a certificate.
With job review turned off (share set to 0), every scale is decided this way, and Approve N clean scales at the top of a job approves every scale marked Nothing to look at in one click. The job closes when every scale is decided.
The customer's email
When the job is approved (or, with job review off, every scale on it has been reviewed), the job closes and CertaCal emails the customer's owner email:
- every certificate from the visit (PDF, with its QR code and digital copy);
- a health report: a one-page summary of the visit, with each scale's result, anything rated Poor, and each scale's reliability: how often it has been in tolerance when we arrived, over every calibration on record (the old system's history included). It's rated Good (85% or more), Fair (65–84%) or Poor (under 65%) once a scale has 3 visits, next to the average for other scales of the same make and model. Where Site settings shows CertaCal reference data, it also shows the reference figure: the share of that make and model (or kind) found in tolerance across many companies' records, naming none. It helps most where you service too few of a model for your own average. A scale rated Poor over 4 or more visits is listed under "What needs your attention". These are CertaCal's starting values; the company can change them in Settings › Calibration › Company policies.
- each completed troubleshooting report (PDF), and a Troubleshooting section in the health report, as far as Settings › Certificates & reports › Troubleshooting allows.
The job's box on the Review page then shows who it was sent to and when. If the email failed, it says why in red. Fix the problem (usually the customer's email address, on the customer's page) and click Send again.
What goes, and when, follows the company's Sending choices (Settings › Certificates & reports › Emails to customers) and the customer's own (its page, Preferences & contact). If the office sends certificates, a closed job shows Ready to send and nothing goes until someone clicks Send. A customer that doesn't take certificates by email shows Not emailed. If the company holds amended certificates for the office, they're listed at the top of the page under Amended certificates to send.
Click Health report on any job to preview it.
A calibration recorded without a job is approved the same way, but nothing is emailed.
Certificate amendments
When someone has asked to amend a certificate (see the Scales chapter), it's listed at the top of the Review page with the reason and what was corrected. The Quality Manager (or the owner) opens Current certificate to check it, then clicks Approve and reissue, or Reject with a note saying why. Approving reissues the certificate as the next revision and emails it to the customer if they had the original.
Closed in the last two weeks
Tick Show closed jobs under the waiting jobs to list the jobs closed in the last two weeks, with their certificates and whether the email went out. Use it to answer "did the customer get it?" The page remembers the tick in this browser.
A closed job whose certificates haven't gone out yet (held for payment, waiting for the office to send them, or a send that failed) is always shown, under Closed, certificates not sent yet, so you can release or send it.
Government reporting
Government reporting in the menu holds the reports CertaCal sends to regulators for you: placed-in-service reports to the state or county weights and measures office, and, while the company has USDA Packers & Stockyards switched on, a second tab for USDA P&S test reports (see Packers & Stockyards test reports below). A company working in Australia also has an NMI (Australia) tab for the NMI's Form 6 and Form 6A (see NMI Form 6 and Form 6A below).
Placed-in-service reports
When a technician installs, repairs, moves or removes a legal-for-trade scale, the state must be told within a deadline. The form is a placed-in-service report. Where it goes depends on the state: in California, to the county weights-and-measures office (the sealer) for the county the scale is in; in Arizona, to the state (AZDA); in Illinois, to the Department of Agriculture's Bureau of Weights and Measures; in Pennsylvania, to the Department of Agriculture's regional supervisor with the Bureau of Ride & Measurement Standards copied; in other states, to whichever office you've set up for that state under Government reporting › Offices.
CertaCal knows which states require these reports by law, and their deadlines (California, Arizona, Illinois and Pennsylvania; CertaCal adds others as their rules are set up). For those, every scale placed in service there gets a report, held as Needs information until your registration in the state, the technician's license and the state's office are set up. For any other state, CertaCal makes reports once you add it under Settings › Calibration › Agency & licenses with This state wants them on. To start working in a new state, add it there first (Settings chapter).
CertaCal builds these reports for you from the technician's calibration. You only fill gaps and, if needed, send them.
How reports are made and sent
- The technician finishes a job that included service on a legal-for-trade scale.
- CertaCal creates one report per location, listing each device with its manufacturer, model, serial, capacity, CoC number and any tag.
- If nothing is missing, the report is emailed to the right office automatically when the technician completes the job, with a copy to the customer's owner email. A state set to Hold for office review (Settings › Calibration › Agency & licenses) keeps it as Ready to send instead, until someone in the office checks it and sends it.
- If something is missing, the report waits as Needs information and the Home page tells you.
The report list
Click Government reporting in the menu (the Placed-in-service tab). The number next to it is how many are waiting to go out (red if any are past the deadline).
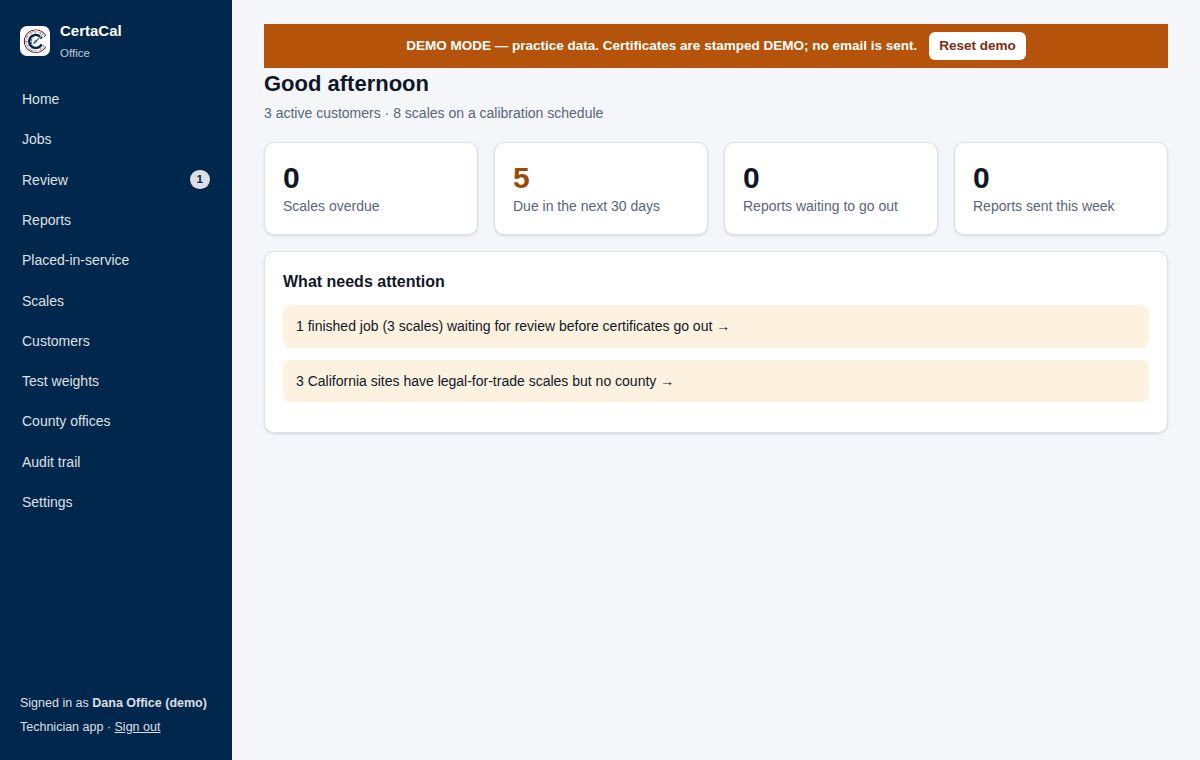
The tabs filter the list: Waiting to go out, Needs information, Ready to send, Sent, All. Each row shows the customer and location, the technician, the number of devices, the status and the time left before the deadline.
Filling in missing information
Open a report. A yellow box headed Before this can be sent lists what's missing. The usual gaps:
- County is missing for a California location. Pick it right there in the box. It's saved on the location for next time.
- Street address or city is missing for the location. Fill it in on the customer's page, under Locations.
- CoC number for a device. Type it into the device row (Enter CoC #).
- Tag number and who approved putting a tagged scale back in service (Division approval).
- Agency or technician license numbers for the scale's state. Follow the link to Settings › Calibration › Agency & licenses.
Under Report details you can add Remarks (printed on the report) and, for Arizona, the Owner / licensee signer. Goes to shows which office it will be sent to.
Illinois reports
Illinois reports go on the Department of Agriculture's own forms, filled in by CertaCal: Placed in Service Report, scales up to 1000 lbs. (two scales to a copy) and Illinois Placed in Service Report, 1001 lbs. + capacity scales (one scale to a copy), chosen by each scale's capacity. A visit with several scales sends one PDF with every copy it needs. The PDF stays fillable, so the Bureau can read the values.
- The business, the scale's maker, model, serial number, CoC, capacity, division and location, the readings (increasing load, shift or section test, strain test), the technician's and your company's Illinois registration numbers and the date come from CertaCal's records. A kilogram scale is written in kilograms, never converted: on the large form the printed (LBS) headings are written over as (kg); on the small form each number carries its unit. The forms' titles keep their pounds, which say which form it is. Nominal capacity on the large form is the weighbridge's capacity (from the scale's record, blank when it isn't recorded); Capacity is the scale's programmed capacity.
- What only Illinois asks (the service person's decal number, the reason, whether the installation meets the Act, the seals and audit trail counters, and on the large form the recorder and scale type, markings of the load cells and weighbridge, the new vehicle scale questions) the technician answers on the calibration. Each device has a card on the report with the answers: change any of them until the report is sent. The reason is worked out from the calibration (a rejection tag, a repair, a new or moved device) unless someone changes it. A scale's type, recorder and markings are offered again from its last Illinois report.
- The owner may use the device commercially until the Department inspects it ticks the form's temporary commercial use box. The owner, manager or user countersigns: the name and signature of the customer who signed for the job are used, or type a name under Report details.
- Routine work goes on a report too when the scale was adjusted or a seal was broken: the technician is asked about seals on every legal-for-trade Illinois calibration, and the reason is Recalibration.
- A report is due within 5 calendar days of the work (120 hours; weekends and holidays count). The statewide office, with the Bureau's report email, is under Government reporting › Offices › Illinois. A company that works in Illinois has it from the start; one that starts later gets it with its first Illinois report.
Pennsylvania notices
Pennsylvania's report is the Department of Agriculture's Weights and Measures Installation/Repair Notification Form (70 Pa. Code § 6.6), filled in by CertaCal and still fillable. It's due within 48 hours of the installation or repair.
- One notice per visit and location: every device on the report goes on the one form. Their manufacturers, models and serial numbers are listed together, and each device's capacity class is ticked from its capacity (small up to 1,000 lb, medium to 10,000 lb, large above).
- From CertaCal's records: the location, New Installation or Repair (worked out from the calibration's reason; change it on the device's card), the test measure and its serial number (the standards on the calibrations), and your company's block. SIR Name and SIR # are the technician and their Pennsylvania license number (Settings › Calibration › Agency & licenses).
- The technician answers what only Pennsylvania asks: whether a security seal was broken, the new seal ID and why, whether it affected the calibration, a description of the repair, and whether it's a precious metal scale.
- Routine work goes on a notice too when the scale was adjusted or a seal was broken.
- Where it goes: to the regional supervisor for the device's county, with the Bureau (RA-wghts&measures@pa.gov) copied, as the form requires. The seven regions and their counties are under Government reporting › Offices › Pennsylvania: Add Pennsylvania's offices puts them there before your first notice (they also come by themselves with it). Check each one; More shows the supervisor and Also send reports to (the Bureau). Region 6 (Harrisburg) names no supervisor on the Department's page, so its notices go to the Bureau alone until you add the supervisor's email there.
- After the notice, the owner may use the device for up to 15 days until the state or county inspector seals it. Leave a copy of the notice on site.
Sending, and what happens after
- Actions is at the top of the report's page, before the details. Preview PDF there opens the report on the state's own form exactly as it will be sent (or as it was sent): the easiest way to check it.
- Email to the county now (or to AZDA now) sends it straight away. The button only works once nothing is missing.
- After it's sent, record the office's answer when it comes: Accepted (with the AZDA PISR number if they give one), or Rejected with the reason. A rejected report goes back in the queue to fix and resend.
- Cancel a report that shouldn't be sent (for example, the scale wasn't legal for trade after all).
| Status | Means |
|---|---|
| Needs information | Something must be filled in before it can go. |
| Ready to send | Complete. Goes automatically when the job is completed, unless its state holds reports for office review; or send it yourself. |
| Sent | Emailed to the office. Waiting for their answer. |
| Accepted / Rejected | The office's answer. |
| Cancelled | Won't be sent. |
Every report is also kept under its customer: the customer's page lists them all with their status and PDF. Once a report is Sent or Accepted, the customer sees it in their portal (under Placed in service, on the visit and on each scale), with the PDF exactly as it went to the office, and it's included in the visit's Download all. Reports still being fixed, and cancelled ones, aren't shown to the customer.
The offices reports go to
Click Government reporting in the menu, then the Offices tab. This is the list of weights-and-measures offices placed-in-service reports are sent to, with a tab for each state that requires reports by law (California and Arizona) and each state the company is registered in (a state added under Settings › Calibration › Agency & licenses gets its own tab). Another state… opens any other state's list.
For each office: its name, the counties it covers (empty for a statewide office), the commissioner or sealer, email, fax, office hours, how reports are sent (email, online portal…), the address and the deadline in hours (no longer than the state's law allows). Click a row to edit it. Switch In use off for an office that has closed or merged.
Find a county searches the list. Add office adds one. A state that takes reports at one statewide office needs just one office with no counties listed.
USDA Packers & Stockyards offices
While the company has USDA Packers & Stockyards switched on (Settings › Calibration › Agency & licenses), the page has a USDA P&S tab: the three regional offices, Eastern (Atlanta), Midwestern (Des Moines) and Western (Aurora, Colorado), with the states each covers and the email address test reports go to. They come from USDA's current list; edit any of them when an office moves or changes its address, and switch In use off for one that has closed. States covered takes two-letter codes separated by commas; each state should be covered by one office.
Packers & Stockyards scales
A scale used to buy or sell livestock, carcasses, live poultry or feed is subject to the Packers & Stockyards Act: it must be tested at least twice a year, once from January 1 to June 30 and once from July 1 to December 31, at least 120 days apart, and each test is reported to the USDA Packers & Stockyards regional office (9 CFR 201.72). A scale used only within one 8-month season may instead be used for 8 months after each test.
On the scale's page, the Packers & Stockyards card (shown while the company has P&S on):
- Subject to the Packers & Stockyards Act: switch it on for each such scale.
- Test report form: P&SP-4200 Livestock (stockyards, auction markets, dealers, packers), P&SP-4300 Monorail (carcass rails at packing plants), P&SP-4400 Vehicle (scales weighing live poultry) or P&SP-4500 Hopper (feed scales).
- Seasonal: for a scale used only within an 8-month season.
- The form's own questions about the scale, with their line numbers on the form: for a livestock scale, for example, the pit depth, the type of levers or load cells, the platform size inside the rack, the livestock weighed, the accessories and how test weights reach the deck. The maker, model, serial number, capacity, division and class come from the scale's record. Still to fill in lists what's missing.
The card shows when the next test is due: by the end of the half-year after the last test (the end of the current half-year if there's none on record), and from which day it counts (120 days after the last). The scale's Next due date is the earlier of its own interval and that, so reminders, stickers and certificates follow the law.
Home shows how many P&S scales still need their test this half-year and how many are past it; the links open the Scales list filtered to them (the Packers & Stockyards choice in its filters). The technician sees the form and the test window at the start of each calibration.
The P&S test
The technician records each form's own lines with the calibration (the technician guide's P&S test report): sensitivity response or discrimination, motion-detection and auto-zero ranges, the condition of the racks, deck and pit, the test weights and when they were verified, the truck test on a poultry scale, and the result. Which lines each form has is CertaCal data, so a revised form doesn't need a new version of CertaCal.
CertaCal checks them against the P&S limits beyond HB 44's tolerances. They come from the rule set USDA Packers & Stockyards (9 CFR 201): add it from Add from the catalog on Settings › Calibration › Device tolerance rules and approve it, and every scale marked subject to the Act is judged by it (until then the same limits apply as CertaCal's defaults). Its quality manager can change the limits like any rule set; a looser one needs a reason.
- Motion detection within ±3 d on livestock scales and ±1 d on animal scales; auto-zero within ±0.6 d and ±1 d. Set Livestock or animal scale on the scale's card; blank, a Class III scale is an animal scale and anything else a livestock scale.
- Livestock scales have 2,000 to 10,000 divisions, animal scales 500 to 10,000; with 10 lb divisions nothing under 5,000 lb is weighed, with 20 lb nothing under 10,000 lb.
- The scale is tested to its used capacity: the platform inside the rack (square feet) times 110 lb for cattle, 70 for hogs and calves, or 50 for sheep and lambs, by the heaviest livestock weighed.
- Test weights verified within the last 3 years; at least 120 days since the last test (not for seasonal scales).
- On a poultry vehicle scale, the error on the test weight added to the truck within the HB 44 maintenance tolerance.
A problem, and any line the report still needs, shows in Review with the calibration's notes (marked P&S), so it isn't approved without a person looking. When a job with a P&S scale is finished, the technician is asked for the owner's signature acknowledging receipt of the report, even if the company doesn't usually ask for one; without it, the report lists it as missing.
Packers & Stockyards test reports
Every test of a scale under the Act gets its own test report on the scale's form (P&SP-4200, 4300, 4400 or 4500). CertaCal draws it like the paper form, with the same numbered boxes and checkboxes, from the scale's P&S facts, the technician's P&S test lines and readings, your company as the test agency (Settings › Calibration › Agency & licenses › USDA Packers & Stockyards) and both signatures. The readings are listed in the order the test was done: everything as found first, then, when anything was adjusted, the retest as left (marked AL), as the forms ask. Dates are written mm/dd/yyyy, as on the forms, whatever date format the company uses. Readings that don't fit continue on another page, numbered "Page 2 of 2" in box 1.
- The report is made when the technician saves the calibration, and kept up to date while it waits.
- When the job is completed and nothing is missing, it's emailed through the company's email to the regional office for the scale's state (Government reporting › Offices › USDA P&S), with the PDF attached and your test agency email to reply to. With Hold for review chosen on the USDA Packers & Stockyards card it waits as Ready to send instead.
- The owner's copy goes with the certificates from the visit (the job package email and the visit download), and is in the customer portal under USDA P&S reports and on the scale's page as soon as the report is complete, marked Not yet sent to USDA until it goes. Once sent, the customer gets exactly the copy sent to USDA, which is kept and never changes afterwards.
Open Government reporting › USDA P&S test reports to see them. Filter by status or by regional office; open one to:
- Preview the PDF (once sent, The PDF as sent).
- See Before this can be sent: the test lines the form still needs, a missing state or address, no office for the state. Scale facts left blank and a missing owner's signature don't stop it; they're listed as Left blank on the form, as they would be on paper.
- Add Remarks, printed on the form's remarks line.
- Email it to the regional office, Mark accepted, record Rejected: fix and resend with the office's reason (the report reopens; send it again once fixed), or Cancel report.
A report that couldn't be sent (the email server refused it, or something was missing when the job was completed) shows why at the top, and on Needs attention for the CertaCal administrator. The law sets no deadline, so a report held for review isn't counted as late.
NMI Form 6 and Form 6A (Australia)
A servicing licensee tells the National Measurement Institute about the instruments its verifiers verify, on the NMI's Form 6 (one owner's location, up to 32 instruments) or Form 6A (a list of many). A complex instrument, a weighing instrument over 3 tonnes such as a weighbridge, must be reported within 14 days with its test report. The tab appears once the company has the Australia (NMI, national) card under Settings › Calibration › Agency & licenses, or a location in Australia.
Open Government reporting › NMI (Australia). Each row is one owner's location on one visit in the last 120 days: the date, the owner and location, each instrument with its performance code and whether it's complex, and the Form 6's status.
- Download gives that visit's Form 6, the NMI's own workbook filled in: the owner, the location, your licence, the verifier and their mark, and a line for each instrument.
- Send emails it through the company's email to the NMI (TMV@measurement.gov.au), with each instrument's certificate attached as its test report and your licence's reply-to email. Approve the calibrations first: the certificates go with it. Sent visits show when they went.
- Needs information lists what the form still needs, for example the owner's ABN or NMI business type, a verifier number, or an instrument's NMI approval number.
- Download Form 6A lists every verified instrument in the dates you choose (a year at most).
In-service inspections aren't verifications, so they aren't on either form. The demo company prepares the forms but never sends them.
Performance codes
CertaCal works out each instrument's code from the visit: A new to trade (a new installation, an added or replacement instrument), B reverified as found, C adjusted while inside the limits, D adjusted from outside them, E after a repair, F removed from trade, and H not reverified (it failed, or an NITP 6 check failed), with the failed checks as the reason. The technician can choose G (modified or upgraded), F or H, and type the reason, on the NITP 6 checks; their choice wins.
What the forms need
- Settings › Calibration › Agency & licenses › Australia: the licence number, licensee name, licensee mark and ABN.
- Each verifier's Australia number under Technician license numbers.
- On the customer's page, under Billing address: the owner's ABN and NMI business type (the NMI's list). The street number and street name are split from the street line, so write it as 12 Example Road.
- On each location: the suburb and postcode, or GPS for a location with no street address.
- On each scale: the NMI certificate program with its approval number, and for a public weighbridge, its Public weighbridge number.
Test weights
Our certificates are only as good as the weights behind them. Every test weight is sent to an accredited lab on a schedule. The lab checks it against its own standards and issues a certificate with a traceability number and a due date. CertaCal keeps that record for every weight, warns technicians who pick a weight that isn't current, and lets the office find every certificate a weight was used on.
> > - On a calibration, the state is the scale's location, and only for legal-for-trade scales. A weight past that state's interval is treated like an expired one: the technician is warned, the calibration is marked, and the reviewer has to give a reason to approve it. If your company chose Block for weights without a current certificate (Settings › Calibration › Company policies), the technician can't send the calibration at all. > - On the Test weights pages and Home, where no one scale decides, the state is the one the kit's office is in; a kit without an office uses the strictest state your company is registered in. The due date then shows which rule set it (for example CA: 24 months), with the certificate's own date beside it.
Weights are grouped into kits: the set that travels together on one truck or lives in one shop. A kit is only as good as its worst weight.
The kit list
Click Test weights in the menu. The red number next to it is how many weights are in service without a current certificate.
For each kit: the office it belongs to, how many weights, the certificate its weights are on, the due date and the status. Use Search kits and the Show filter (Expired or no certificate, Due soon, Current) to find the ones that need attention.
Weights found out of tolerance at the top lists any weight the lab found out of tolerance that still needs a customer-impact review (see below). When another standard is waiting on a review too (an instrument, a reference material or a customer's own standard), the list is called Found out of tolerance and shows those as well.
A kit's page
Click a kit to open it. You see:
- Where it lives (truck or shop) and Notes. Keep these current so the office knows where to find it.
- Responsible person: who sends the kit for calibration. When the kit's first weight comes within the company's due soon days (Settings › Calibration › Company policies, Test weights: due soon within, 30 days unless changed), CertaCal puts a task on their Home page: Send test-weight kit … for calibration, with the due date. With nobody chosen, the task is for anyone in the office.
- Every weight in the kit: its serial, nominal value, the certificate it's on, any problem (expired, no certificate), and its status: In service, Out of service or Retired. Change the status from the drop-down. A weight that's out of service or retired can't be picked by technicians.
Adding kits and weights
- Add a kit (top of Test weights): its name, the office it belongs to, the unit and where it lives. CertaCal opens the new kit.
- On a kit's page, Add a weight (under the list): its ID as stamped or tagged (e.g. W-121), its nominal value and unit, and its class. A new weight has no certificate until you record the kit's next one.
Recording a new certificate
When a kit comes back from the lab:
- Open the kit and click Record new certificate.
- Enter the Traceability number from the lab certificate (for example 260330001), the Lab report number if one traceability number covers several reports, Calibrated on and Due.
- Tick Enter the lab's as-found results if the lab reported how each weight was before it adjusted them. For each weight, enter the as-found error, the tolerance and the uncertainty in milligrams. Tick Out of service for any weight that must not be used.
- Click Save certificate.
To keep the lab's certificate with it, click Attach the certificate and choose the PDF, or photos of the paper (a page each), then Attach.
The whole kit is now on the new certificate. If any weight's as-found error was bigger than its tolerance, CertaCal says so and opens a customer-impact review for it.
Australia: Regulation 13. A company that works in Australia also sees Regulation 13 certificate (Australia): tick it for a certificate issued under regulation 13 of the National Measurement Regulations. NITP 6 verifies a legal-for-trade instrument only with standards on a current Regulation 13 certificate, so a calibration of one at an Australian location made with weights or other standards that aren't is listed with not on a Regulation 13 certificate (NITP 6 2), like an expired certificate (your company's Warn or Block applies), and the instrument gets no verification mark. The kit's certificate list shows Reg 13 beside such a certificate, and other reference standards have the same tick on their form and when their new certificate is recorded.
Intermediate checks
Between lab calibrations, test weights and reference materials are checked against a reference of known value: by default every six months, counted from the certificate or the last check. No check is asked for when the calibration falls due first, so a weight on a yearly certificate gets one check, around the middle of the year. Change the interval in Settings › Calibration › Company policies.
Click Intermediate checks at the top of Test weights (or of Other reference standards). Each weight certificate with weights in service, and each reference material, is listed with its last check, when the next is due and its status: Overdue, Due soon (within your test weights' due-soon days, 30 unless changed in Settings › Calibration › Company policies), Not yet due or Calibration due first. Overdue checks show on the Home page too.
To record a check:
- Click Record a check beside the certificate or reference material.
- Enter the date, what it was Checked against (a reference standard in calibration on that day, or describe something else), the Method (for weights, CP-200 single substitution unless yours differs) and who did it (Checked by).
- For each weight checked, enter the Error found. The tolerance comes from the weight's class; change it if its certificate says otherwise. Leave a weight blank if it wasn't checked this time. For a reference material, enter its error and tolerance.
- If an error is outside the tolerance, repeat the comparison straight away and enter the Re-check. The item passes if the re-check is within tolerance, and fails only if both are out. Both results are kept.
- Click Record check.
An item that fails is taken out of use: a weight is set to Out of service and a reference material is switched off. CertaCal opens a customer-impact review of the calibrations it was used on since it was last known to be in tolerance (its last passing check, or its certificate). If nothing used it in that time, the review closes itself as No customer impact.
A passing check also counts later. If the item comes back from the lab out of tolerance, its impact review looks back only to the last passing check, not to the previous certificate.
Checks are never edited or deleted. If one was recorded wrongly, check the item again and say why in Notes. Every check is listed in Reports → Intermediate checks (Checks done).
Letting the AI read the certificate
Instead of typing the lab's numbers, you can upload the certificate and let CertaCal read it. This needs an AI service set up under Settings › Connections › AI reading; without one, the Upload a certificate button isn't shown, and certificates are typed in with the lab's copy attached (above).
- On Test weights, click Upload a certificate. (Or, on a kit's page, click Record new certificate, then Fill from a PDF or photo.)
- Click Choose files for the certificate as a file: a PDF, a spreadsheet (.xlsx, .ods, .csv), a document (.docx, .odt, .txt) or a saved web page. Any layout works as long as the numbers are readable; an old .xls spreadsheet needs saving as .xlsx first. For a paper certificate, click Take a photo: on a phone or tablet it opens the camera. Take one photo per page, flat, in good light, with the whole page in the picture. Take another photo adds the next page.
- Click Read the certificate. Reading takes up to a minute.
CertaCal then shows what it read: the lab, report number, dates, and each weight with the kit it belongs to. It finds weights by their ID, so "ABC 121" on the certificate finds weight ABC-121. Click Check and save for kit name to open that kit's certificate form, already filled in.
Then, on the kit's form:
- Click Open the certificate and check every value against it: traceability number, dates, and each weight's as-found error, tolerance and uncertainty (all in milligrams; CertaCal converts from grams or pounds). Anything the AI wasn't sure of is listed in the yellow box. Correct anything that's wrong.
- Click Save certificate. The uploaded file is kept as that certificate's copy.
If one certificate covers weights in several kits, save it on the first kit, then go back to Test weights, upload it again (or reopen the kit link) and save it on the next kit.
Several certificates at once
To catch up on a stack of lab PDFs, click Upload several on Test weights, choose the files (one PDF per certificate), and click Read N certificates. Each is read on its own.
They wait under Certificates to check and save, with the traceability number, report, date, number of weights, and what each needs (weights out of tolerance, weights not in a kit yet). Click Check and save on each one in turn; the list stays until every certificate is saved or discarded, so you can stop and come back later. Try again re-reads one that couldn't be read; Discard removes one you don't want (for example a duplicate or the wrong file), and Cancel stops one that is still being read. An upload you've opened has Discard this upload at the top too. Discarding never changes anything already recorded from it; a certificate that has been saved keeps its upload as part of the record, so it can't be discarded.
Putting the weights in kits
- Check the certificate at the top: traceability number, lab report and dates, against the lab's copy. It's recorded on each weight as it goes into a kit.
- Under To do, tick the weights that belong in one kit (click a row or its box; the box in the heading ticks them all).
- In the bar above the list, pick the kit beside Add to. For a kit that doesn't exist yet, pick + New kit… and type its name.
- Click Add to kit. Those weights go into that kit with the certificate recorded on them, and move to Done. Weights CertaCal didn't have are added with the ID, size and class on the certificate.
- Repeat until To do is empty. The certificate then leaves Certificates to check and save by itself.
Weights already in a kit (found by their ID) show Not recorded; click Record the certificate on these to record it on all of them at once. If a weight in To do shouldn't be saved (a misprinted ID, a weight you no longer have), click Finish and leave it off.
The Conv. Mass Correction is the weight's error as the lab received it (As found). When the lab adjusted a weight, its Adjusted Correction is what it was left at (As left). A weight out of tolerance as received but adjusted shows Out as found, adjusted in: it's fine now, but it still needs the impact review, because it was out while it was being used.
A master kit's certificate often names the weights only by size under one Kit # (for example LC-A: 10 lb, 10 lb., 5 lb …). CertaCal gives each one an ID from the kit number and size (LC-A 10 lb, LC-A 10 lb #2), marked (by size), and suggests a kit with that number in its name, or a new kit named after it. Labs list a kit in the same order every year, so next year's certificate finds the same weights.
Adding weights to a kit doesn't record the certificate on them; only Save certificate does. You can close the review and come back to it from Certificates to check and save.
In-house certificates and old scale-style certificates
Your own in-house weight reports (for example a Weight Calibration Test Report) are read the same way. The report's own number (or its job number) becomes the certificate number; the traceability number printed for the standard used is listed under it as Standard used, not taken as this certificate's number. A due date printed as a month only (03/2026) means the last day of that month.
Weights that were certified on an older system's scale certificate, one page per weight with Before Reading and After Reading instead of errors, are read from the PDF's text without the AI, all pages at once. CertaCal works out each error as the reading minus the standard applied. Those certificates often say Pass and Adjusted: No for a weight that was out of tolerance as found and then adjusted; CertaCal goes by the readings, so check each weight marked Out as found and its impact review.
A long certificate is read a few pages at a time, so a set of many weights isn't cut short. When a document prints readings (the measured mass against a standard applied) as well as errors, CertaCal works out the errors from the readings, reading minus standard, and says so when the printed errors have the opposite sign.
Customer-impact review
If the value was read or typed wrong, click Correct the value on the review, type the as-found (and as-left, if the lab adjusted the weight) as printed, pick the unit on the certificate, and say what was wrong. The old value and your reason are kept; if the corrected value is within tolerance, the review closes.
Open the review from the Home page or from Weights found out of tolerance.
- Calibrations it was used on lists every calibration that used this weight since its previous certificate: date, customer, scale, certificate and result. Download CSV gives you the list.
- For each, judge whether the weight's error could have changed the result. Usually it couldn't: the weight's error in milligrams is tiny compared with a scale division in pounds.
- Under Outcome, pick No customer impact or Affected customers notified, add a case number if you have one, and write why, or who was told. That text is kept with the weight's record for audits, with your name and the date; the review shows who last recorded the outcome and when.
- Click Record outcome.
Archive data
Results brought in from the old system (certificates from years ago, reviewed at the time or not at all) don't need a review in CertaCal. Mark them archive data:
- All at once: under Weights found out of tolerance on the Test weights page, click Mark all as archive data, add a note if you like (for example "Imported history; reviewed at the time"), and confirm.
- One at a time: open the review and pick Archive data under Outcome. No reason is needed.
They come off the list and the Home page. Each result stays on the weight's record, marked archive data, with who did it and when. Use it only for history: a weight that comes back out of tolerance from now on gets a real review.
Seeing a weight's certificate
Go to Test weights and open the kit.
- One weight: in the weights table, click Open beside the weight's certificate number. The lab's certificate opens in a new tab.
- The whole kit: the Certificates section lists every certificate for the kit's weights, newest first. Current means it still covers at least one weight. Replaced means every weight has moved on to a newer certificate. The list shows the lab, calibration date, due date and how many of the kit's weights each certificate covers. Click Open certificate to see the lab's PDF.
A certificate that was typed in by hand, without a PDF, shows No PDF on file. Click Attach PDF and choose the lab's PDF, or photos of its pages, to keep a copy with it.
Renaming a kit
On a kit's page, click Rename beside its name, type the new name and click Save. Its weights, certificates and the calibrations it was used on stay with it; past certificates keep the name printed on them. Two kits can't share a name.
Deleting a kit
At the bottom of a kit's page, Delete this kit shows whether any calibration used it.
- Not used: click Delete kit, then Yes, delete. Its weights are deleted with it, and so is a certificate left with no weights. If the kit came from an uploaded certificate, the upload can be saved again.
- Used: it can't be deleted, because those calibration certificates must keep showing the weights that were used. Click Switch off to take it out of the lists and the technician app.
Recall: where was this kit used?
At the bottom of a kit's page, Recall finds every calibration the kit's weights were used on between two dates. Pick From and To, click Find calibrations, then Download CSV if you need to send it on.
Other reference standards
Standards that aren't weights are kept under Test weights › Other reference standards. Technicians pick them as the standards they used, like weights.
- Calibrated instrument: a reference thermometer, hygrometer or gauge. Record its ID, what it is, its certificate number, when it was calibrated and when it's due, and its range and uncertainty.
- Reference material: a viscosity standard, or a metal detector's test piece. Record its ID, lot, expiry date and its certified values: for a viscosity standard, for example, 500 cP at 25.0 °C, ±1 % of value. A standard certified at several temperatures has a line for each. Enter Opened on when the container is opened, and Use within (months) of opening from the producer (12 for most viscosity standards).
Choose a Responsible person too: when the standard comes within the due soon days of its Usable until date, they get a task on their Home page to send it for calibration (or replace it). A weight certificate gets no task of its own while it's in a kit: the kit's task covers it.
Usable until is the earlier of the due or expiry date and the end of the use-after-opening period. A standard past it is shown in red and counts as out of date on calibrations. Attach the certificate PDF when you save. Switch a standard off (In use) when it's used up or retired.
A new certificate for a standard
When an instrument or reference material comes back from its lab, click New certificate on its row. Enter the certificate number, its date, the due or expiry date and, from the certificate, the largest as-found error and the tolerance (what the lab found before any adjustment). Attach the PDF and click Save new certificate. Technicians keep picking the same standard; calibrations from now on are traceable through the new certificate.
If the as-found error is over the tolerance (with no allowance for the lab's uncertainty), it was found out of tolerance. When the certificate says so without giving the error, tick Found out of tolerance and write what it found. CertaCal then opens a customer-impact review over the calibrations the standard was used on since its previous certificate, and takes you to it. It works like a weight's review (above): check the calibrations, pick the outcome and write why, or who was told. Your name and the date are kept with the outcome. If the standard wasn't used in that time, the review closes itself as No customer impact.
Once a standard's dates are set, Edit shows them read-only: they change only through New certificate, which records what the lab found.
A standard with a review still open shows Out of tolerance: review on its row. A customer's own standard gets its new certificate on the device's page instead (Scales chapter, A customer's own standards).
Reports and exports
Click Reports in the menu. Each card is a report. Click one, set the filters, and read it on screen or export it.
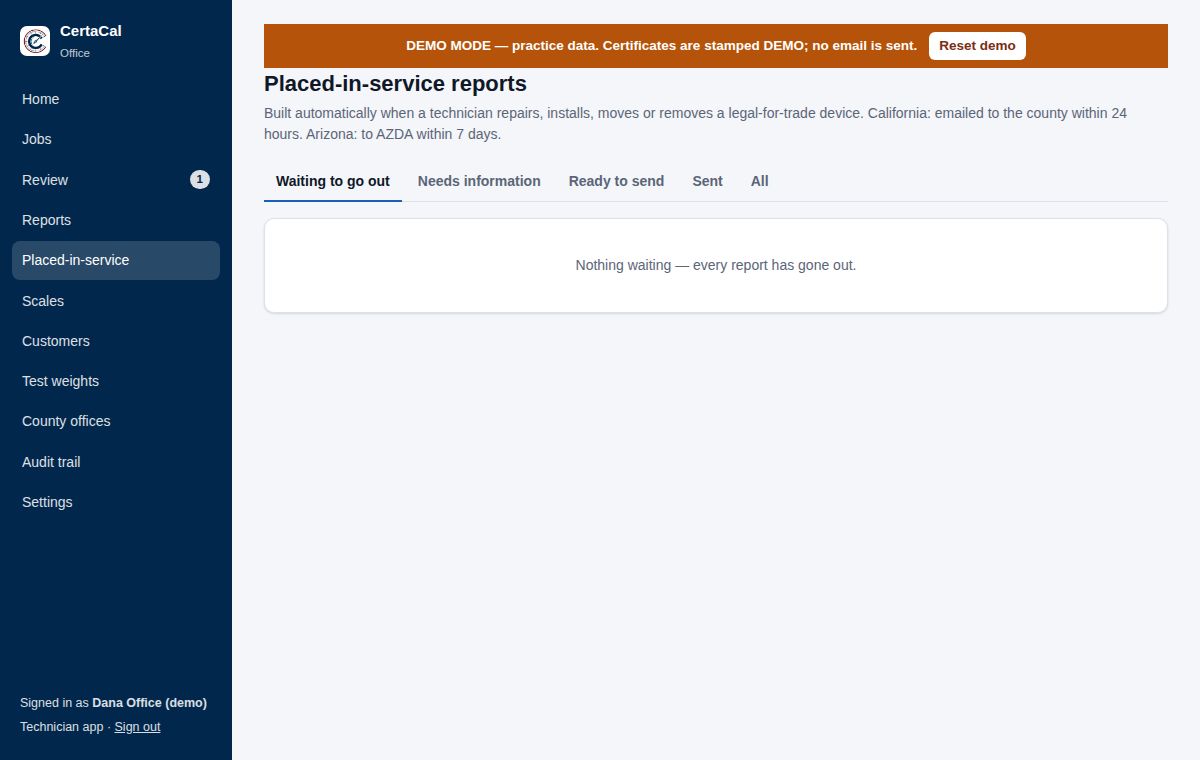
| Report | What it answers |
|---|---|
| Calibrations due | Which locations have scales due, and is a visit already booked? Use it to plan the month. |
| Scales tested | Every calibration in a period, with result, certificate and review state. Use it for billing and for "what did we do for this customer?" |
| Adjustment / fail | Scales found out of tolerance, adjusted, or left out, by scale or by customer. Shows which scales keep drifting. |
| Response time | Days from booking to the visit, and from the visit to certificates in the customer's inbox. |
| Providers on your jobs | A manufacturer's hub: each provider you send jobs to (your provider offices and linked providers): jobs sent, accepted, declined and finished, average time to accept, average time from sending to the work done, and first-time fix (no scale from the job back on another job within 30 days). |
| Your models on your jobs | A manufacturer's hub: each make and model your providers calibrated on your jobs, with how many were in tolerance as found, adjusted or failed. |
| Weights due | Test-weight kits whose certificate is expired, missing or coming due. Use it to plan lab trips. |
| Standards back from the lab | Weights and other standards (instruments, reference materials, customers' own standards) back from calibration: as found against tolerance, and the customer-impact review. |
| Intermediate checks | Test weights and reference materials checked between calibrations: what's due (overdue, due soon, not yet due), or every check done with its result, re-check and any impact review. |
| Service agreements | Service agreements due for review, and ones that ended without renewing (when agreements are on). |
| Problem scales | Owners, office admins and quality managers only. Scales that keep needing adjustment or failing, with why each is listed, its last result and visit, and any quote already made for it. Start a quote opens a repair quote for the scale. See below. |
| Scale export | Every scale with its details, in one spreadsheet. |
| Certificate amendments | The amendment register: every correction to an issued certificate, the reason, what changed, who asked, who approved it, and whether the customer was sent the new revision. |
| Technician time | Each technician's drive and on-site hours per day (or per week, starting Monday), the jobs and the scales they calibrated on them. Hours come from the service report's times. See below. |
| Time by job | Each job's drive out, on-site and drive back hours over all its technicians, and the hours its invoice bills by the hour, if any. |
| Quotes | When quotes are on, for the people who see Quotes. Quotes made, sent, accepted, declined and expired by month, with their totals and the share accepted; or Show: Open quotes, the drafts and sent quotes with how many days each has waited. See below. |
| Money | Owners and office admins (others only if the owner adds them). What closed jobs billed by month, technician or customer, split into flat-rate labour, hourly labour and parts, or every billed line. The same figures as the Money page, and, with service agreements on, what agreements should bill in the period; see below. |
| Job quality scores | Owners, office admins and quality managers only. Every job review: the job's quality score and its four lines, how many scales were audited, and whether it was approved or sent back. Show: Each technician's average turns it into a table of each technician's jobs reviewed, average and lowest score, and how many were returned for rework. Use it to coach, not to rank. |
| Technician As Found | Owners, office admins and quality managers only. Each technician's As Found failures and "perfect" readings against other technicians on the same scales, and how many calibrations carry a recording check. Use it to decide where ride-alongs and blind re-checks are needed, not as a finding about anyone. |
| Your figures against the industry | Owners and quality managers only. Your As Found failure rate for each kind of equipment over the last three years, beside the same figure pooled from every company on CertaCal. See below. |
| Your makes and models against CertaCal reference data | Owners and quality managers only. Your As Found failure rate and calibration interval for each make and model, and each kind, beside CertaCal reference data. See below. |
Your figures against the industry
CertaCal pools as-found results from every company's calibrations each week, without naming any company, customer, location, scale or person (terms of service 6.3). This report puts your own figures beside the pooled ones:
- Your calibrations and Your found out % come from your company's records only: approved calibrations from the last three years, not counting visits marked not inspected.
- Industry found out % is the share of calibrations found out of tolerance as found across every company. It shows only when at least 5 companies and 30 calibrations went into it; otherwise it reads Not enough companies yet.
- Difference (pts) is yours minus the industry's: above zero, more of your scales were found out than is usual for that kind of equipment. A high figure can mean harder use at your customers or longer intervals, not poorer work; use it to ask questions.
The industry figures are as of the date in the Industry figures from box. A company that has turned contributing off (Settings › Your CertaCal account › Industry figures, owner only) sees its own figures only: the industry columns say where to turn it back on.
Your makes and models against CertaCal reference data
CertaCal reference data is worked out from the calibration history of the companies on CertaCal, de-identified: it never names a company, customer, location, scale or person. A figure is kept only when at least 5 scales from at least 3 different end customers went into it. Where a pooled industry figure exists for a kind of equipment (see above), the report shows that one instead and says Industry; otherwise it says CertaCal reference.
- Rows are your own makes and models, and your kinds of equipment, that have a reference figure. Model numbers written differently (IQ plus 355, IQplus-355) count as one.
- Your found out % is from your own records only, over the same years as the reference data.
- Reference interval for 90 % in tolerance is the calibration interval after which 9 scales in 10 of that make and model are still found in tolerance, worked out from how often scales were found out after shorter and longer intervals. A make and model with little history is pulled toward its manufacturer's or its kind's figure.
- Your current interval is the typical interval your scales of that make and model are on now (a service agreement's frequency where one covers them). The note says when yours is longer than the reference interval.
Show: Year by year lists each make and model, and each kind, by the calendar year the calibrations were done: your found out % for that year beside the reference figure for the same year, and the reference interval worked out from that year's calibrations. Use it for trends: whether a model is found out more as it ages, or whether a change you made shows up. A year shows a reference figure only when enough scales and customers went into it that year, so early years with little history may be blank.
It's a guide, not a rule: a scale at a feed mill and the same model in a clean lab drift differently, and your customer's requirements come first. Use it to ask whether an interval suits the scale, for example when acme's floor scales are on 24 months and the reference interval is 9.
Technician time and Time by job
Both count the times each technician records on the Customer Service Report: drive out, on site and drive back.
- A day is the day the technician was on site, in your company's time zone. Work that runs past midnight counts on the day it started.
- Hours are shown to two decimals. A time with a start but no end (or an end before its start) counts as nothing, and the row says Times incomplete; so does a technician with no on-site times on a job. A blank drive back is normal (straight on to the next job) and isn't flagged.
- Scales calibrated counts the scales the technician calibrated on those jobs, not visits marked not inspected.
- Billed by the hour is filled in when the job's invoice bills time by the hour: a service agreement with hourly labor or travel, a time-and-materials quote, or Bill parts and time from the service report in QuickBooks settings. Otherwise it's blank.
- Miles, when technicians record mileage (Settings › Field work › Field rules): each technician's own miles, or the visit's one figure counted once, on the lead technician's row (or the first technician who recorded times when the lead didn't). The column isn't there while mileage is off.
The same hours appear on the QuickBooks invoice lines that bill time, with who worked them, for example Labor: 3.25 h (J. Rivera 2.00, T. Tech 1.25).
Problem scales
A scale that needs adjusting at visit after visit, or fails, is usually cheaper for the customer to repair or replace than to keep adjusting. This report lists those scales so the office can offer a quote. The rule is your company's, in Settings › Company › Problem scales; the sentence above the filters says what it is now. By default a scale is listed when it needed adjustment or failed at 2 or more of its last 3 approved calibrations, or was left out of tolerance at any of them.
- Only approved calibrations and imported history count. Work waiting for review, work sent back, and visits marked not inspected never do. Retired, inactive and field-added scales, rentals in stock and the scales of inactive customers are left out.
- Why it's listed says what the rule found, for example Adjusted at each of the last 3 visits or Failed as left at 1 of the last 3 visits.
- Quote shows the newest quote that names the scale and where it stands. Open quote opens it.
- Start a quote opens New quote as a repair quote for the scale's customer and location, with the scale ticked. Change anything there (calibration instead of repair, time and materials, more scales) before Start the quote. It's the same quote as any other: sent, answered and billed the same way. You need the Quotes page to start one.
- Hide takes a scale off the list with a reason (for example Customer declined or Already being replaced), until its next calibration or until a day you pick. Until its next calibration: it comes back when a newer calibration is approved and the scale still meets the rule. Until a day: it stays hidden until then, whatever happens. Show: Hidden lists hidden scales with the reason, who hid them and until when; Bring back puts one back now.
- The scale's History tab says when the scale is listed, and why, with its own Start a quote.
- Export gives every listed scale, with the same columns.
Quotes
Each quote number counts once, as its latest revision: when a revision replaces a sent quote, the earlier one isn't counted as expired.
- Created counts quotes made that month, Sent quotes first sent that month, Accepted and Declined the customer's answer that month, and Expired quotes whose good-until date fell that month.
- Totals are the quotes' own totals; a service agreement quote's total is for a year.
- Accepted % is accepted ÷ (accepted + declined + expired).
- Filter by what the quote is for, who prepared it, the customer or the prospect.
Money
Money in the menu shows what your company billed: totals for flat-rate labour, hourly labour and parts, a chart by month, a table by technician and one by customer, and the top labour lines and parts. Pick This month, Last 12 months or Custom (from and to dates) at the top; Export opens the Money report with the same dates for a CSV or Excel file.
Only owners and office admins see it. The owner can add quality managers or reviewers in Settings › Company › Role permissions.
Where the figures come from:
- Only closed jobs count (reviewed by the office), by the date of the visit, the date on its invoice. Quotes that are open or accepted but not yet done never count.
- Each job is priced as its invoice is: a job from a quote at the quote's price (time and materials: the quote's rates times the service report's actual hours, plus its truck charge, parts and any minimum charge); a visit under a service agreement at the agreement's prices; any other job from its QuickBooks invoice total.
- Flat-rate labour is everything charged per visit or as quoted: a flat quote, an agreement's service, truck and per-visit lines, a minimum charge's balance, travel by the mile, and Mileage (miles technicians recorded, billed at a per-mile rate): distance, not time. Hourly labour is time billed by the hour. Parts are the service report's parts on jobs that bill them.
- Tax shows below the totals and is never in them. CertaCal knows the tax only from quotes; QuickBooks works out the rest.
- A job whose scales are priced only in QuickBooks, with no QuickBooks invoice yet, isn't counted: a yellow note lists those jobs.
- By technician: time billed by the hour goes to the person who worked it, and mileage each technician recorded to that technician. Flat-rate work and parts are shared by each person's on-site hours on the job; without times, by the scales each person calibrated; otherwise all to the lead technician.
Agreements to bill (estimate)
With service agreements on (Settings › Company › Service agreements), the Money report By month and By customer has one more column, Agreements to bill (estimate): what your agreements should bill for visits in the dates you picked. Use it to see what's coming in, including months that haven't happened yet: pick dates ahead in From and To.
- Each agreement's visits are counted on its own schedule: its start date, then every frequency (an agreement starting 1 March every 3 months has visits on 1 March, 1 June, 1 September and 1 December), up to its end date, or on past it when it renews by itself.
- Each visit is priced at the agreement's per-visit lines: service, truck charge, the Misc lines, and labour and travel when they're per visit. Labour and travel billed by the hour aren't in it, because the hours aren't known until the visit.
- It counts a visit whether or not it has been done, so it's what the agreements are worth over the period, not what's left to bill. Compare it with Total, what closed jobs billed.
- Agreements of inactive customers, and agreements with no frequency, aren't counted; the summary says how many have no frequency.
- By customer also lists customers with agreements but nothing billed yet. By technician has no estimate: a visit nobody has done yet has no technician.
- The summary above the table has the estimate's total and how many visits it counts.
Filters
Most reports let you pick From and To dates, an Office, a Technician and a Customer (start typing to search). Dates are calendar days in your company's time zone (Settings › Certificates & reports › Certificate setup). The report updates as you change a filter.
Exporting
Above the results, Export N rows: CSV / Excel downloads exactly what's on screen with the filters applied. The Excel file opens in Excel with proper columns; the CSV is for other programs.
The Scales and Customers lists have the same export buttons, so you can export a filtered list (for example, every overdue scale for one office).
Looking things up
Much of the office's day is answering questions: "When was this scale last done?", "Did the customer get their certificate?", "Which weights did we use?" Here is where to look.
| Question | Where to look |
|---|---|
| When was a scale last calibrated, and what was the result? | Scales, search the serial number or name, open it, History tab. |
| A customer has a certificate number: whose scale is it? | Scales → Find a certificate, type the number (part of it is enough). Open the PDF, the scale or the customer from there. |
| What's the certificate number? | The scale's History tab (under the date), or the Review page once approved. |
| Did the customer get their certificates? | Review, tick Show closed jobs, or the job's box on the Review page. It shows who it was sent to and when. |
| Which scales does a customer have, and which are overdue? | Customers, open the customer; or Scales with the customer's name in the search. |
| What's booked for next week? | Jobs, then → to next week. |
| Which weights were used on a calibration? | Test weights, open the kit, Recall for the date of the calibration. |
| Has a placed-in-service report gone? | Government reporting → Sent, or All and search by customer. |
| Everything we did in a period | Reports → Scales tested. |
| Who changed this record, and when? | The scale's or customer's Change history button, or Settings › Company › Audit trail for everything. |
| Who's using CertaCal right now? | Settings › Company › Users, the Last active column. |
| How did a job score, and who reviewed it? | The job on the Review page, or Reports → Job quality scores. |
Calibrations brought over from the previous system appear on each scale's History tab marked Imported, with a button for the original certificate PDF and the job summary. They are read-only.
Settings
Click Settings in the menu. The list down the left side groups everything that shapes how CertaCal works for the whole company (on a phone it's a menu at the top). Most pages are set up once and changed rarely. Changes save when you leave a field.
| Group | Page | What's in it |
|---|---|---|
| Company | Offices & stickers | Adding offices; each office's name, address, phone and tagline on stickers and reports; whether technicians print stickers; this computer's printer. |
| Company | Appearance & logo | The colors of the office app, technician app and customer portal, and your logo on them and on certificates. See Appearance & logo. |
| Company | Users | Everyone who signs in, their username, role, password, whether they work in the field, last active, on/off, and unlocking an account. |
| Company | Security | Two-step sign-in for office people and how often people sign in again (the owner's), signing out or locking when nobody is using CertaCal, how long emailed password links last, the shortest password, and locking accounts after wrong passwords. |
| Company | Review & auto-approval | How jobs are reviewed (share to audit, minimum score), auto-approval of clean calibrations, and preliminary reports in the customer portal. |
| Company | Role permissions | Who may ask for and approve amendments, and approve rule sets, company policies, procedures and certificate wording; the people who are technical managers; which office pages office admins, quality managers and reviewers see; whether people may approve their own work (one-person companies). Starts at CertaCal's rules; only the owner changes it. |
| Company | Service agreements | Service agreements on or off (owners), the names of the three Misc price lines, and when the review reminder comes. |
| Company | Quotes | Quotes on or off, the price list a new quote starts from, quote numbering, how long a quote is good for and its terms. |
| Company | Problem scales | When a scale that keeps needing adjustment is listed in Reports › Problem scales, and the optional line about it on the customer's health report. |
| Company | Audit trail | Every sign-in and every add, change or delete, by whom and from which app, with the values before and after; Check the trail confirms it's intact. Auditors see this page too. |
| Connections | Outgoing mail server | Your company's own mailbox that certificates, placed-in-service reports and customer portal emails are sent from (owner, office admin). |
| Connections | Customer portal | The customer portal on or off, what customers can do in it, and Sign in with ERPNext. See The customer portal. |
| Connections | ERPNext | The connection to ERPNext: Service Orders become jobs, results go back. |
| Connections | Integrations | API keys for other programs, webhooks, and QuickBooks Online through Make. |
| Connections | Job Link | A service company: list it in the manufacturer directory, and accept or decline manufacturers' invitations (owner). A manufacturer's hub: find providers on CertaCal and invite them (owner, office admin). See Manufacturers and Job Link. |
| Connections | AI reading | Which AI service reads uploaded lab certificates, and its API key. |
| Your CertaCal account | Billing | Your CertaCal plan and monthly statements, billed by technician (owner). |
| Your CertaCal account | Company backup | Your company's own backup to its Nextcloud, and restoring from it (owner). |
| Your CertaCal account | Export | Everything your company has in CertaCal in one zip (owner). |
| Your CertaCal account | Import records | Bringing customers, locations, scales, test weights, reference standards and past calibrations in from your previous system as a CSV or Excel file, or from a template filled in by hand, with saved column mappings (owner, office admin). |
| Your CertaCal account | Support access | Letting CertaCal support see your records for a set time (owner, quality manager). |
| Your CertaCal account | Industry figures | Whether your company's anonymous figures go into the industry comparison (owner). See the owner's chapter. |
| Calibration | Agency & licenses | The company's registered-agency details for each state it works in, each technician's license numbers, and USDA Packers & Stockyards. |
| Calibration | Test catalog | The tests CertaCal knows about and their names. |
| Calibration | Tests by equipment type | Which tests each type of scale offers, and which are on for a new scale. |
| Calibration | Types & units | Scale types (with default interval) and units of measure. |
| Calibration | Device tolerance rules | The rule sets every scale is judged by (HB44 to start; others added from the catalog; a copy per state that differs), locked and versioned; and custom rules a customer or a kind of device calls for. |
| Calibration | Test weight tolerance table | The class tables test weights are checked against (OIML R 111, ASTM E617, NIST HB 105-1 Class F, NIST HB 44), read-only. |
| Calibration | Company policies | The company's own targets and thresholds: the As Left target, health-report grades and watch level, when test weights count as due soon, whether weights without a current certificate warn or block, the load-cell troubleshooting limits, the field methods (the drop test's loads, the corner allowance, the moisture analyzer's weighing load, the magnet limits), the quality score's lines and deductions, when readings count as copied, and what keeps a calibration from automatic approval. Locked and versioned like the rule sets. |
| Calibration | Manufacturers | The manufacturer list, and merging duplicate spellings. |
| Calibration | Manuals | Makers' manuals by make and model, for technicians on the job and kept on their phones. |
| Field work | Work instructions | The procedures technicians follow. |
| Field work | Inspection checklists | The visual inspection done on each scale. |
| Field work | Comment templates | Ready-made wording technicians tap to add to notes. |
| Field work | Tech app message | A notice shown at the top of everyone's technician app. |
| Field work | Field rules | Photos of a scale added in the field, who finishes a job, which scale details a technician may change and how, speaking readings, mileage on visits, and a new equipment type's interval. |
| Field work | Technicians' requests | Whether a technician's job requests and added scales wait for the office or are scheduled for them straight away. |
| Field work | Job task lists | Named lists of tasks the office adds to a visit in one click, and whether every task must be done before a job can be finished. |
| Field work | Technicians’ pick lists | The choices technicians pick from: reasons a scale wasn't inspected, reasons for service, conditions (weather), Arizona location codes, metal detector fail-safe checks and the service report's time buttons. Rename, reorder or retire items (records keep what they used), add your own where the list allows, and Back to CertaCal's list. Items marked Kept can be renamed but not retired. |
| Certificates & reports | Certificate setup | Logo, certificate message, decision rule, uncertainty, compliance lines, preview. |
| Certificates & reports | Certificate wording | The sentences your certificates print that are yours to word, and your accreditation body, number and symbol. |
| Certificates & reports | Accreditation scope | Each line of your scope of accreditation with its CMC, so certificates never report an uncertainty smaller than the CMC. |
| Certificates & reports | Emails to customers | The wording of each email sent to your customers: certificates, amended certificates, placed-in-service reports, portal emails and due reminders. |
| Certificates & reports | Forms & certificate layouts | Every form CertaCal prints, by Form type: certificate layouts (the certificates and the form builder for making your own), and your own layout for the Customer Service Report, the health report, the troubleshooting report and quotes: drafts, versions, preview and publish (owner, office admin, quality manager). |
| Certificates & reports | Sticker designer | The calibration sticker: the label size and which fields print where. |
| Certificates & reports | Troubleshooting | Where troubleshooting reports go: the PDF, the job package, the customer portal, the health report and review. |
The menu's groups open one at a time: opening a group closes the one that was open, so the list stays short. Clicking the CertaCal logo at the top left closes them all and goes to Home. CertaCal always opens on Home.
Find a setting. Type a word in the Find a setting box above the list (for example sticker, logo, password or QuickBooks) and the list shrinks to the pages whose name or description has that word, whichever group they are in; Enter opens the first one. Clear the box to get the whole list back. Before you pick a page, Settings shows every page you can open, group by group, each with a line saying what it is for; the box narrows that too.
The Company, Connections and Your CertaCal account pages are for owners, office admins and quality managers; other people don't see them. Some are narrower still, as the table says.
The Users tab has its own chapter.
Company backup
The company's owner can keep the company's own copy of its work: its certificates (PDF and digital certificate XML), photos, signatures, logos and documents, and its records (customers, equipment, calibrations, certificates, weights, users without their passwords), encrypted with the company's own passphrase and sent to the company's own Nextcloud. Only the owner sees this page.
- Under Nextcloud account, enter the address, the user name and an app password (in Nextcloud: Settings › Security › Devices & sessions › Create new app password), and the folder. Click Save, then Test the connection.
- Under Encryption passphrase, set a passphrase of at least 12 characters. Keep it somewhere safe as well: without it a backup can't be opened.
- Switch on the nightly backup and pick its hour, or leave it off and click Back up now whenever you want one. Old backups are deleted after the number of days you choose.
Each backup is one file, company_….tgz.gpg. Any GnuPG program opens it with the passphrase; inside are:
| In the backup | What it is |
|---|---|
| certificates.csv | Every certificate: number, revision, issue date, customer, equipment, serial number, and its files. |
| certificates | Each certificate as issued (.pdf) and its digital calibration certificate (.xml), named by certificate number. earlier revisions holds the revisions an amendment replaced. |
| files | Photos, signatures, logos and documents. |
| records.json | All the company's records in CertaCal, as data. |
This backup is the company's to keep. If the company ever needs to be put back as it was, the service does it from its own backup of the whole site; one restore a year is free.
Import records
Bring your customers, locations, service agreements, scales, test weights, reference standards and past calibrations in from your previous system. Any system that can export a spreadsheet will do: upload its CSV or Excel (.xlsx) file as it is. With no system to export from, fill in a template (below). Owners and office admins can import.
- What's in the file? Pick Customers, Locations, Service agreements, Scales and other devices, Test weights, Reference standards (not weights) or Past calibrations (read-only history), and choose the CSV or Excel file (CertaCal reads the sheet named Records, or else the first sheet). A file of devices can carry their customers and locations too: any that aren't in CertaCal yet are added with them.
- Match the columns. Each column of your file is listed with its first few values. CertaCal picks the field for the headings it recognises; choose a field for any others you want, or leave them on Skip. The fields marked needed must be matched.
- Kinds of equipment (devices only). Choose which of your kinds of equipment each value in the file's type column means, and one for rows that have none.
- Check. Nothing is saved yet: CertaCal works through every row and shows how many customers, locations and devices it would add, how many are already in CertaCal, and every row it would leave out, with the reason (for example "thirty" isn't a number). Fix the file and upload it again, or change the matching and check again.
- Import brings in every row without a problem.
- Nothing is duplicated or overwritten. A customer already in CertaCal is found by its old system's ID or by its name (ignoring punctuation and LLC or Inc), a location by its customer and name, a device by its old system's ID or serial number. For records already here, an import only fills fields that are blank.
- Save this mapping as keeps the way you matched the columns under a name. Choose it when you upload the next file from the same system and the columns match themselves.
- Undo this import (or Undo under Earlier imports) removes everything the import added and clears the blank fields it filled. It isn't possible once something made since uses an imported record, such as a job or a calibration; CertaCal says what's in the way and changes nothing.
Templates to fill in by hand
Under the file, Download a template gives a CSV or an Excel file for the kind of record chosen. Its headings are CertaCal's own column names, so an unchanged template matches every column by itself, and it has two example rows to copy and then replace with your own. The Excel template has a second sheet, Columns, saying what goes in each column; What goes in each column on the screen shows the same table: the column, whether it's needed, what goes in it and an example. A column you don't need can be left blank or deleted; the needed ones must stay. Dates are written YYYY-MM-DD (MM/DD/YYYY also works); yes/no columns take yes or no.
The templates are for typing records in by hand. A file exported from another system doesn't need to be copied into one: upload it as it is and match its columns.
Import in this order, so each file finds what the one before made:
- Customers
- Locations (each names its customer)
- Service agreements (each names its customer and, unless it covers the whole customer, its location)
- Scales and other devices (each names its customer and location)
- Test weights
- Reference standards
- Past calibrations (each names its device)
The examples fit together: the devices template's rows name the customers and locations of the customers and locations templates. A devices file can also be imported on its own, and adds the customers and locations it names.
Service agreements
Service agreements brings in what each customer or location is billed a visit and how often its devices are done. It's offered once an owner has switched service agreements on (Settings › Company › Service agreements); while they're off, the check says so and nothing is imported.
- Import the customers and locations first. An agreement never adds a customer or a location: a row naming one CertaCal doesn't have is left out, with the reason, so a misspelt name can't start a second customer. A blank Location name means the agreement covers the whole customer.
- A row needs the Start date. The end date is the start plus the Term (months), and the review reminder is set from it as on the screen.
- Frequency takes what people write: Quarterly, Semi-annual, Annual, Monthly, Bi-monthly (every two months), 4 a year, every 3 months, 12 months. It replaces each covered device's own interval, and their due dates move as soon as the import is done.
- Prices can be written with $ and commas (for example $1,400.00). Labor per and Travel per take hour or visit. Misc 1 to Misc 3 are the extra lines you name in Settings › Company › Service agreements.
- An agreement already here for the same customer, location and start date only gets its blank fields filled.
- Undo removes the agreements and puts the devices they covered back on their own intervals.
Past calibrations
Past calibrations (read-only history) brings in each device's earlier calibrations, so its history in CertaCal starts where your old system's did. Import the devices first: each row finds its device by the old system's Device ID (from the devices import), else by Serial number (add the Customer when one serial number is on two customers' devices). A row needs the Date calibrated and the Result (pass, fail or adjusted); the certificate number, technician, next due, job number, reviewer, weights used and notes come in when the file has them.
- They're kept as they were: never judged again, never on a placed-in-service report, a quality score or the reports' counts, and they don't change any due date (set those on the devices, or bring them in with the devices import).
- A technician is matched to your people by full name. A name CertaCal doesn't know becomes a former technician who can't sign in; undoing the import removes them again.
- The old certificates. After matching the columns, add a zip of the certificates' PDFs under The old certificates, and name each row's PDF in the Certificate PDF file column. Each is kept with its calibration as the original certificate (open it from the device's history). The check lists any row whose PDF isn't in the zip.
- Importing the same file again adds nothing: a certificate number already brought in (or, without one, the same device and day) is left as it is.
- Some systems' exports repeat a column heading (one Applied for each test load, for example): CertaCal numbers the repeats, Applied (2), so the file can be uploaded as it is.
Test weights
One row per weight, or one row for several identical weights with How many (they're numbered from the weight ID, or the set's name: C-01, C-02…). Rows with the same Set make one set of weights; rows with the same Certificate number go on one certificate.
| Column | |
|---|---|
| Weight ID or serial | Unique in CertaCal. |
| Nominal value, Unit | Needed. lb, kg, g, mg, oz and the troy units. |
| Class | OIML E1 to M3, ASTM E617 000 to 7, F (NIST HB 105-1) or HB 44. Checked against the tolerance tables. |
| Set (kit) name, Set description, Where the set is kept | The set the technicians pick. |
| Status | In service (blank), out of service or retired. |
| Certificate number, Calibrating lab, Traceable to, Calibration date, Due date | The lab's certificate. The due date must be after the calibration date. |
| Correction, Uncertainty, Tolerance, Unit of those (default mg) | The certificate's result for the weight. A blank tolerance comes from the class tables; a size the tables don't list needs one. |
Example:
Set,Weight ID,Nominal,Unit,Class,Certificate,Lab,Calibrated,Due,Correction,Uncertainty Truck 12 kit,W-01,500,lb,F,AZ-19523,State lab,2026-03-02,2027-03-02,2.5,8 Truck 12 kit,W-02,500,lb,F,AZ-19523,State lab,2026-03-02,2027-03-02,-1,8
The correction is brought in as the weight's result as the lab left it. An imported certificate never opens an impact review, and calibrations already done keep the weights they recorded. From the import on, the weights follow the same rules as weights entered by hand: a weight whose certificate is past its due date (or past your state's recalibration interval) can't be relied on.
Reference standards
For standards other than weights: calibrated instruments (a reference thermometer, a hygrometer) and reference materials (a viscosity standard). Rows with the same Identifier add certified values to one standard.
| Column | |
|---|---|
| Identifier | Needed. Unique in CertaCal. |
| Kind | Instrument (blank) or reference material. Weights go in through Test weights. |
| Description, Manufacturer, Model, Serial number, Range, Resolution | Model, serial number, range and resolution are kept, as typed, in the description. |
| Lot | A reference material's lot. |
| Certificate number, Calibrating lab, Traceable to, Calibration date, Due date (or expiry) | The certificate. |
| Certified value, Value unit, Value at, Value tolerance, Uncertainty | One certified value per row, e.g. 1000 cP at 25.0 °C, ±1 %. |
Example:
Identifier,Kind,Description,Manufacturer,Model,Serial,Certificate,Calibrated,Due,Certified value,Value unit,At,Tolerance,Uncertainty VS-1000,material,Viscosity standard,Cannon,N1000,,C-2,2026-03-02,2027-03-02,1000,cP,25.0 °C,1,0.3 REF-T1,instrument,Reference thermometer,Fluke,1523,S-88,C-1,2026-03-02,2027-03-02,,,,,0.05
A certificate PDF can't be imported with a file yet: attach it to the standard afterwards in Test weights. Past calibrations will be importable the same way.
Export
Settings › Your CertaCal account › Export gives the company's owner everything the company has in CertaCal in one zip, to keep or to move to another system. Only the owner sees this page.
- Click Make an export. It's made in the background: a company with many certificates and photos takes a while, and you can leave the page and come back.
- When it says Ready, click Download the export.
Each export is kept for 7 days; making a new one replaces the last. Inside the zip:
| In the export | What it is |
|---|---|
| certificates.csv, certificates, files, records.json | The same as in the company backup (above). |
| tables | Every kind of record, one file each: a .csv that opens in a spreadsheet, and a .json with the same records as data. "id" is the record's number; a column naming another kind of record holds that record's id. |
Passwords, keys and sign-in tokens are left out. Every export, and every download of one, is recorded in the audit trail.
DCC archive, below the export, is a smaller zip of just the digital certificates: the DCC XML of every certificate your company has issued, including each revision an amendment replaced, and manifest.csv listing each one with its status (current or replaced) and its fingerprints. Give a date in Issued since to include only certificates issued from then on, or leave it empty for all of them. Click Make a DCC archive, then Download the DCC archive when it's ready. It's kept for 7 days too; a new one replaces the last archive, not the full export.
When your company is read-only
If your company is leaving CertaCal, the service first makes it read-only: a banner at the top says Read-only. Everyone can still sign in, see, print and download everything (certificates, reports, exports), and the owner can still make the export above, but nothing can be added or changed. In the technician app, recording work is switched off, and anything a technician finished but hadn't sent yet stays on their phone. After that the company is switched off and nobody can sign in, so download the export while you can.
Support access
Your records belong to you. CertaCal staff don't view your company's records unless you switch on support access, which you control and can turn off at any time, and everything CertaCal's administrator does to your company is recorded where you can see it. Your own backup is encrypted with a passphrase only you hold. The owner and the quality manager see this page; only the owner switches support access on and off.
- When you've asked CertaCal support for help that needs them to see your records, open Settings › Your CertaCal account › Support access.
- Choose how long (1, 7 or 30 days), say what it's for if you like, and click Switch on. It turns itself off at the end of that time; Switch off now ends it sooner. Switching on and off is also in the audit trail.
What CertaCal's administrator did
Below the switch, What CertaCal's administrator did lists, newest first, when, who and what for every administrator action that touches your company:
- each page of your records they opened while support access was on;
- adding your company, switching it off or back on, making it read-only, notices sent to it, and changes to its settings;
- putting your training company back to the start, and putting your records back from a backup;
- opening your company's usage page (the figures CertaCal keeps on how much your company uses it, never what you record).
Nobody can change or delete these entries, CertaCal included. Other companies' entries never appear here. Show older goes further back.
Agency & licenses
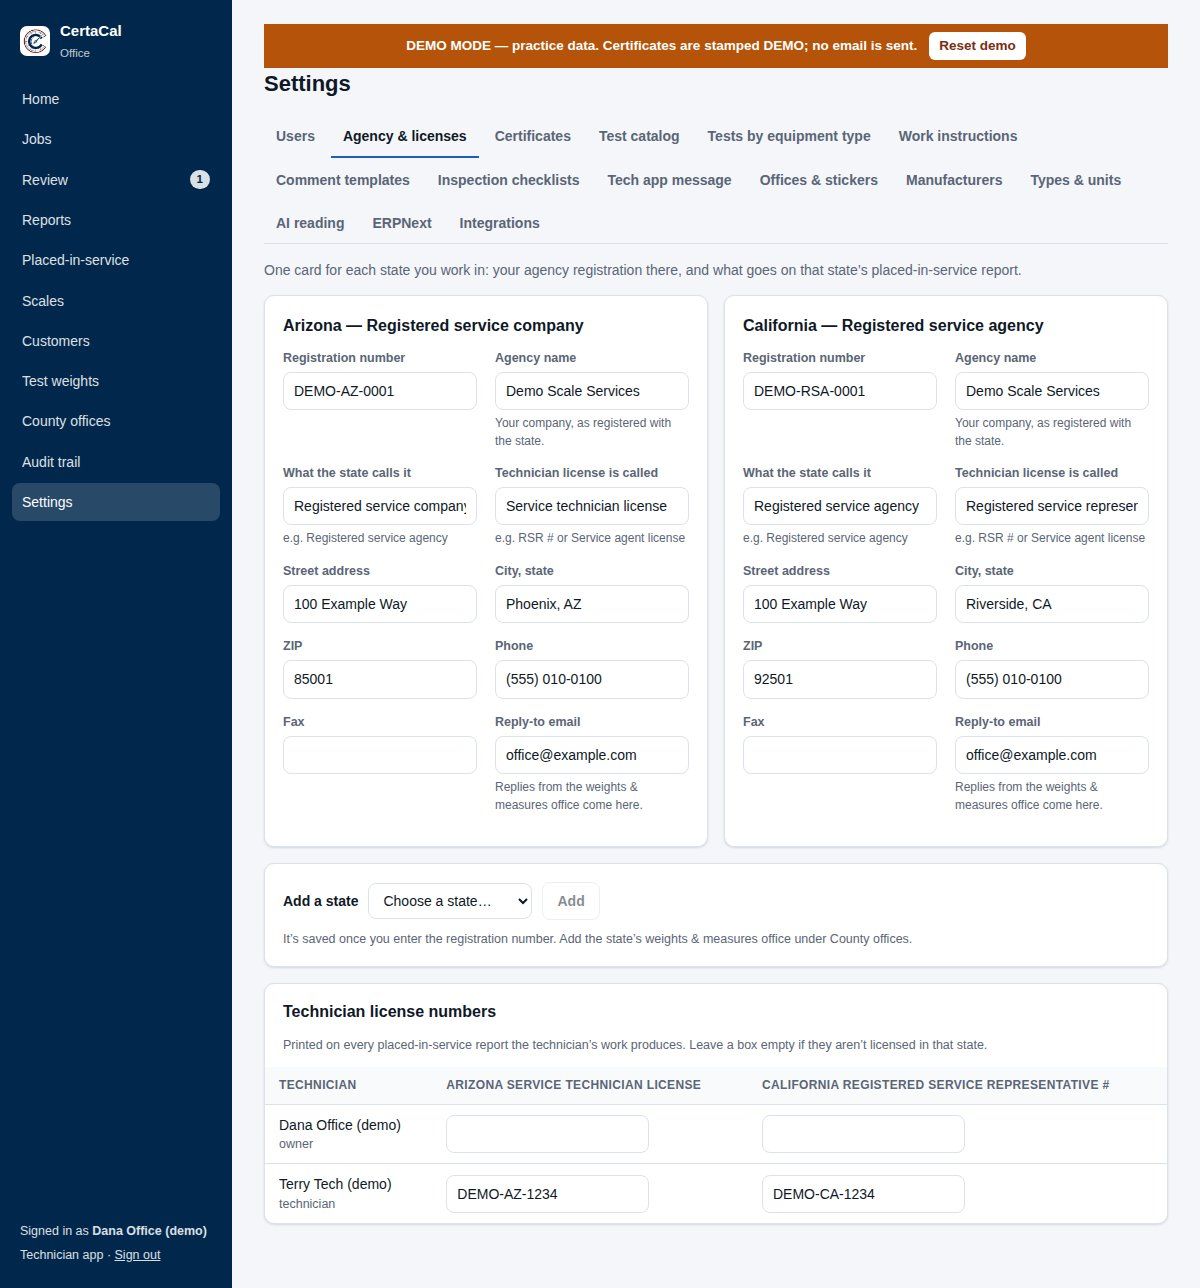
There's a card for each state the company is registered in. To start working in another state, click Add a state, choose it, and enter its Registration number; the state is saved once that's filled in. For each state:
- Registration number, Agency name (the company as registered with the state), address, phone, fax and Reply-to email (the weights-and-measures office's replies come here).
- What the state calls it (for example Registered service agency) and Technician license is called (for example RSR # or Service agent license). These are the words printed on that state's reports and used on this page.
- Report due within (hours): the deadline for placed-in-service reports, used when the state's office doesn't set its own. Where CertaCal knows the state's legal deadline (California 24 hours, Arizona 7 days, Illinois 5 days), a new state starts at it and the box says so; you can set a shorter time, never a longer one.
- Sending reports: Check and send automatically (a complete report is emailed when its job is completed) or Hold for office review (it waits as Ready to send on the Government reporting page and on Home until someone in the office sends it).
- Placed-in-service reports: This state wants them or Not required here. In a state that doesn't want them, CertaCal doesn't make them. A state whose law requires them (California, Arizona) has no switch: its reports are always made.
- Standards used for legal-for-trade work must be recalibrated every (months): the state's law on how often test weights used on legal-for-trade scales go back to the lab, whatever date the certificate gives. California starts at 24 months and Arizona at 12 (the state's rule in CertaCal); other states start blank (no limit beyond each certificate's due date). Change it if the law changes, or set a shorter interval if your company recalibrates more often.
Below that, Technician license numbers: one box per technician per state. These print on every placed-in-service report that technician's work produces. Leave a box empty if they aren't licensed in that state.
Then add the state's weights-and-measures office (or offices) under Government reporting › Offices, so CertaCal knows where its reports go.
Australia
Australia licenses servicing companies and verifiers nationally, so it's one card for the whole country: Add a state › Australia (NMI, national). Enter the servicing licence number as the Registration number and the Licensee mark, the three capital letters the NMI issued. Each verifier's registration number (for example VR-00234) goes in their Australia box under Technician license numbers.
Every legal-for-trade instrument that passes verification at an Australian location (a site whose country is Australia) then gets its verification mark: the licensee mark, the last four digits of the verifier's number, the month as a letter (A for January to L for December) and the year's last digit, for example ABC0234K6 for November 2026. It prints on the certificate beside the technician, and on the sticker wherever the sticker design has the Verification mark (Australia) field (Sticker designer). A rejected instrument gets no mark. Add the licensee's ABN too: Form 6 and Form 6A ask for it. The forms themselves are under Government reporting › NMI (Australia).
USDA Packers & Stockyards
At the bottom of the page, the USDA Packers & Stockyards card is for companies that test scales used to buy or sell livestock, carcasses, live poultry or feed. Federal law (9 CFR 201.72) has those scales tested twice a year, once from January to June and once from July to December, at least 120 days apart, and every test reported to the USDA Packers & Stockyards regional office for the scale's state.
- On / Off: off to start with. While it's off nothing about Packers & Stockyards shows anywhere.
- Test agency name, Phone, Email, Address: what the test reports print for your company. Leave a box empty to print your company's own details (shown greyed in the box).
- Send a complete test report when its job is completed: as for the state reports; off holds each report in Ready to send for the office.
Then mark each scale on its own page (Packers & Stockyards card), and check the regional offices under Government reporting › Offices › USDA P&S. Each test's report then appears under Government reporting › USDA P&S test reports, and the owner's copy goes with the visit's certificates.
Certificate setup
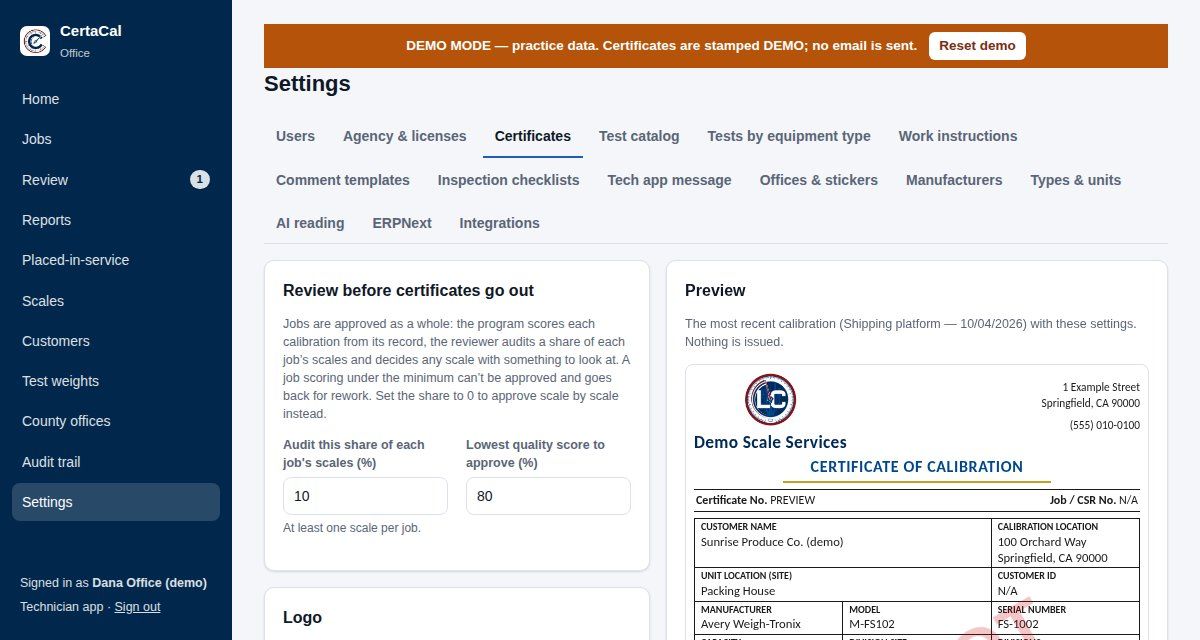
- Company and numbering: the company's name, how certificate numbers look and what the job number is called on certificates, all first chosen when the company was set up.
- Starts with, Count (the year in the number, restarting each January, or one count that never restarts), Digits and First number (to carry on from a previous system's numbers). The page shows what your first certificate will be. Once a certificate has been issued the numbering can't change: numbers already printed must keep their form.
- Job number, called on certificates: Job / CSR No., Job No., Work order, Service order, Ticket No., or your own words. It changes only the label on certificates.
- Time zone: sets when "today" turns over for your company: due and overdue dates, the Jobs board, reports and the nightly work. Left on From my main office's state, it follows the state of your default office (Settings › Company › Offices & stickers). Work at a customer's location is always dated by the clock in that location's state, so an evening calibration in Arizona is that day in Arizona.
- Write dates as: 11/01/2026 (month/day/year, the default), 01/11/2026 (day/month/year), 2026-11-01 or Nov 1, 2026. Used on certificates, stickers, reports, emails, the customer portal and every screen. Certificates already issued keep the dates they were printed with. Digital certificates (DCC XML) and files made for other programs always use 2026-11-01, the international form.
- Logo: goes on every certificate, health report and troubleshooting report. With no logo uploaded, your company name prints instead.
- Certificate message: printed above the compliance lines, e.g. "Thank you for your business. Questions? Call our office.".
- Decision rule: how pass/fail is decided, printed on every certificate. The default is simple acceptance: a reading passes when its error is within the HB44 tolerance, and uncertainty is not added or subtracted.
- Certificate check (owner, office admin, quality manager): every night CertaCal checks that each issued certificate's PDF, digital certificate and data still match what was recorded when it was issued. The box shows the last check and lists any certificate that no longer matches, with what's wrong. Compare it with your copy as issued and amend it if it's wrong; tell CertaCal support if you can't see why it changed. The owner and quality manager can click Check now. A problem also shows on Home under What needs attention.
- Print photos of the device on every test report: off unless you want them. When on, the calibration's photos of the device and its serial tags print in a Photos section after the signatures (up to eight). The photo of where it is never prints.
- Print a new scale's photos on its first test report: on unless you switch it off. A new scale is one with no earlier calibration in CertaCal (imported history counts, so scales you brought over don't). Its first report shows the device and the serial tags photographed when it was entered, so the customer can see what was recorded.
- A certificate layout with its own Calibration photos block prints them there instead.
- Print measurement uncertainty: off until the company is required to report uncertainty (the accreditation body or a customer contract). When off, the Uncertainty column is left off every certificate; the values are still kept. When you switch it on, change the decision rule to say how uncertainty is used. Uncertainty prints one step finer than the device's division, rounded up: a scale reading by 0.1 lb shows 0.03, one reading by 20 lb shows 6. The full calculated value is kept on the record and in the DCC XML. How many steps finer, and whether to round up or to the nearest, are company policies (see Company policies).
- Work out scale uncertainty automatically (on): CertaCal calculates the uncertainty of every scale test point from the calibration's own data, so technicians don't enter it. It uses the scale's division (zero and load readings), the test weights at their nominal value (each weight's tolerance, or its certificate's uncertainty when no tolerance is known; stacked weights added together; a strain load is never counted as a weight, and each substitution under a load adds the resolution and repeatability of bringing the substitute to the weights' reading), the repeatability test (never counted below 0.5 d/√3, since readings that agree only show the scale repeats within a division; 0.5 d when it wasn't run) and the shift or section test (a 1 d difference at a third of the load when it wasn't run), with k = 2. The coverage factor and the values assumed when a test wasn't run are company policies (Company policies, Uncertainty). Never report less than sets the minimum in divisions (2 d by default). A value someone types in is kept as it is; a value CertaCal worked out is removed if it can no longer be worked out (the setting is switched off, the scale has no division, or a reading is in a unit CertaCal doesn't know). Readings in another mass unit than the scale's are converted. On the Review page, a calibration whose uncertainty came out above the minimum says why (for example "mostly eccentricity"). Thermometers, flow meters and other devices keep entering their own; weight sets keep theirs.
- Signatures: the technician signs once for each job when they finish it, and the signature prints on the job's health report and on every certificate from the job. Customer acknowledgement (Off by default) asks the customer, at the same time, to type their name and sign "I acknowledge that the equipment listed was serviced on this date and the results were reviewed with me." Optional lets the technician skip it; Required means a job can't be finished without it. The customer's name and signature print next to the technician's.
- Compliance lines: the standards the certificate says the work complies with ("The equipment noted on this certificate has been tested and/or calibrated in compliance with…"). Switch lines on or off. Prints for limits a line to kinds of device: NIST Handbook 44 and weights-and-measures statutes belong on scale certificates, not on a thermometer's or a viscometer's.
- Preview: draws the most recent calibration with these settings, so you can see the effect. Nothing is issued.
Certificate wording
Settings › Certificates & reports › Certificate wording holds the sentences every certificate prints that are your lab's own to word, and your accreditation. Certificate content is part of your quality system, so it works like Company policies: locked, versioned, and changed by an owner or quality manager (Unlock to edit, change, Save draft, then Approve with what changed and why). Office admins and auditors can read it. Each certificate keeps the version it was issued with, and amendments keep it too.
Each block shows CertaCal's wording until you write your own; Back to CertaCal's wording returns to it. The preview under each shows it as a certificate prints it.
- Reproduction statement: the line at the foot ("this certificate relates only to the item…").
{company}is your company's name. - Traceability statement: the sentence before the list of reference standards. A lab outside the United States traces through its own national institute or accredited labs: say so here.
- Result: in tolerance / adjusted / out of tolerance: the overall result line.
- Visual inspection key and component condition key: under the inspection checklist and a truck scale's condition table.
- Verification caption: beside the QR code.
{url}is the certificate's verification address. - Draft stamp, preliminary report stamp and notice: they can be reworded, never left out.
- Customer's acknowledgement: what the customer signs to at the end of a visit (Settings › Certificates & reports › Certificate setup › Customer acknowledgement). Each signature keeps the wording it was given with.
Placeholders are just names in braces; to print a brace itself, type {{ or }}.
Health report wording
The same page has the equipment health report's headings and advice, approved with the rest:
- Report title (Equipment Health Report) and the headings: Not inspected this visit, What needs your attention, Troubleshooting, and the one over the table of every device (
{Device} by {device}:{device}is scale on a visit to only scales, else device;{Device}the same, capitalized). - Advice for each device that needs it: the titles for poor condition, out of tolerance, adjusted, close to the limit and often out on arrival, and the text printed under out of tolerance (
{device}) and close to the limit ({percent}, how much of its tolerance it used). A technician's own note on the device is printed instead of that text.
The health report is drawn each time it's sent or downloaded, so once a change is approved every health report uses it, an earlier visit's included when it's downloaded again; copies already emailed keep their wording.
Accreditation
Switch on Print the accreditation on certificates and give the accreditation body, your accreditation number, an optional scope reference and the symbol your body gave you (PNG, JPEG or SVG, under 200 KB). The certificate then prints "Accredited by {body}, certificate {number}." with the symbol, the DCC carries the number, and the verification page shows it.
The symbol prints only on work within your accredited scope:
- Mark each device that's in scope with ISO 17025 on its page.
- A reviewer can mark one calibration as outside the scope on the Review page (Within our accredited scope), before it's approved.
- Outside the scope, the certificate prints "This calibration is outside the laboratory's scope of accreditation." and no symbol. Both sentences can be reworded here.
CertaCal never prints the symbol without the number, or on work outside the scope, whatever the settings (ILAC P8).
Accreditation scope
Settings › Certificates & reports › Accreditation scope holds each line of your scope of accreditation and its Calibration and Measurement Capability (CMC), as your scope document writes it. Each line has the Kind of device, an optional Type, the Parameter, the range (From, To and Unit; both ends count as inside), and the CMC: a fixed part (CMC fixed and CMC unit), a part proportional to the reading (CMC proportional, as % of reading, ppm of reading or × reading), or both, at k = 2. Untick In scope for a line your scope excludes, and add a Note if you want one.
Type the lines in, or copy your scope table from Excel or a CSV file (heading row first) into Your scope table and choose Replace the lines or Add to the lines.
Let CertaCal read the scope PDF. With AI reading set up (Settings › Connections › AI reading), uploading a new scope of accreditation fills in the table: your AI service reads each line and its CMC from the PDF, CertaCal unlocks the scope if it's locked, and the lines go into the draft in place of the old ones, with a note saying what the AI wasn't sure of and which lines it left out. Check every line against the PDF, change what's wrong, Save draft and approve. Certificates go on using the approved scope until you do. To read the current scope again, unlock it and click Read its lines into the scope under the document: the lines then come into Your scope table to take in by hand.
With Read its lines into the scope, the lines come into Your scope table with the same note: anything the AI wasn't sure of, and any line it read that doesn't make a valid scope line (a missing CMC, a unit CertaCal can't convert), left out for you to type in. Check every line against the PDF, then choose Replace the lines or Add to the lines and Save draft. Nothing is saved until you do, and the scope is approved as usual. The PDF is sent to your AI service to be read; a scope of accreditation holds no customer information. Download as CSV gives you the lines as a CSV file (Download a blank table before you have any).
On work inside the scope, a certificate never reports an expanded uncertainty smaller than the CMC at that point (ILAC P14 5.5):
- Where the worked-out uncertainty is smaller, the certificate and the DCC print the CMC, with a note that it was raised. The worked-out value stays on the record.
- A reading on no line, on a line marked outside, or a kind of device with no line, takes the whole certificate outside the scope: it prints the outside-the-scope sentence, no symbol, and the worked-out values.
- With no lines, nothing changes.
Units are converted (for example a scope in kg and a scale in lb). The scope only applies when Print the accreditation on certificates is on and the device is marked ISO 17025.
The scope is approved with your certificate wording, by the owner or quality manager: unlocking one unlocks both, and each certificate keeps the scope it was issued with. A new scope that claims more than the one in force (a smaller CMC, a wider range, a line newly inside) needs a reason when you approve it, for example the accreditation body's new scope document and its date.
What happens to a calibration whose uncertainty was raised is the company policy Uncertainty raised to the accredited CMC (Settings › Calibration › Company policies, Uncertainty):
- Hold (the default): it waits for a person, who sees which points were raised.
- Allow: it can still be approved automatically.
- Block: it can't be approved until the uncertainty budget is put right or the work is marked outside the scope.
Review shows the raised points (worked out → CMC), work outside the listed scope, and accredited work with no uncertainty at some points.
#### Accreditation documents
At the top of the same page, Accreditation documents keeps your accreditation body's certificate of accreditation and scope of accreditation as PDFs. Upload a new issue with the date the body issued it, and its expiry date if it has one. With AI reading set up, Read it with AI after choosing the PDF fills in the form (which document it is, its title, when it was issued and until when it's valid) for you to check before Upload. For a certificate of accreditation it also shows the body and your accreditation number, and, while the wording is unlocked, Put the body and number in the certificate wording saves them in the draft (Certificate wording › Accreditation). Every issue is kept, marked current or superseded (ISO/IEC 17025 keeps obsolete documents). A document the body sent, or you scanned, as separate files is one upload: add each PDF in order (Add another page) and they're kept as one PDF. An accreditation certificate and its scope in one scanned document are two uploads: the certificate page as the Certificate of accreditation, then the scope pages together as the Scope of accreditation. A scope usually has no date of its own, so a scope uploaded without one takes the dates of your current certificate of accreditation (the form says so); upload the certificate first. Remove takes away an upload made by mistake, but only until a certificate has been issued since the date it took effect; after that it's kept, and a corrected one is uploaded as a new issue. Whoever approves the certificate wording (the owner or quality manager, unless changed in Settings › Company › Role permissions) uploads them; other office people can open them.
Customers' auditors see, on each certificate's Traceability and revisions, the certificate of accreditation and scope that were in force on that calibration's date, when the certificate was issued under your accreditation, and can download them. Each download is in the auditor log the customer sees.
Emails to customers
Settings › Certificates & reports › Emails to customers sets the wording of each email CertaCal sends your customers for you. Until you change one, it reads as CertaCal wrote it. Owners and office admins change them; quality managers can read them.
| When it goes | |
|---|---|
| Certificates after a visit | When a job is closed, to the customer's and the location's email, with the health report and the certificates attached. |
| Amended certificate | When an amendment is approved, to whoever had the original, with the new revision attached. |
| Placed-in-service report | To the weights and measures office, copying the location's contact and the customer, with the report attached. |
| Customer portal invitation | When the office sets up a portal account. |
| Customer portal password reset | When someone asks to reset their portal password. |
| Visit booked | When a visit is booked for today or later, and again if its date changes, while Visit booked is on (below). |
| Visit finished | When the technician finishes a visit, while Visit finished is on (below). |
| Calibration due reminder | To portal users whose equipment is due soon or overdue, unless they've stopped reminders. |
Click Edit next to an email to change its subject and message.
- Placeholders such as
{customer},{company}or{visit_date}are filled in when the email goes; each email lists its own, with what each one is. Click one to put it where the cursor is. Dates are written your company's way (Settings › Certificates & reports › Certificate setup); the placed-in-service report's date stays MM/DD/YYYY, as the agencies' forms are. To show a brace itself, type{{or}}. - Needed placeholders can be moved but not removed, because the email doesn't work without them: the set-password link and username on an invitation, the reset link on a password reset, the equipment list and the stop-reminders link on a due reminder (customers must always be able to stop them), and the certificate number, revision and reason on an amended certificate (ISO/IEC 17025 asks that an amended certificate say what it replaces and why). Save refuses a message without them, or with a placeholder the email doesn't have.
- The preview shows the email filled in with made-up details. Send me a test sends it, as typed, to your own email address through your company's email (Settings › Connections › Outgoing mail server), with "Test:" before the subject.
- Back to CertaCal's wording removes your own wording for that email.
The wording is all that changes: who receives each email and what's attached stay the same. Changes are recorded in the change history.
Sending, at the top of the same page, decides when these emails go and who gets a copy. Each choice starts as CertaCal has always sent, so nothing changes until you change it. Owners and office admins change them; changes are recorded in the change history.
- Certificates after a visit. Automatically: emailed as soon as the job closes. The office sends it: the job waits on the Review page, marked Ready to send, and Home says how many are waiting; click Send to email exactly what would have gone automatically.
- Hold for payment (off by default). On: when a visit's job closes, its certificates and health report wait. They're not emailed, and the customer portal doesn't show them or a preliminary report, until the owner or a reviewer releases them on the Review page (for instance once the PO or payment is in). Each customer can be set to always or never be held instead, on its page. Turning it on doesn't pull back anything already sent. Who may release is set in Settings › Company › Role permissions.
- Amended certificates. Automatically: emailed to whoever had the original once the new revision is ready. The office sends it: it waits on the Review page under Amended certificates to send, with a Send button.
- Office copy. An address that gets a blind copy of every email to customers (certificates, amended certificates, placed-in-service reports, portal emails and due reminders). Customers don't see it. Blank: no copy.
- Failed scale alert. Your own people (sales, the service manager), never the customer: emailed the moment a scale fails, with the scale, the customer, the technician's notes and a link to the scale, so someone can follow up the same day. Addresses separated by commas. The follow-up also shows under Tasks on Home, with or without addresses. Its wording is under Email templates › Failed scale alert. Demo companies never send it.
- Send the health report with the certificates. Off: the certificates go without the Equipment Health Report, and the email no longer mentions it.
- Visit booked (off by default). On: the customer and the location are emailed when a visit is booked for today or later (a job scheduled, a request accepted, a technician booking their own), and again if its date changes. A visit already in the past is never emailed.
- Visit finished (off by default). On: they're emailed when the technician finishes the visit, before the certificates go. A job entered already finished (history, an import) is never emailed.
The visit emails go to the same addresses as the certificates. The job's panel on the Jobs board shows each one: who it went to, or why it couldn't go (no email on file for the customer or location, or your email not set up). Demo and training companies never send them.
Each customer can also be set, on its page under Preferences & contact, not to get certificates by email, or to always or never get the health report (see the Customers chapter).
Due dates & reminders, on the same page, sets two things. Owners and office admins change them; changes are recorded in the change history.
- Due soon (days). A scale due within this many days counts as due soon: the Home page's Jobs due in the next … days, the Due soon filter on Scales, the customer portal's due-soon count and the
scale.duewebhook all use it. Default 30. Test weights keep their own setting, Test weights: due soon within, in Company policies. - Reminders. When customers with portal accounts get a due-date reminder: any mix of N days before it's due, on the day it's due and N days after, if overdue, up to six. Click Add a reminder, set each one, then Save reminders; the sentence underneath says what customers will get, for example "Customers get reminders 60 and 30 days before a scale is due and 7 days after if it's overdue." Until you change it, customers get one reminder 30 days before (the server's setting), as they always have; Back to CertaCal's default puts that back.
Each reminder goes once for each due date, on your company's own day (its time zone). A scale already past several reminders when it's added or the schedule changes gets one email, not one for each, and adding an earlier reminder never sends one that's already been passed. Reminders only go while Due-date reminder emails is on under Connections › Customer portal, and never to anyone who has stopped them.
Certificate layouts
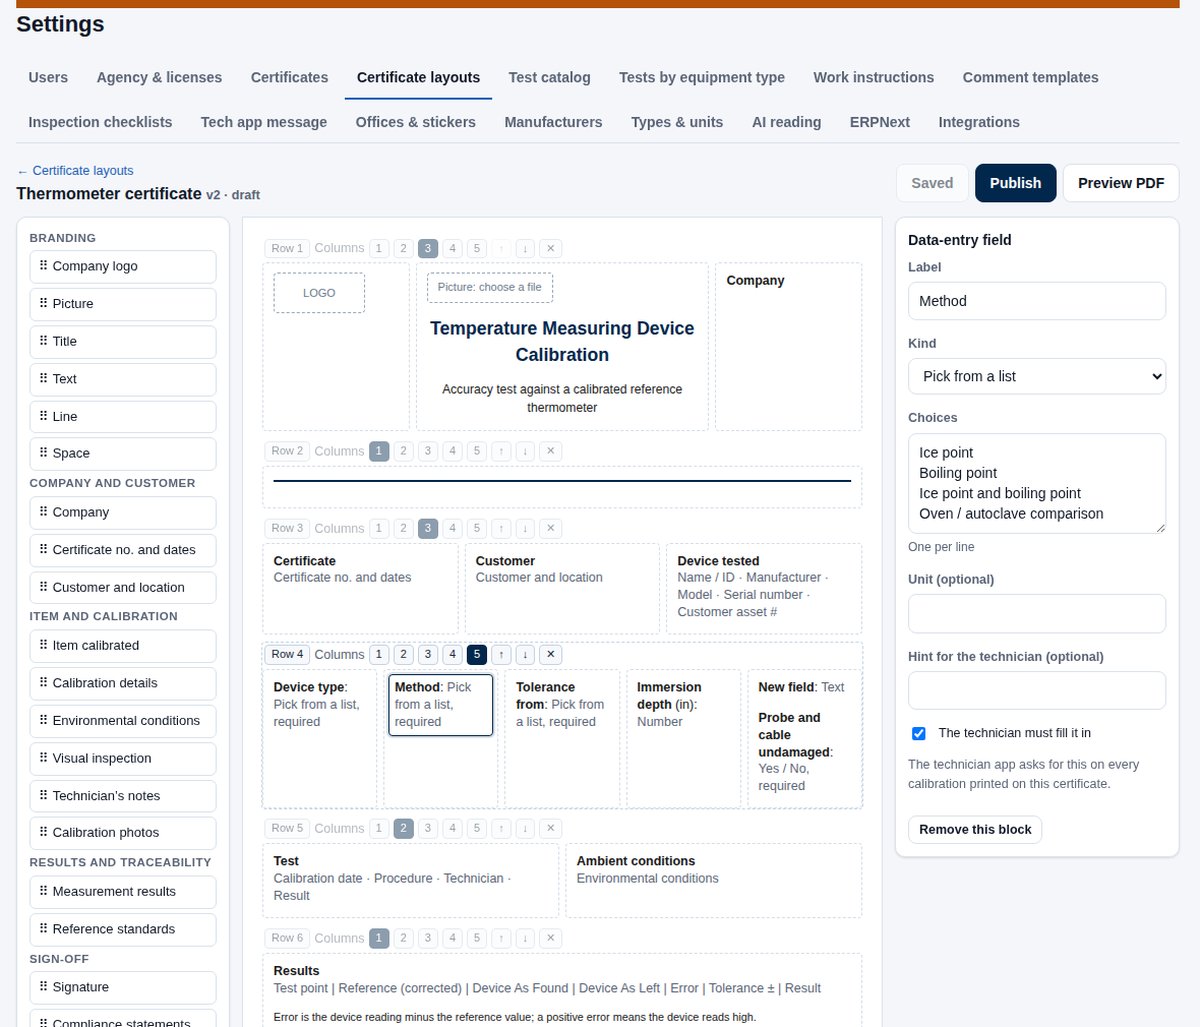
Every type of equipment prints on a certificate layout, and every layout is made with the form builder, so any of them can be changed. CertaCal's own scale certificates (general, truck / railroad, tank / hopper) are remade in the form builder on each update, with a Tests performed block that prints one table per test the scale had (shift, build, section, zero return…).
- Click New layout: give it a name, pick the type it's Used for, and start from A complete certificate (everything a certificate needs, ready to rearrange), a blank page, or a copy of another layout.
- The page is made of rows, each with 1 to 5 columns. + above and + below on a row add an empty row there (Add a row at the bottom adds one at the end); the numbers change its columns; ↑ ↓ move it, or drag it by ⠿; ✕ removes it. Click Row to set the column widths (2 and 1 makes the first column twice as wide). While you drag a block, New row here appears between the rows: drop it there to give it a row of its own. For columns of different widths, use Join → at the top of a column to join it with the one to its right (one column as wide as both), and Split to make one column into two. For example, pick 5 columns, then join 2 and 3: a short column, a long one, and two short ones. The percentage on each column shows its share of the row.
- Drag blocks from the left onto a column: your logo, a picture (PNG or JPEG, uploaded), a title or text, the company, the certificate number and dates, the customer, the item, the calibration details, environmental conditions, the measurement results, the reference standards, the visual inspection, the technician's notes and photos, the signature, the compliance lines and the QR code. Drag a block on the page to move it. Click a block to change it on the right: its heading, which details or columns it shows, headings for the results columns (e.g. Reference and Device reading), size and alignment. The customer block can show the customer's name, the location, the unit location, the customer's ID, and, if you want them on the certificate, the customer address (billing) and the location address.
- Data-entry fields are your own questions: a label, the kind of answer (text, number, yes/no, a pick list, a date), a unit, a hint, and whether it must be filled in. The technician app asks for them, under Certificate details at the end of the calibration, on every item printed on this layout, and the answers print where you put them.
- Preview PDF draws it on the latest calibration of that type; when there is none yet (a new kind of equipment), it uses sample data, stamped SAMPLE. Preview with sample data always uses the sample. Save draft keeps your work.
- The yellow box lists anything ISO/IEC 17025 7.8.2 needs that's still missing. When it's gone, click Publish: new certificates of that type use it from then on. Certificates already issued keep their layout.
Each detail ISO/IEC 17025 needs (the certificate number, the location, the item's serial number, the calibration date, the procedure…) has to be somewhere on the page, not in every block: switch it off in one block when another block shows it. The yellow box says if one is missing from the whole page.
Visual inspection prints either a summary (items checked, and any in poor condition) or, with Print: The whole checklist, every item the technician rated, section by section, with Good, Poor or N/A. CertaCal's remade certificates print the whole checklist.
Tests performed prints each test the calibration recorded as its own table: static load, applied, As Found, As Left, error, tolerance, result. Static load is a load on the scale that couldn't be removed (what it read before any test weight went on), 0 when there was none; with one, the error is measured from it and the tolerance is based on the applied test weights only. A test with a strain or substitution load also prints its test load, for example "Certified test weights 1,000 lb + strain load 2,000 lb (material)". In your own layouts it's run.other_load.summary, with run.other_load.use, kind_label, description, amount, unit and certified (the certified test weights) when you want the parts; run.other_load is empty on a test without one. Click it to choose which tests and in what order: tick tests to add them (the ones set up for that kind of equipment are listed first), then drag them by ⠿ or use ↑ ↓; the numbers show the printed order. With none picked, every test recorded prints in the order it was done. Also print any other test (on unless you switch it off) prints tests you didn't pick after yours, so no result is left off by accident. A picked test that wasn't done on a calibration prints its name and "Not performed on this calibration", its empty table, or nothing; choose under A picked test not done on a calibration. Previews show every picked test with sample readings, including substitution and strain-load tests.
Every certificate is numbered "Page 1 of N" at the bottom of its first page. When it runs to two or more pages, each page after the first has a header with the company name, the certificate number and "Page 2 of 3" (ISO/IEC 17025 7.8.2.1). This is added to every layout automatically, built-in and form builder alike.
A published layout itself can't be changed: Edit on the list starts its next version as a draft (or opens the draft already started); the published version stays in use until you publish the draft.
The list shows each layout once, with the version in use (and any draft). Versions it replaced fold under it: click Older versions to see them, with Preview and Open to view one, and how many certificates were issued on it.
On the list, every layout has:
- Preview: shows it with sample data, stamped SAMPLE, without needing a calibration. The sample uses the tests set up for that kind of equipment (Settings › Calibration › Tests by equipment type, each linked to its SOP) at loads that suit its usual capacity, so each kind looks like its own certificate.
- Rename: changes its name on every version, for example "Caliper Certificate" instead of "Scale Calibration Certificate". Nothing printed changes, and a renamed built-in layout still gets CertaCal's updates.
- Copy: a new layout of your own to edit in the form builder, with its own name and the kind of equipment it's for.
- Delete: for any version no certificate was issued on (one that was shows how many were issued instead, and is kept with them). Deleting the published version leaves that kind of equipment printing on another published layout for it, if there is one.
Forms & certificate layouts
Settings › Certificates & reports › Forms & certificate layouts is the library of the forms CertaCal prints for you: the Customer Service Report, the Equipment Health Report, the Troubleshooting & Repair Report and the Quote, laid out here, and your certificates and your own PDF forms. Until you publish your own, each form prints as CertaCal's built-in one. Form type at the top shows every form or one kind. Certificates shows your certificate layouts (each layout and version, New layout, and the designer, as below under Certificate layouts); each other form lists its versions the same way: the draft, the version in use and since when, CertaCal's built-in form while you haven't published your own, and Older versions folded underneath. A manufacturer's hub also has Service tickets there: its own service ticket forms and their versions (see Office › Jobs › Service tickets). Stickers have the Sticker designer.
- Make it your own starts a draft that looks exactly like the built-in form. The owner, an office admin or the quality manager edits it; everyone else in the office can look.
- Every form is edited in the same editor as certificates (see Certificate layouts below): the page is rows of 1 to 5 columns (+ above, + below, Split, Join, the column numbers, and dragging a row's handle to move it), and you drag blocks from the left onto a column, or drag a block on the page to move it. Click a block to change it on the right, and Remove this block takes it out; click the page to set its name, margins, text size and accent colour. The blocks on the left are that form's own (for the CSR: the job number and date, customer and contact, check list, work requested and done, times and mileage, tasks, parts, the billing box, accounting notes and signatures; for the other reports and the quote, each of their sections) and the ones any form has (your logo, a picture, a title, text, a space and a line).
- Single item puts one piece of the form's data on its own, anywhere: just the job number, just the date, just the technician, the customer, a contact's phone, the quote's total, and so on. Choose how its label shows (beside it, above it or none) and change the label's words, the size, bold and alignment. The ready-made blocks are still there for the usual groups.
- Field to fill in (on the CSR): a question of your own for the technician, such as a seal number or the site's condition. Give it a label, what kind of answer it takes (text, a number, yes / no, one of your choices, a date) and help if it needs it. Once the layout is published the technician answers it on the job's CSR in the technician app, the office can correct it on the job, and the answer prints where the block sits.
- Preview PDF prints the draft with your most recent real one; Preview with sample data with made-up details.
- Publish makes the draft the form CertaCal prints from then on. A published version doesn't change: Edit a copy (or New version on the list) starts the next draft from it; Throw away on the list removes a draft, and Versions lists the earlier ones, each one to look at or start from. Use the built-in goes back to CertaCal's form; your versions are kept.
- What you type prints exactly as typed. The health report's headings and texts are still worded under Certificate wording, and the quote's terms under Quotes. The CSR's check list items, vehicle zones, footer line and billing box are still set under Customer Service Report below; the customer's copy still leaves out prices, billing and accounting notes, whatever the layout.
Your PDF forms
Under Forms & certificate layouts, Your PDF forms takes your own fillable PDFs: a customer's own form, such as a confined space permit. Upload a fillable PDF (one made with form fields in your PDF editor), or Try the sample permit to see how it works.
- CertaCal reads every box in the form and lists them in page order. Show box numbers opens the form with each box's number in it, to see which is which.
- For each box, Fills with is something CertaCal knows about the job (Customer, Location, Address, Date, Job number, Technician, Scale, Serial number, Model, your company's name, phone and address; for a tick box, Always ticked), Ask the technician (a question, with the words they see and the kind of answer: text, a number, a date or one of a list; a tick box is a yes / no), or Leave blank.
- Name a box in your PDF editor like the thing that fills it (Customer, Date, Serial number, Technician; capitals and spaces don't matter) and CertaCal fills it from the job by itself when you upload the form. Any other box becomes a question, worded from its name in plain words (a box named txtPermitNo asks Permit no); change the words to suit.
- Two boxes with the same question share one answer.
- Offered on the jobs of: a customer's own form goes on that customer's jobs only; leave it for every job.
- Send the filled form to the customer with the job's certificates: on unless you switch it off.
- Preview what fills each box shows the form with what goes where; Use it on jobs offers it on jobs, Retire stops offering it, and a form no job has used can be deleted.
On the job, the technician answers the questions in the technician app (the form's card on the job), and anyone can Open the PDF filled from the job and the answers. The office sees the same card on the job and can correct the answers.
Sticker designer
Settings › Certificates & reports › Sticker designer draws the calibration sticker: the label size and what prints where. It starts as the built-in sticker; change anything and press Save to make it the company's own. From then on every sticker uses it, whether the office prints it or a technician prints it in the field (the technician app picks up the new design the next time it has signal).
- Label size: pick a common size or Other size… (1 to 6 inches each way). If items then hang off the edge, they're marked in red; Shrink everything to fit scales the whole design down, or Start over from the built-in sticker redraws the built-in sticker at the new size.
- Add items from the list on the left (click, or drag onto the sticker): fixed text, lines, boxes, the QR code, the company logo, and fields: the office's name, address, phone and agency registration number, tagline, technician and license number, service date and due date, and the scale's name, manufacturer, model, serial number, asset tags, capacity, division, customer and site.
- Move and size: drag an item; drag its corner to resize (text grows or shrinks with it). Arrow keys nudge the selected item a dot, Shift + arrow by more, Delete removes it, Escape lets go.
- Grid: next to the zoom, tick Grid to draw light lines over the sticker, every 1/32, 1/16, 1/8 or 1/4 inch (the printer dots are shown beside each size). Every fourth line is a little darker, so quarter- and half-inch marks stand out. Snap to grid makes dragging, resizing and Shift + arrow land on the lines; untick it for fine 2-dot steps. While you drag, a pink line shows when an item's edge or centre lines up with another item or the middle of the sticker, and it snaps there. The grid never prints, and your choices are kept in this browser for you only: they aren't part of the company's sticker.
- The selected item (right): which field or text it prints, text before the value (such as “S/N ”, left off when the field is empty), text size, character width, alignment, position in inches, and Print it: always, or only when another field has a value or is empty (for example, a caption that only belongs with the QR code). Lines and boxes can be filled or outlined.
- A field with no value for a scale is left off its sticker. Text too long for its box is narrowed, then cut short.
- Company logo: the logo uploaded in Settings › Certificates & reports › Certificate setup. It starts at an eighth of the sticker's area, shaped like the logo; drag its corner or type a width to resize it, and it keeps its shape. Zebra and Bluetooth printers print black dots only, so grey and colour become a pattern of dots: the panel on the right shows exactly how it will print. A simple, high-contrast logo prints best. Other label printers get the logo as uploaded. With no logo uploaded, nothing prints there.
- Show as for an office with QR codes on switches the sample between offices with and without QR codes. The QR code prints only for offices with QR codes turned on (Settings › Company › Offices & stickers).
- Preview PDF shows exactly what prints, with sample values; Test print sends a sample to this computer's printer. Neither saves anything.
- Use the built-in sticker removes the company's design and goes back to the built-in one at the same label size.
Only owners, admins and quality managers can save changes; others can look.
Test catalog
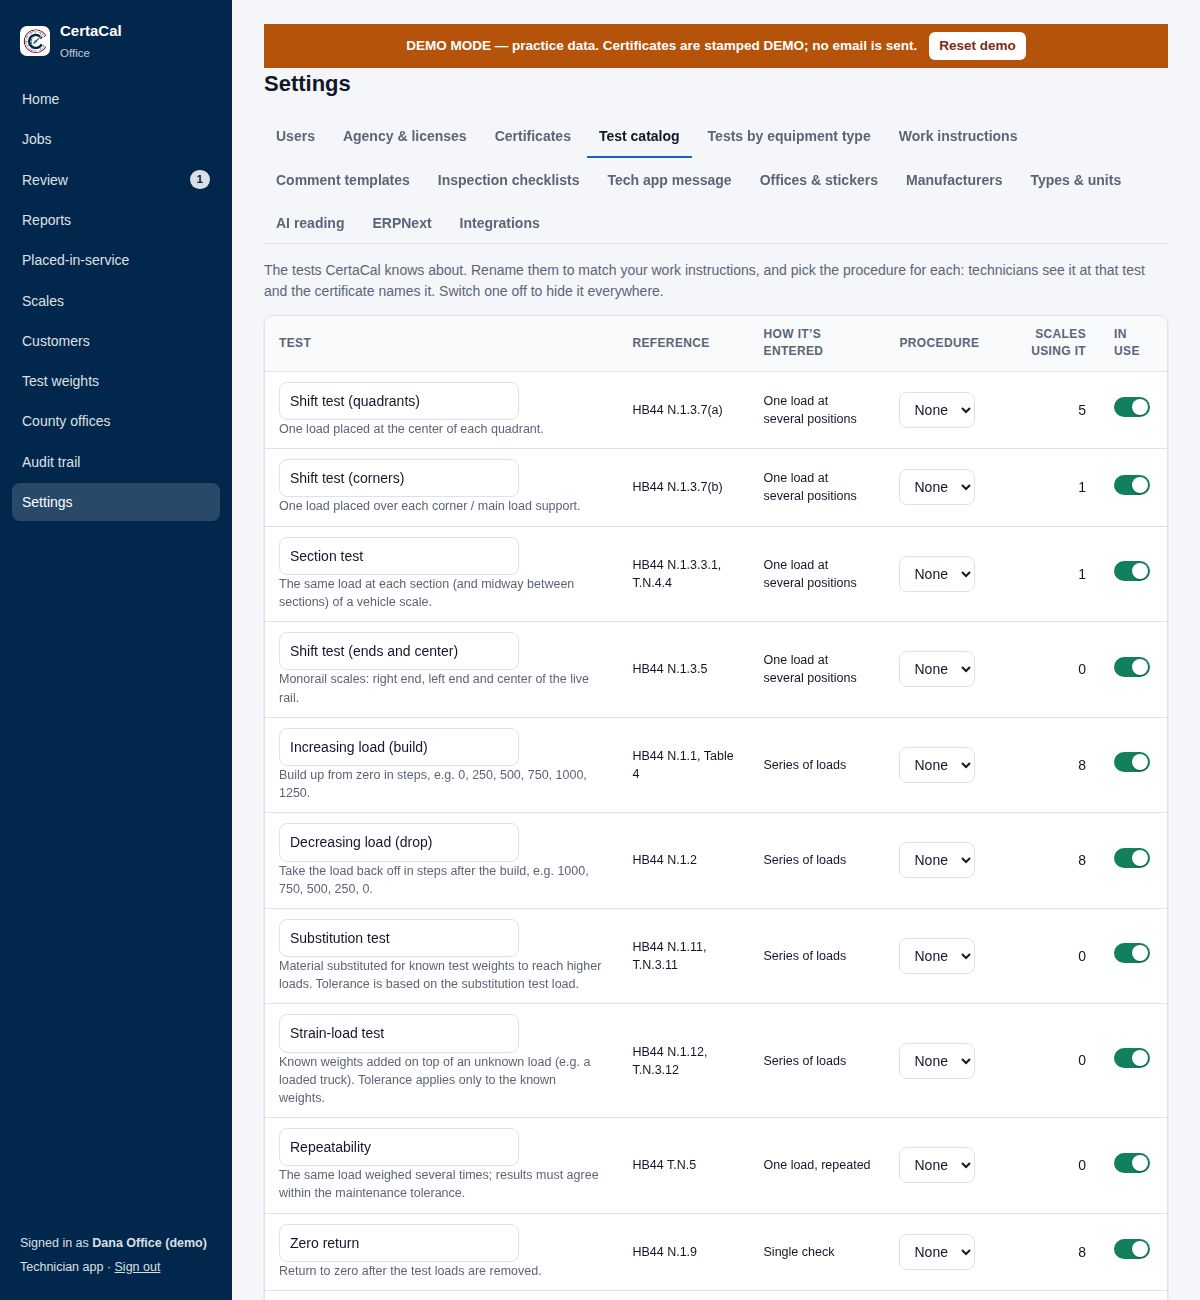
Every test CertaCal does, grouped by kind of device: scales and balances, weighing + heating (moisture analyzers), mass standards, temperature, humidity, volume and flow, pipettes and volumetric glassware (whose test volumes, readings, densities and glass expansion coefficients are numbers you can change here), dimensional, viscosity, and pass/fail (metal detectors, magnets). Open a group to see its tests. Each one shows its reference (the HB44 paragraph or the procedure section), what the technician records, how the result is judged, and the numbers that judge it (for example the heating check's ±3 °C default, or the 10 % torque below which a viscometer reading isn't judged), so nothing is decided out of sight.
Rename a test to match your own work instructions, and pick its Procedure: technicians see it at that test, each calibration records it, and the certificate names it. Switch a test off to hide it everywhere; a test marked Required is part of its method and can't be.
An owner or quality manager can Change the numbers. Every change is in the audit trail, and each calibration keeps the numbers it was judged by, so a change never alters a certificate already issued.
Tests by equipment type
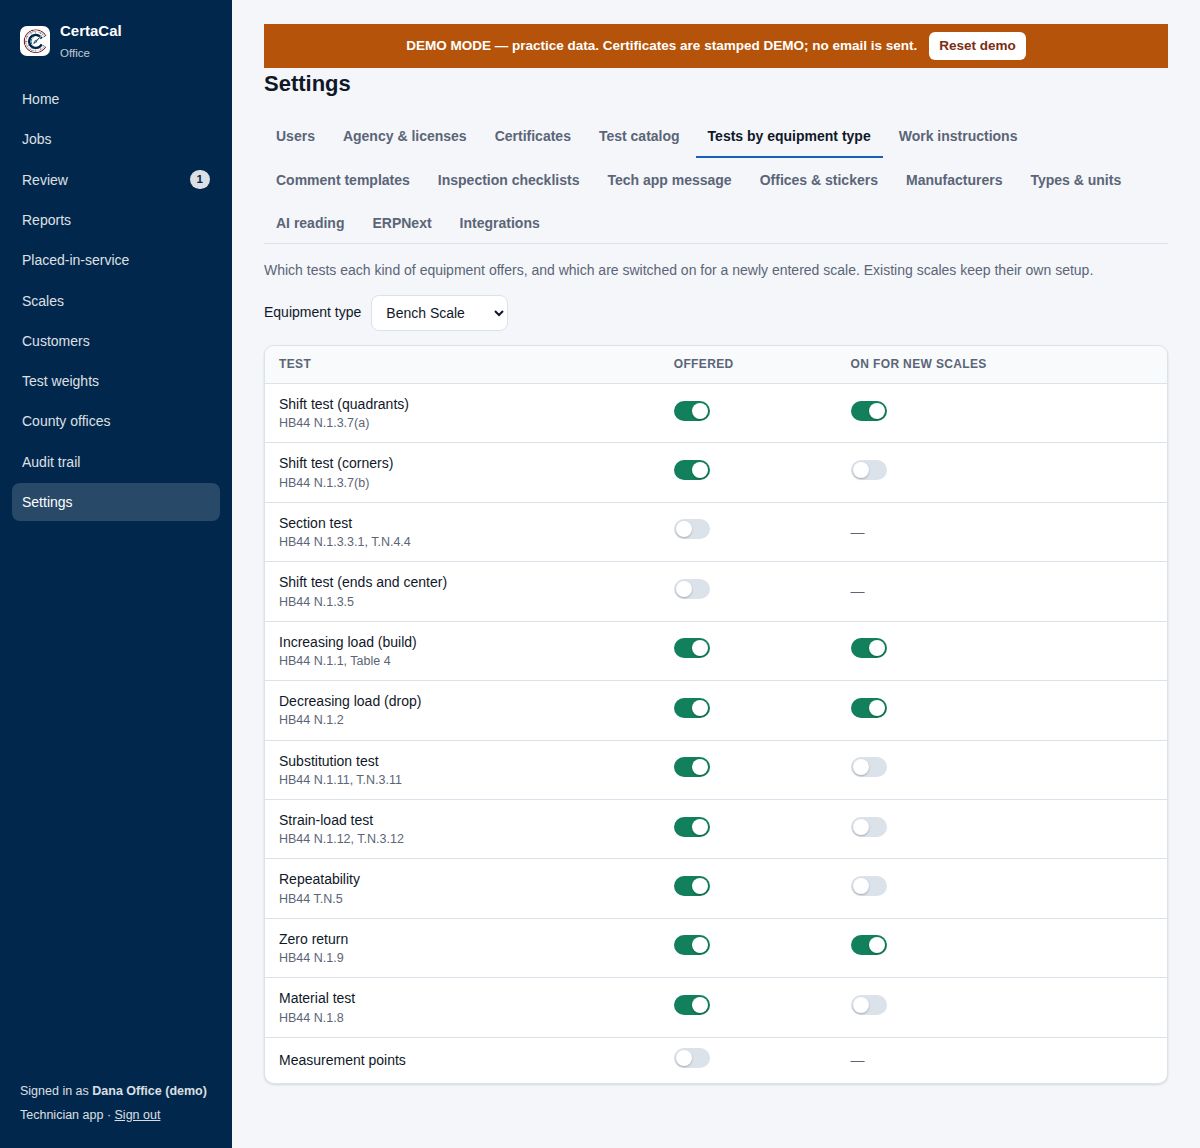
Pick an equipment type (the list is grouped by kind of device). It shows the tests of its own group. For each test: Offered (can this type have it at all?) and On for new devices (is it switched on when one of this type is added?). A test marked Always done is part of the method and can't be switched off. A moisture analyzer also lists the scale tests it can add where it's used as a balance, off to start with. Existing devices keep their own setup; change those on each device's Tests & weights tab.
Calibration procedures
Settings › Calibration › Calibration procedures lists the procedures a technician picks from on a calibration, grouped by equipment type. Each shows its version, its work instruction and its reference standards, with an In use switch. A technician can't complete a device, or mark it not inspected, unless its type has a procedure in use, so a type without one is flagged at the top of the page and in its group. Their app also tells them to ask the office.
- Add a procedure: choose the equipment type, give it a name and version, and pick its work instruction from your approved ones (Work instructions, below). Tick the reference standards it uses. Temperature and humidity are optional; leave them blank when they aren't required.
- Edit changes one. Switch it off to stop it being offered; calibrations already done keep it.
- Add a procedure for every type without one gives each flagged type a procedure named after the type, version 1.0, in use. Where the type already has one that's switched off (from an import, say), that one is switched on instead. Only your company's types are touched.
Settings › Calibration › Types & units shows each type's procedure, or No procedure in use, add one.
Owners and quality managers add and change procedures, as they do work instructions; everyone else, auditors included, can only read them.
Work instructions
A work instruction is a written procedure (SOP). Each has a Number (e.g. WI-12), Title, Revision, an optional PDF of the full document, and Steps shown to the technician: short, phone-sized steps, one per line. Tick the scale types it is the default for; a scale can still name its own on its Details tab.
Each also shows who approved it and when. Only owners and quality managers add, change or approve procedures; everyone else can read them.
The procedure store
Above your work instructions, the Procedure store holds CertaCal's ready-made procedures (the CP series): the quality system, service work and a method for each kind of equipment. They are written for any calibration company, with places marked [Company to set: …] for your own limits and choices.
Besides the methods for each kind of equipment, the store has procedures for the standards and regulations CertaCal can enforce: CP-107 calibrating scales and balances to EURAMET cg-18, CP-108 testing balances to USP <41> (2026), CP-520 section 7.1 for volumetric instruments to EURAMET cg-19, and CP-036 USDA Packers & Stockyards scale tests and reports. Placed-in-service reports are in CP-016.
- Read shows a procedure's text.
- Word downloads it as an editable Word file to adapt into your own procedures; PDF downloads a copy to keep. All as Word and All as PDF download every procedure in one zip (the PDFs take about a minute). Each file starts with a document control block (your company, the procedure, the version it's based on, and a line for who approved it and when) and leaves out the ISO/IEC 17025 notes section when your company isn't accredited (Settings › Certificate setup).
- Add (owners and quality managers) gives you your own copy as a draft work instruction, linked to its tests, its kind of equipment and its rule set. Edit it for your program, then approve it and technicians see it. When CertaCal publishes a newer version, Take version N offers it to you, to approve again.
Everyone who uses the office app can read and download the procedures.
Uploading your procedures
Upload procedures loads a whole set at once:
- Save each procedure as a PDF named with its number and title, for example QP-12 Thermometer Calibration.pdf.
- Click Upload procedures and choose the PDFs, as many as you like.
- Each one appears for checking: its number and title (from the file name), its issue (when the document states one), and who approved it and when. Fill in Approved by and Approved on at the top for every procedure that doesn't name its own.
- Tick what each covers: the method for these types of equipment (it becomes their default procedure) and describes how to do these tests (each test in the test catalog points to it).
- Save and approve.
If your company has AI reading switched on (Settings › Connections › AI reading), the AI reads each procedure and suggests its number, issue, approval and what it covers, marked Suggested by AI. Check every suggestion before saving. With AI reading off, you tick what each covers yourself.
A number you already have is uploaded as a new issue: it replaces the current one, and the issue it replaces is kept. History on each procedure lists its earlier issues with their PDFs. Old issues are never used for new work; they are kept so the procedure in force on any past date can be shown (ISO/IEC 17025 8.3). Changing a procedure's revision or approval date by hand (Edit) keeps the earlier issue the same way.
Procedures loaded in bulk at setup arrive as drafts: revision "Draft — not released" and switched off. Link them where they belong (a default for scale types, the inspection, each test in the test catalog); technicians and certificates see a procedure only once it is released. To release one, edit it, set its Revision, and switch In use on. The technician app shows the steps on each scale. Every calibration records which instruction (and revision) was followed and prints it on the certificate. Steps: None yet means the technician will only see the title; add steps.
Comment templates
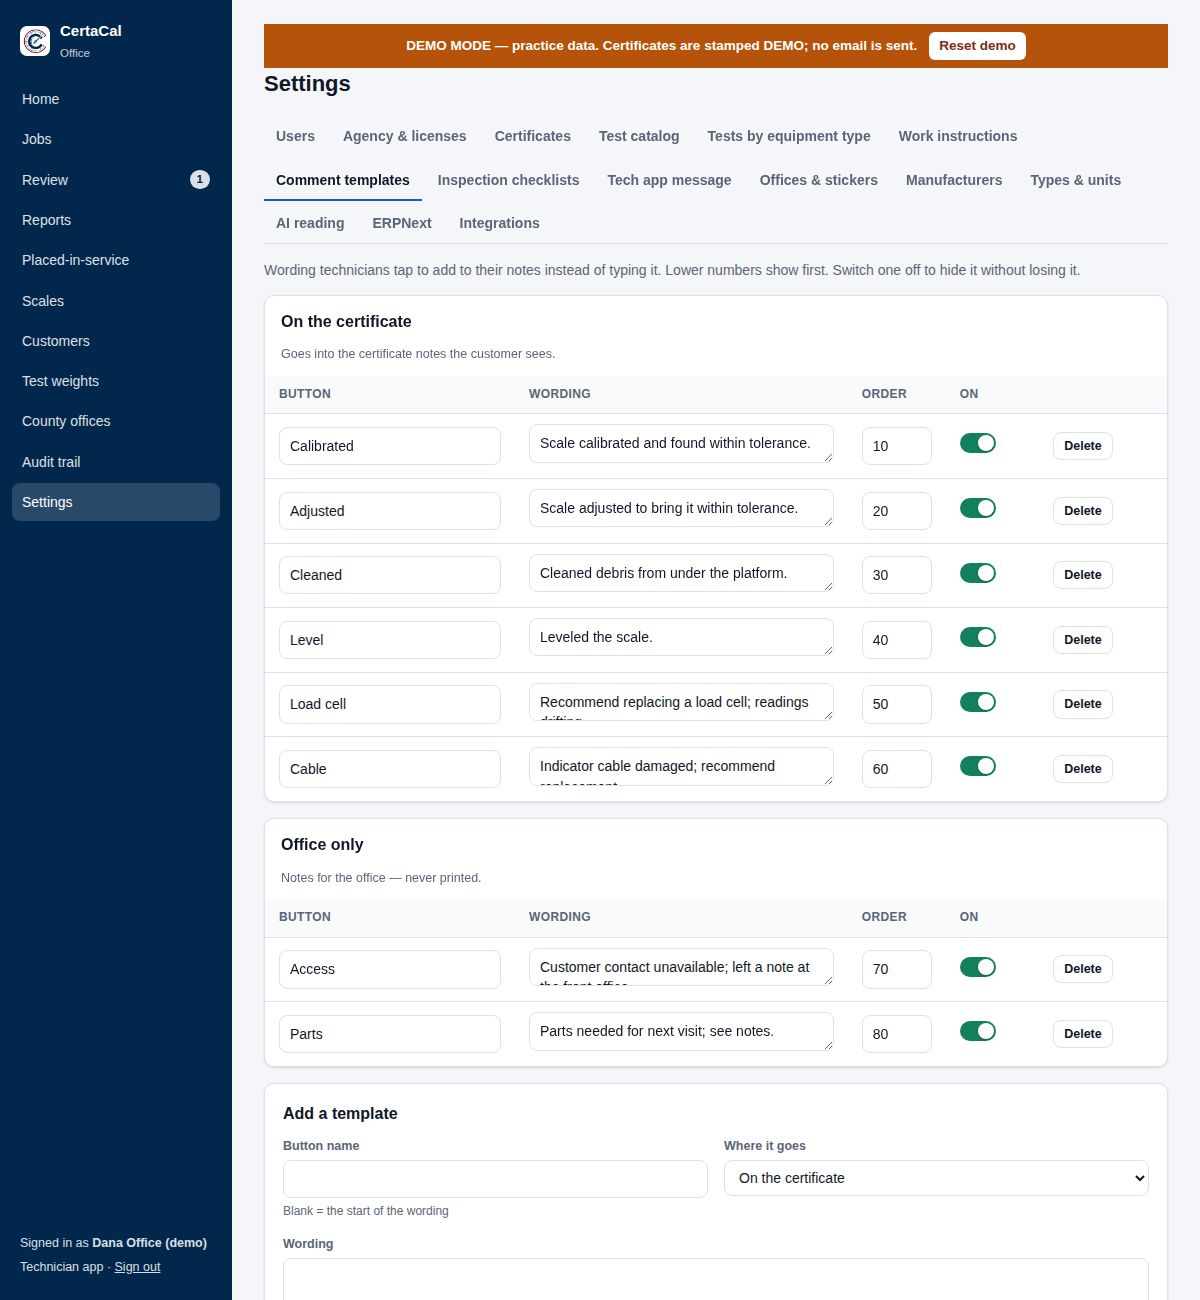
Wording technicians tap to add to their notes instead of typing, e.g. "Scale cleaned and leveled." Lower numbers show first. Switch one off to hide it without losing it. Add a template adds one.
Inspection checklists
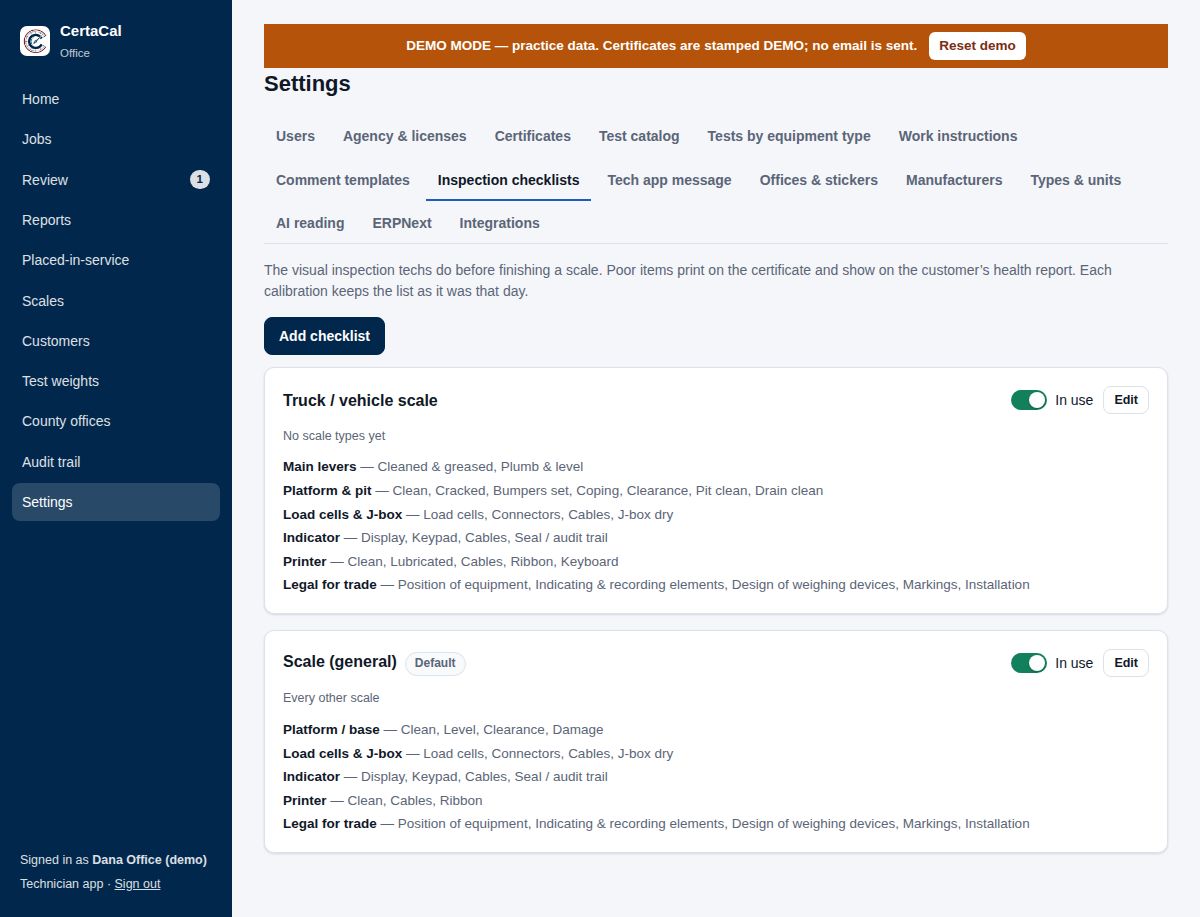
The visual inspection a technician does before finishing a scale (indicator, cables, load cells, platform, level, seal…). Items rated Poor print on the certificate and the customer's health report. Each checklist says which types of scale it's for; one is the default for every other scale. Its Procedure (for example your visual inspection procedure) is shown to the technician at the inspection.
Other equipment has its own starting list: thermometers and oven indicators, weights, hygrometers, calipers and micrometers, metal detectors, flow meters, moisture analyzers and viscometers. A moisture analyzer, for example, is rated on its pan, draft shield, heater glass and temperature sensor, not on load cells and printers. A type of equipment added later uses the list for its kind until you link it to another.
To edit, type one section per line: the section name, a colon, then its items separated by commas. For example: Platform: Level, Clear of debris, Bumpers intact. Each calibration keeps the checklist as it was that day, so changing it doesn't alter old certificates.
Tech app message
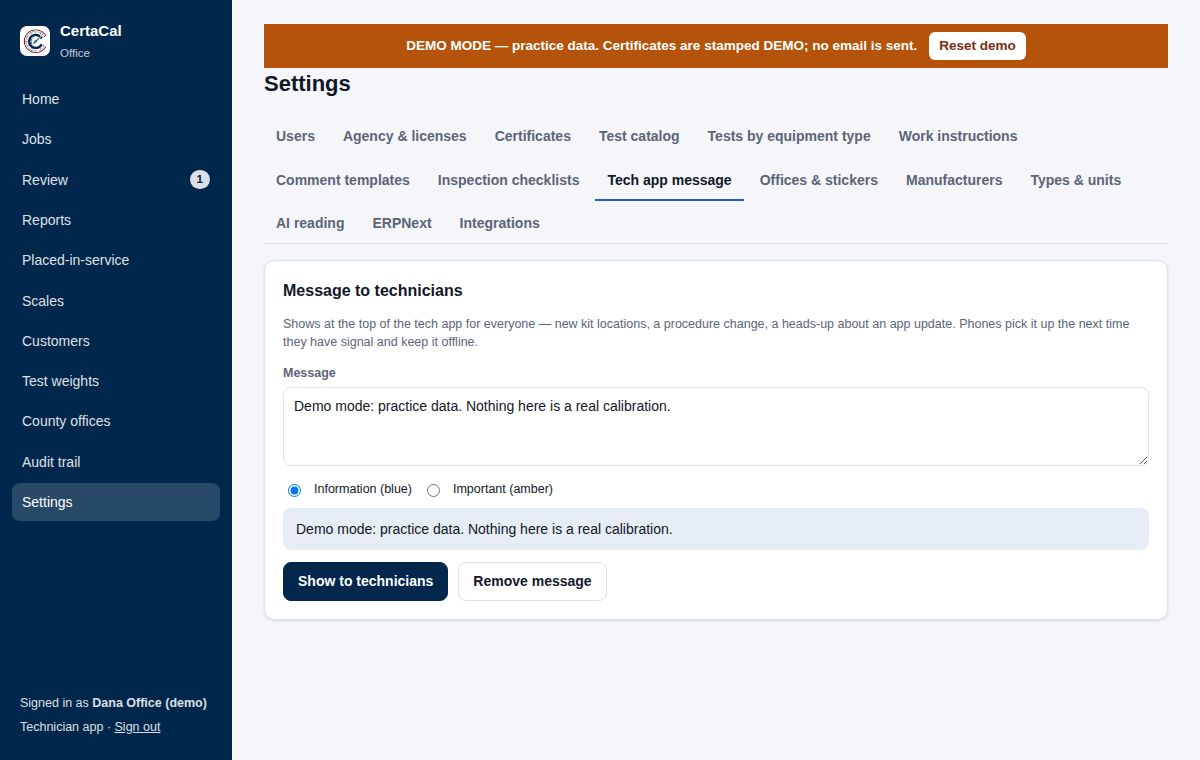
A notice at the top of every technician's app: new kit locations, a procedure change, a heads-up about an update. Pick Information (blue) or Important (amber). Phones pick it up the next time they have signal and keep it offline. Clear the box to remove it.
Technicians' requests
A technician can ask for a job for a customer (Request a job, ticking the scales to test) and ask for more of the customer's scales on a job of theirs. The owner or an office admin chooses what happens:
- The office approves them (the starting choice): job requests wait on the Jobs board for Accept or Decline, and added scales wait on the job for Add them or Turn down.
- Scheduled for the technician straight away: the job is theirs at once, on the day they chose, with the scales they ticked (or the location's due ones if they ticked none). If they already have a job at that location that day, the scales go onto it. Added scales go straight onto their job.
Jobs a technician scheduled for themselves are marked From the field on the Jobs board and listed on Home for a week. While your visits are booked in ERPNext, new jobs still wait for the office.
Field rules
How your field work runs. Owners and office admins change these; quality managers can read them. Each starts at how CertaCal has always worked, and the technician app gets the change the next time it has signal.
- Photos of a scale added in the field (its serial tags and where it is): Required (the starting choice): the technician can't complete the scale's calibration without them. Recommended: they're asked for, but the technician can complete without them; Review still lists the ones not taken. Not asked for: no tag or location photos, and Review lists none. A customer that allows no photos never gets asked, whatever this says.
- Who finishes a job: Only the lead technician (the starting choice), or Anyone on the job's crew. Whoever finishes signs for the job, so their signature is the one on the certificates. Someone not on the job can never finish it; the office always can.
- Scale details a technician may change, on a scale already on record (see Scales: Changes technicians send from the field). For each detail: Technician changes it, the office accepts it (the starting choice: the change waits in the scale's list of changes and holds its certificate); Applies at once (the record changes when the technician's phone sends it, and the change is kept in the list as accepted, under their name); or Not changed in the field (the detail is greyed out in the app; the technician writes what it should be in the calibration's notes). Capacity, division, accuracy class, unit and legal for trade can never apply at once: the scale is judged against them, so they always wait for the office or are kept from the field.
- Technicians may speak readings into the app (on to start with): a microphone on each test's readings. The technician says the reading; the app shows what it heard, enters it with an Undo and moves to the next one. A reading that isn't a step of the division is never entered on its own: the technician picks the reading either side or says it again. It shows only where the phone's browser recognises speech (Chrome or Samsung Internet on Android, Safari on iPhone and iPad; not CertaCal's Android app), and it needs a signal. Switched off, the microphone is gone and readings are tapped or typed as before.
- Mileage on visits (off to start with): Each technician records their own miles (each drives their own vehicle) or One figure for the visit (the crew shares a truck). Technicians record it on the job's Customer Service Report, so it needs service reports on (Settings › Certificates & reports › Certificate setup › Customer Service Report). Tick Technicians type the odometer at the start and end to ask for readings instead of miles. Ask the technician to check miles above (300 to start with) only warns; more than 5,000 miles is refused as a typing slip. The office can correct the miles on the job's CSR until the job is closed. Where the visit is billed by the mile, the miles are billed at its per-mile rate: a time-and-materials quote whose travel is by the mile bills the recorded miles instead of the quoted ones, at the quote's rate; with Bill from the service report on, other jobs get a mileage line at the price list's per-mile rate when its travel is by the mile (Settings › Company › Quotes; Travel, per mile when set, else the travel rate). Flat-price quotes and service agreements don't bill miles; the miles are in Reports › Technician time and Time by job either way. Switched off, nothing is asked, printed, billed or reported.
- A new equipment type is calibrated every (months): the interval a type starts with when it's added (Types & units, or a new type made while adding a scale). Default 12. Change it on the type afterwards if it differs.
Job task lists
A visit can carry tasks for the technician to tick off (see Jobs: Changing a visit). Here the owner or an office admin keeps named task lists, for example "Truck scale annual" or "New install": New task list, a name, and the tasks one per line. On a visit, Add a task list… adds all of a list's tasks at once; the visit's copy can then be changed without changing the list, and editing or deleting a list doesn't change visits it was already added to.
Tasks must be done to finish a job is off to start with: a technician with tasks not done is asked whether to finish anyway. On, they can't finish the job until every task is ticked.
Appearance & logo
Colors sets the menu bar, buttons and links of the office app, the technician app and your customers' portal. Click a theme, then Save colors:
| Theme | Looks |
|---|---|
| CertaCal (the default) | Navy and blue, CertaCal's own colors. |
| Trust | Blue: calm, reliable and professional. |
| Energy | Deep red: bold and confident. |
| Nature | Green: fresh, steady and clean. |
| Elegance | Black and white: simple and serious. Links are underlined. |
| Friendly | Warm orange: open and welcoming. |
| Industrial | Slate gray: plain, modern and workmanlike. |
| Your own color | Pick your brand color, or type its code (like #1D5FB8). If white text on it would be hard to read, CertaCal makes it a little darker and says so. |
Whatever you pick, passed, failed, overdue and needs-review keep their own colors, so a red theme is never mistaken for a failure, and each person's Light or Dark choice in their name menu still applies. You see the change straight away; everyone else sees it the next time their app opens. The sign-in screens stay in CertaCal's colors, because CertaCal doesn't know whose company it is until someone signs in.
Logo is the same logo that goes on certificates and health reports (also under Certificate setup). It shows at the top of the menu in the office app, the technician app and the customer portal, on a small white plate. A wide logo with a clear or white background works best. Remove it and CertaCal's mark comes back.
Owners, office admins and quality managers change these; the change is in the audit trail.
Review & auto-approval
- Review before certificates go out: how jobs are reviewed (see the Review chapter). Audit this share of each job's scales (%), default 10, at least one scale per job; and Lowest quality score to approve (%), default 80. Set the share to 0 to approve scale by scale instead of by job. Reviewers, office admins, quality managers, owners and technicians with the Review add-on can approve (never auditors), and the approver is recorded, but never on their own work.
- Auto-approval: when a technician finishes a job, calibrations with nothing to look at (passed as found, not adjusted, no weight or load warnings, nothing rated poor, no new scale waiting for the office; some of these are your choice under Company policies) are approved straight away, under the name you pick in Whose name goes on auto-approved certificates. Everything else waits for a person. It's off until you pick a name and switch it on, and it only works when approving scale by scale (share set to 0).
- Preliminary reports in the customer portal: off unless you switch it on. When it's on, as soon as a technician finishes a job the customer sees a report for each scale in the portal, stamped PRELIMINARY - NOT YET APPROVED and boxed as not a calibration certificate. It has no number and nothing is saved: it's made from the readings each time it's opened. When the certificate is approved, it replaces the preliminary report. A calibration sent back to the technician is withdrawn from the portal and shown as being corrected until the new one is finished. Download all waits for the approved certificates.
Service agreements
A service agreement holds a customer's price per visit, how often their devices are done, its length and review date, and the service and accounting contacts (see Customers). Only an owner switches them on or off; leave them off when your ERP or service software holds your agreements. While off, agreements don't show anywhere and change nothing: devices keep their own intervals, no jobs are made and QuickBooks bills each scale.
- Misc 1, 2 and 3 are called: your names for the three extra price lines, for example Scale cart or Weight truck.
- Review reminder (days before the end): used for new agreements and renewals. Default 60.
- A new agreement starts with: its length (months; default 12, blank for open-ended) and whether it renews automatically (off to start with). New agreements and agreement quotes take these; change them on each one as needed. Owners and office admins change them.
Quotes
Quotes are on unless an owner or office admin switches them off (for a company that quotes from other software). While on, Quotes is in the menu (see Quotes).
- Price list: what a flat rate includes (one line each; printed as Included), and the rates for work beyond the service: labor per hour, travel per hour or per mile, travel per mile for time-and-materials quotes that charge by distance, the truck charge and the minimum charge, printed under Work beyond the service. A time-and-materials quote starts from the labor, travel and truck rates and the minimum charge. A new quote starts from these, and each quote can change them. There's no company flat rate or tax rate: each quote's flat rate and tax are entered on the quote, because tax depends on where the work is.
- Numbering: what the number starts with (default Q-) and the next number.
- A quote is good for (days): default 30, counted from the day it's sent.
- Terms printed on every quote: the fine print, changeable on one quote. Terms on time-and-materials quotes print on those instead: that it's an estimate and the work is billed at actual time and materials.
- Materials list (optional): parts you quote often, with part number, description, price each and supplier. The office and technicians pick from it and the price fills in; In use off takes a part off the list without losing it. A part that isn't on the list is typed in with its price.
- Customers can accept quotes online (on unless switched off): each quote email has a link to read the quote and accept it (name, title and signature) or decline it, and customers answer in the customer portal too (see Quotes). Off: no link, the portal shows quotes read-only, and the office records the answer.
The email that goes with a quote is the Quote email under Settings › Certificates & reports › Emails to customers. While customers can accept online, your own wording for it must keep {quote_link}.
Problem scales
When a scale is listed in Reports › Problem scales (see Reports and exports). Owners and office admins change it; quality managers can read it. A change applies to the list at once and never touches a calibration, certificate or quote.
- List problem scales (on unless switched off): off hides the report and the line on each scale's History tab.
- Calibrations looked at (default 3): each scale's latest approved calibrations, imported history included.
- Listed when this many needed adjustment or failed (default 2): out of those. A scale with fewer calibrations so far is judged on the ones it has, so with the defaults a scale adjusted at both of its first two visits is listed.
- Also list a scale left out of tolerance at any of those calibrations (default on).
- Also list scales in service more than (years) (default blank, off): from the scale's install date, when it also needed adjustment or failed at least once in those calibrations. An old scale that passes every time is never listed.
On the customer's health report (off unless switched on): a listed scale gets one line under What needs your attention on the health report that goes with the certificates, worded by you. Blank heading and text use CertaCal's: Needed adjustment at repeated visits and This scale needed adjustment or was out of tolerance at 2 of its last 3 visits. We can quote a repair or replacement if you would like one. The placeholders are {device} (scale, or device for other kinds of equipment), {count} and {visits}. Keep it factual: the customer reads it. A scale the office has hidden from the list gets no line.
Security
Signing in is the owner's to change; others see it.
- Two-step sign-in required for: Nobody (the default), Owners and office admins, or Everyone who uses the office app. After their password, the people it covers type a code from an authenticator app on their phone (Google Authenticator, Microsoft Authenticator or similar). Each sets it up at their next sign-in, which takes about a minute and gives them recovery codes to keep. Technicians are never asked: their app has to work for days without signal.
- Office people sign in again every and Technicians sign in again every (1 to 90 days): counted from the password, whatever they do in between. No limit keeps the default: signed out only after 30 days without using CertaCal. Give technicians long enough for their longest trip without signal: work done offline waits on the phone until they sign in again.
- Someone who lost their phone and their recovery codes: the owner clicks Turn off beside Two-step sign-in on in Settings › Company › Users; they set it up again at their next sign-in. It's recorded in the audit trail. An owner's own is turned off by another owner, or by CertaCal's support.
- Sign out everywhere (Settings › Company › Users, beside each person): ends their sign-ins on every phone and computer at once, for a lost phone or someone leaving. Changing someone's password or role, or switching their account off, does the same. Your own keeps the window you're in. Work a technician hasn't sent yet stays on their phone until they sign in again. Recorded in the audit trail.
- Password-reset links last (default 1 day) and Invitation links last (default 7 days): the links customer portal users get by email. Each works once.
- Shortest password allowed (default 10 characters): for staff and customer portal accounts, the next time a password is set. Very common and all-number passwords are always refused.
- Lock after a number of wrong passwords in a row (default 10, or Never lock), for a time (default 15 minutes). A locked account can't sign in even with the right password until then. Settings › Company › Users shows who's locked, with an Unlock button. When an account locks, CertaCal emails your owners, office admins and quality managers and records it in the audit trail, so someone guessing a password doesn't go unseen.
- Whatever this is set to, CertaCal also holds back an address that keeps guessing: 5 wrong passwords for one account, or 30 for any accounts, and that address can't try again for 15 minutes. The person signing in from anywhere else isn't affected. Two-step codes: 10 wrong ones for an account and its code step waits 15 minutes.
- Sign out or lock after a time without a click, a key or a touch (default Never; up to 4 hours). The office app and the customer portal show a minute's warning with Stay signed in, then sign out. The technician app doesn't sign out: it locks until the technician enters their password, and unlocks even without signal once they've signed in with it on that device. Nothing waiting to be sent is lost. A wrong password at the lock counts toward Lock after, as at sign-in. The demo never signs out or locks.
- Ask staff for a new password every (default Never; 30 days to two years). At sign-in after that long, office people and technicians choose a new password before carrying on, and it can't be one of their last 5. Current guidance (NIST) advises against forced changes; some auditors still ask for them, so it's your choice. Customer portal accounts aren't asked. The clock for everyone already on CertaCal started on the day this setting arrived.
Someone who has signed records electronically keeps their username: it can't be changed, so every signature always points to the same person. Their name, role and everything else can still change, and switching the account off keeps the username with it.
Offices & stickers
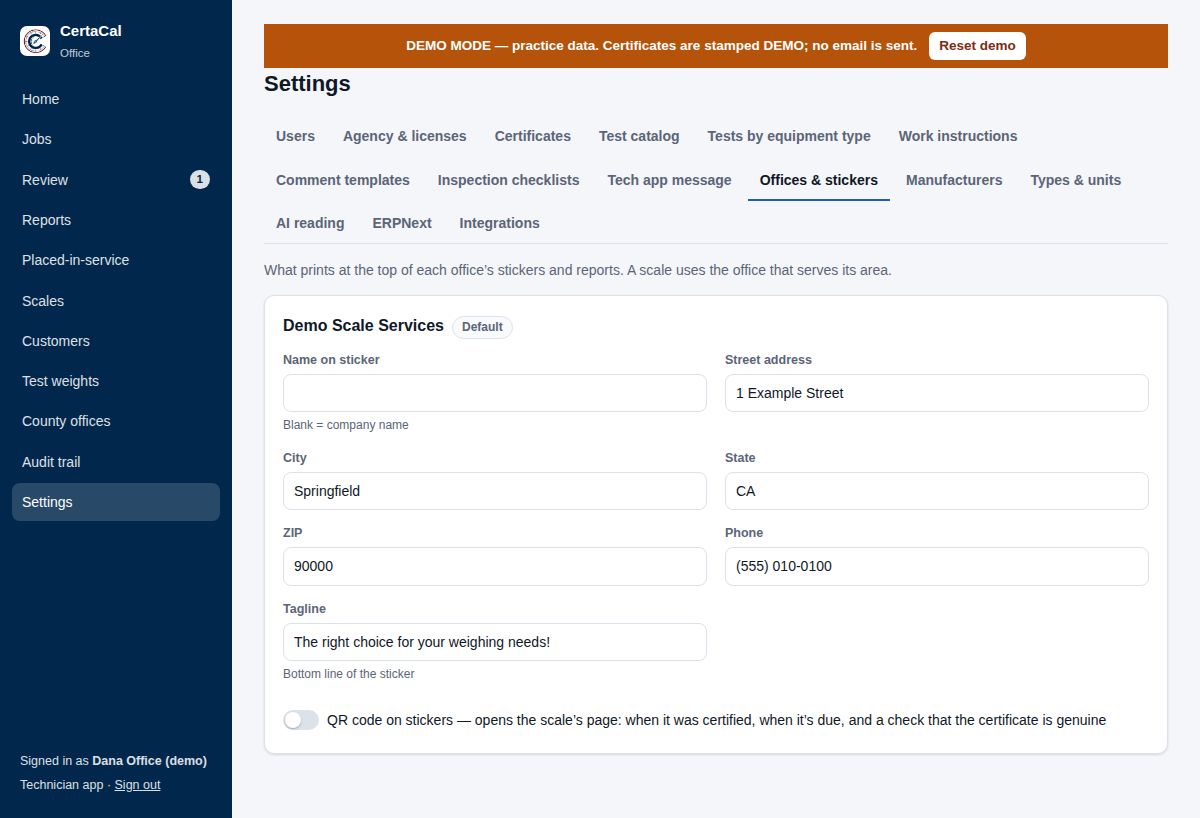
Sticker printing, at the top:
- Technicians print stickers in the field: switch it off when technicians don't carry printers. The technician app then doesn't offer stickers; print or reprint any scale's sticker from the scale's page (Scales → the scale → its calibration).
- Label size and layout: shows the label size; Open the sticker designer changes it and what prints where (see Sticker designer).
- This computer's printer: a Zebra (and its resolution), which prints directly through Zebra Browser Print; a Bluetooth printer (TSPL), a portable printer paired with the computer or phone, which prints directly from Chrome; or Other label printer, which opens a PDF the size of the label to print from. Each computer and phone remembers its own choice. With a Bluetooth printer, Test print next to the choice prints a sample sticker.
Blank stickers, at the bottom of each office's card, prints stickers to fill in by hand: that office's name, logo, address, phone and tagline with the sticker's captions and lines, but no dates, model, serial number or QR code. Pick Blank — no technician, or a technician to print their name and their license number for the office's state, then how many (up to 500) and Print blank stickers. A Zebra or Bluetooth printer gets them as one label with a copy count; another printer gets a PDF with a page per sticker.
Add an office opens a short form: the office's name, city and state. Pick the name with care: scales find their office by it (or by the areas it also serves), so it can't be changed here afterwards. Then fill in the rest on its card.
Each of the company's offices: the name on sticker (blank means the company name), address, phone, email and tagline (printed wherever the sticker design has the Tagline field). A scale uses the office that serves its location. Also serves lists other areas (service zones) covered by that office, separated by commas. One office is the default, used for scales no office serves; Make default moves that to another office. The QR code on stickers switch adds a code that opens the scale's public page: when it was certified, when it's due, and a check that the certificate is genuine.
Customer Service Report
Its layout is yours to change under Forms (above).
Off until you switch on Technicians fill in a Customer Service Report for each job. Then:
- Billing box: vehicle zone, regular / overtime / double time and a miscellaneous charge. For a customer on a service agreement (one in Service agreements, or Billing set to Service agreement on the customer's page, under Accounting) the office fills it in, starting from the customer's vehicle zone and billing note; for time and materials the technician fills it in. The office can correct it on the job's CSR either way.
- Check list: one item per line, in order.
- Vehicle zones: one per line, for picking; leave empty to type the zone.
- Footer: printed at the foot of the CSR, e.g. your form number.
The customer's copy (with the certificates in the job's email and in the portal) leaves out prices, billing and accounting notes.
Troubleshooting
What happens to the troubleshooting reports technicians fill in on a job. Each part can be switched off:
- PDF test report: a Troubleshooting Test Report PDF for each completed report. Off: the reports are still kept and reviewed, but no PDF is made, sent or shown to customers.
- Goes with the job package: the PDFs are emailed with the job's certificates.
- In the customer portal: customers see them on the scale's page once the job is closed.
- In the Equipment Health Report: the job's health report gets a Troubleshooting section: what was found, failed or suspect load cells, parts replaced and whether the scale was tested after the repair. A scale waiting on parts or repaired is also listed under "What needs your attention".
- Reviewed by the office: the reports show in Review with the job, with anything to check flagged.
Manufacturers
The list of manufacturers. Under Possibly the same company, CertaCal groups spellings that look alike ("Rice Lake", "RICE LAKE WEIGHING"). Pick the spelling to keep and click Merge; the other spellings' scales move to it.
Manuals
Settings › Calibration › Manuals is the company's library of makers' manuals: service, installation and user manuals, parts lists and wiring diagrams, as PDFs up to 60 MB. Owners and office admins add and change them; everyone else reads them.
Add a manual: pick the Make (from the manufacturer list), type the Models it covers as on the scales, separated by commas (leave it blank for every model of the make), give it a Title and Kind, and choose the PDF. Model numbers match however they're typed: IQ-355, iq 355 and IQ355 are the same. The list shows how many of your scales each manual covers.
Technicians see a Manuals button on each scale of that make and model on their jobs. Keep on phones (on by default) has their phones keep a copy of the manual for the jobs they hold, so it opens with no signal; switch it off for a big manual that's rarely needed, which then opens only with signal. Edit replaces the PDF or changes the models (phones fetch the new copy at their next refresh); switching a manual off (In use) hides it from technicians; Delete removes it.
Device tolerance rules
Rule sets
A rule set is every rule a scale reading is judged by, listed so it can be audited: each accuracy class with its tolerance bands (in divisions, d), the acceptance tolerance as a share of maintenance, the most divisions a class allows (scales set up past it are tested as if at that maximum), and how a class is worked out for a scale with none on record. Every company starts with US – NIST Handbook 44, version 1.
A rule set is locked. To change it, an owner or quality manager:
- clicks Unlock to edit, which makes a draft of the next version (calibrations keep being judged by the version in force);
- changes the classes and bands, and clicks Save draft;
- clicks Approve version N, says what changed and why, and approves it. It's in force from then on and locked again. Discard draft throws the draft away instead.
A version that judges more loosely than the one in force (a band giving more divisions, a looser acceptance tolerance, a class removed) needs the law or document that allows it; it's kept with the version and shown in red in the version history. Approved versions never change.
When acceptance tolerances apply is part of each rule set:
- As set on each scale (HB44): a scale's Judge results against setting decides.
- New devices placed in service only: acceptance tolerances for calibrations whose reason is New device placed in service; maintenance for everything else, whatever the scale is set to.
- Never: maintenance tolerances throughout.
#### Rule sets from the catalog
CertaCal keeps a catalog of rule sets for other jurisdictions (for example OIML R 76), and USDA Packers & Stockyards (9 CFR 201), which judges scales under the Packers & Stockyards Act with the P&S limits as well as HB 44's tolerances. Every company starts with NIST Handbook 44 only, and adds just the sets it needs, when it first sets up or any time later under Add from the catalog, below your rule sets.
- A set you add arrives as a draft: check it against the edition your jurisdiction uses, give it the states it judges (Name and states) and Approve version 1. Until then it judges nothing.
- When CertaCal publishes a newer version of a set you have, the set shows Catalog update. Take the update as a draft opens a draft with the new tables; your set keeps judging as before until you approve it. Nothing changes without your approval.
- A set you don't use can be removed: Discard draft on a set that was never approved removes it, and Remove removes an approved set no calibration has been judged by. A set that has judged calibrations stays with their records; take its states off it and it judges nothing more.
#### A rule set for another state or country
Where a jurisdiction judges differently, give it its own set rather than changing the one other states use. For example, California uses acceptance tolerances on new installations only, while Arizona and Nevada follow HB44 as written:
- On US – NIST Handbook 44, click Make a copy. Name it (e.g. California), give the jurisdiction and the states it judges (CA), and click Make the copy. The original doesn't change.
- The copy opens as a draft. Change what differs (here, When acceptance tolerances apply › New devices placed in service only) and click Save draft.
- Click Approve version 1. Anything looser than the set it was copied from needs the law or document that allows it.
A scale is judged by the set covering its site's state (as on the site's address), and by the default set (HB44 to start with) when no other set covers it. A company outside the US makes its own country's set the default: on an approved set, Make this the default (owners and quality managers). It then judges every scale no other set covers; the HB44 set stays, with its states, and can be removed if nothing was judged by it. A state belongs to one set at a time. A copy judges nothing until its first version is approved; Discard draft on a copy that was never approved removes it. Name and states changes which states a set covers; scales move from their next calibration, and the audit trail keeps the change.
Each test the technician records keeps the rule set version it was judged by, with the class, maintenance or acceptance, the division used and whether the scale was legal for trade. The certificate prints the rule set and version, so a certificate reprinted later still shows what applied that day.
Custom rules, the catalog and the shared library
A custom rule is a tolerance a customer or a kind of device calls for instead of the rule set, such as "within 1%" or a thermometer's ±1 °C. Pick it on a device's page under Tolerances.
Give a rule its Published source when it comes from a standard, a regulation or a manufacturer's specification that anyone can look up (for example FDA Food Code 4-203.11). Leave it blank for a customer's own requirement.
A rule with a published source is Shared: other CertaCal companies are offered a copy of it. Your company's name is never shown with it. To keep a rule to yourselves, tick Keep private. Rules made from an imported customer test plan are never shared.
Add from the catalog, below your rules, lists the tolerance rules CertaCal offers every company that you don't have yet: the published thermometer rules, and samples. A sample has made-up figures that show how such a rule is built, for example an oven indicator's ±5 °F. Add it, then click Edit and put in the manufacturer's figures for your device: until you change its tolerance or wording, it shows Sample: check the figures. A copy from the catalog is yours. When the catalog publishes a newer version, your copy shows Take the update; nothing changes until you take it.
The Shared library, below your rules, lists the rules other companies have shared that you don't have yet. Add a copy puts one in your rules. If you already have a rule with that name, give the copy another name and add it again. A copy is yours: changing the original never changes it. When the original changes, your copy shows Take the update. Calibrations judged before you take an update keep the tolerance they were judged by.
Volumetric tolerance tables
Below your rules, Volumetric tolerance tables hold the maximum permissible errors pipettes, burettes and glassware are judged by when the instrument's page has no manufacturer's limits (CP-520). There's one table for each standard and class: ISO 8655-2 pipettes, ISO 8655-3 piston burettes, and ISO 648, ISO 385, ISO 1042 and ISO 4788 glassware in classes A and B.
- Glassware tables start with the published class A tolerances, and class B at twice class A. Check them against your copy of each standard.
- ISO 8655 tables start empty: the standard is copyrighted, so type the limits in from your copy. Until you do, a pipette with no manufacturer's limits is reported with no statement of conformity.
- Click Edit and write one line per nominal volume, the test volume as a % of nominal, then the systematic and random limits:
1000: 10% 8/3, 50% 8/3, 100% 8/3. For glassware, one limit at nominal:50: 100% 0.05. - Every change is in the audit trail. Calibrations already judged keep the limits they were judged by.
Test weight tolerance table
Settings › Calibration › Test weight tolerance table lists the maximum permissible error of each test weight class: OIML R 111 (E1 to M3, metric), ASTM E617 (000 to 7, in metric, pounds, ounces, troy ounces, pennyweights and grains), NIST HB 105-1 Class F, and NIST HB 44 commercial weights (acceptance and maintenance). Pick a standard, then a unit system.
Class F (NIST HB 105-1) is retired: a weight marked F is checked against ASTM E617 Class 6, keeping the name F because so many weights carry it. Since E617-23, Class 6 has the old Class F values, so a weight marked F gets the same tolerance under either name; the HB 105-1 table stays for reference.
Each table names its source under it: the standard, its edition and the table the values come from. HB 44 acceptance tolerances are half the maintenance tolerances, as HB 44 sets them.
When a lab certificate gives only a weight's class, CertaCal looks the tolerance up here to tell whether the weight came back out of tolerance; the certificate's own tolerance is used when it prints one. Write the class on the weight as the certificate does (F, Class 4, F1, ASTM 2). A size the tables don't list needs its tolerance typed on the weight. These are published standards, so they can't be edited.
Company policies
Settings › Calibration › Company policies lists the numbers that are the company's own choice rather than the law (the law is in Device tolerance rules):
- As Left target: leave each adjusted reading within this many divisions (1 d to start). It's a goal, not a pass/fail limit: the technician app marks readings further off, and the Review page shows them so you can check the notes say why.
- Health report: a scale is Good when in tolerance on arrival at least 85% of visits, Fair from 65%; it's rated only after 3 visits, and compared with the same make and model only when 10 or more of them have enough visits. A scale that passes using 75% or more of its tolerance is listed to watch, and one often out on arrival is flagged after 4 visits. The customer portal's scale health uses the same numbers.
- Test weights due soon: within 30 days.
- Test weights and standards without a current certificate: Warn (to start) or Block. It covers a weight with no certificate, a certificate that has expired, been replaced or has no due date, a standard picked directly that isn't current, and, on legal-for-trade work, a weight past the state's recalibration interval (State law on recalibrating standards in the Test weights chapter).
- Warn: the technician sees the warning and may carry on; the calibration is marked, and approving it needs a written reason (Approve anyway on Review).
- Block: the technician app won't start the test or send the calibration until the technician picks current weights (another kit, or Choose in the kit and untick the ones listed), or records the scale as not inspected. The server checks it again when the calibration arrives, so a phone with old settings can't send one through. A calibration recorded with no signal and refused when it syncs isn't lost: it comes back to the technician, marked The office server didn't accept this calibration, with the weights named, to fix and send again.
- A calibration is judged by the version in force on its date, so work recorded offline before you switch to Block still syncs as it was done.
- If your company prints its accreditation or has a device within ISO/IEC 17025 scope, the screen recommends Block and says why: ISO/IEC 17025 asks that equipment is checked as meeting its requirements before use (6.4.4) and that results are traceable (6.5). It's a recommendation, not forced: going from Block back to Warn is more lenient, so it needs a reason, kept with the version.
- Printed uncertainty: 1 decimal place finer than the device's division, rounded up so a certificate never states less than was calculated (0.0213 lb on a 0.1 lb scale prints 0.03). Up to 3 places finer; rounding to the nearest instead counts as more lenient, so it needs a reason. Only the printed value changes; certificates already issued keep what they printed.
- Load-cell troubleshooting: the limits each load cell on a troubleshooting report is judged by. To start: zero balance within 10% of full-scale output; each cell's dead load within 20% of the other cells'; cross legs within 0.5% of the output resistance; insulation passes at 3,000 MΩ or more and fails below 1,000 MΩ (suspect in between). Readings in nS are judged by the same limits (nS = 1000 / MΩ: 3,000 MΩ is 0.333 nS, 1,000 MΩ is 1.0 nS), so there's nothing separate to set. Insulation must fail below the reading it passes at, and each percentage is above 0 and at most 100. A bridge leg under 1 Ω is a short circuit (0.1 to 10 Ω; a lower limit is more lenient). An open leg always fails.
The technician app gets the limits when it starts and keeps them for when there's no signal. Each report keeps the policies version it was judged by, and the printed report lists the limits used. So changing them doesn't change a completed report; a report reopened and saved again is judged by the limits in force then.
- Field methods: how your technicians test where HB 44 and the method procedures leave the choice to you. The suggested loads follow them; the technician can still use other loads, and the record keeps what was used.
- Decreasing-load test: the loads suggested: every step of the increasing-load test, back down (to start), or HB 44 N.1.2's: each tolerance breakpoint below the top load, or half the top load on a scale with under 1,000 divisions. HB 44's is fewer loads, so it counts as more lenient.
- Shift test over the corners: the load may be under one-quarter of capacity by up to 10 % (so 225 lb on a 1000 lb scale) before the technician is warned. 0 to 10 %; less is stricter.
Marked Always beside them: the increasing-load test reaches at least HB 44 Table 4's minimum; quadrant loads are one-third of capacity, never under 30 % (N.1.3.7); corner loads are never above one-quarter; vehicle sections are at least 12.5 % and never over the CLC; monorail loads are at least half capacity (N.1.3.5); known weights reach 12.5 % before substitution or strain loads; a magnet is tested with five pulls, the highest and lowest set aside; an open load-cell leg always fails.
- Moisture analyzers: the weighing unit's test load is at least 50 % of capacity (10 to 100 %; a lower minimum is more lenient). The limit when the manufacturer gives none (±0.05 % of the load) is the test's own number, in Settings › Calibration › Tests.
- Magnets: flag Gauss and pull disagreeing against the baseline by more than 10 percentage points (up to 50), and stop and let a magnet cool above 60 °C (140 °F; 30 to 75 °C). Higher is more lenient for both. The pull spread and the instrument checks are the tests' own numbers, in Settings › Calibration › Tests. Each magnet record keeps the values in force on its date, and the technician app keeps them for when there's no signal.
- Quality score: what each of the score's four lines is worth (25 points each to start; they must add up to 100, and a line can be worth 0), and what the readings line loses, as a share of that line: readings that look copied 60%, each reading left past the As Left target with no note 20% (at most 40%), a test load below recommended or above the CLC 20%, and an adjusted or failed scale with no note 20% (the Review chapter's table shows the same in points). A calibration is scored by the values in force on its date.
- Copied readings: a scale's As Found readings are compared with its last visit and the job's other scales only when at least 3 of them differ from their test load, because every reading exactly right is common on coarse scales and matching it proves nothing. Up to 20.
- Automatic approval: what keeps a calibration from being approved automatically (when auto-approval is on, Settings › Company › Review & auto-approval). Your choice, each Waits for a person to start: an adjusted scale, a change to the scale's details from the field not yet accepted, a scale added in the field not yet accepted, a visual inspection item rated poor, a test load below recommended, and a Packers & Stockyards warning. Choosing Can be approved automatically is more lenient, so it needs a reason. Listed with them, marked Always waits for a person, are the rails no setting changes: a failed or not-inspected scale, a weight or standard not on a current certificate, a failed or unjudged reading, weights that don't suit the scale, an instrument's own check finding something, readings that look copied, a different test division, a P&S failure or missing report line, and approving your own work.
- Uncertainty: how CertaCal works out a scale's measurement uncertainty (the method is under How CertaCal computes uncertainty in the quality guide):
- Coverage factor k: 2 to start, a coverage probability of about 95 %. Between 1.645 (90 %) and 3 (99.7 %); a smaller k counts as more lenient.
- Repeatability when the test wasn't run: 0.5 d.
- A measured repeatability counts for at least: 0.5 d, rectangular (0.5 d/√3), so readings that agree to the division never count as zero. 0 lets them.
- Test weights with no certificate or class data: an error bound of 0.5 d, rectangular.
- Shift difference when no shift test was run: 1 d at a third of the load.
- Each test weight counts by: its class tolerance (T/√3), or its certificate's uncertainty (U/2) only without one; or the other way round.
- Each substitution under a load: adds one transfer (two readings' resolution and the repeatability), or nothing.
Marked Always beside them: the parts are combined as the root of the sum of their squares; the weights' and standards' own uncertainty and the resolution at zero and at the load are always counted; k is never below 1 and U never below the company's minimum; a certificate that prints uncertainty states k and the coverage probability. A worked example (a 5000 lb × 1 lb scale with class F weights and no repeatability or shift test) recalculates as you edit. A calibration is worked out with the values in force on its date, and its certificate keeps the k it was worked out with.
They're locked like a rule set: an owner or quality manager clicks Unlock to edit, changes the values (Back to CertaCal's default puts one back), Save draft, then Approve version N with what changed and why. A version that is more lenient than the one in force (a wider target, a lower grade, a later warning, a looser troubleshooting limit, fewer drop loads, a hotter magnet) also needs the reason, kept with it in the version history. Changes apply from approval on.
Settings › Calibration › Device tolerance rules also holds tolerances a customer or a kind of device calls for instead of HB44: "within 1% of the load", Caltrans' "2 divisions from zero to capacity", a thermometer's ±0.5 °C. Build a rule once, then pick it on each device's page under Tolerances › Tolerance rule.
- A device with no rule is judged by the rule set, using its Judge results against setting (maintenance, unless you chose acceptance).
- A legal-for-trade device with a rule is judged by whichever is tighter at each load, the rule or the rule set. A customer can ask for tighter than the law, never looser.
Devices that aren't scales. NIST Handbook 44 has no code for thermometers or metal detectors, so they're never judged by HB44: a new one starts on the manufacturer's tolerances. Every company starts with these thermometer rules, to pick on a thermometer's page (Tolerances › Tolerance rule) by how the customer uses it:
- Food thermometer ±2 °F / ±1 °C: FDA Food Code 4-203.11 (California Retail Food Code §114159(c)), for food temperature measuring devices.
- Ambient air thermometer ±3 °F / ±1.5 °C: Food Code 4-203.12, for air and water temperature devices (coolers, freezers).
- W&M thermometer ±1 °F / ±0.5 °C: NIST Handbook 105-6, for thermometers used to test meters or packages. It asks for three test points starting at the ice point.
Pick the one in the thermometer's own unit. Metal detectors have no tolerance: they pass by detecting and rejecting each test piece the customer's plan calls for.
Scales brought over from the previous system with customer-defined or manufacturer tolerances had their own per-load tolerances. Each distinct set is now a rule named Imported customer plan: … or Imported manufacturer plan: …, shared by every scale that had it and shown on each scale's page, so nothing is judged by numbers you can't see. Each of the plan's loads is the top of a band, and the last band covers every load above. Check them like any other rule; edit one to change it for all its scales.
New rule opens the builder:
- Name: what you pick on a device, e.g. Caltrans ±2 d.
- Wording on the certificate: what the certificate says the results were judged against. Blank uses the name and the rule in words.
- Tolerance by load: one or more bands, read top to bottom. Each band covers loads up to a limit (leave the last one blank for every load above) and works the tolerance out as % of the test load, % of capacity, a number of divisions (d), or a fixed amount in the device's unit. For example, 1% of the test load up to 500 lb, then ±5 lb.
- Never tighter than (d): an optional floor, for rules like "1% or 1 d, whichever is larger".
- Try it shows the tolerance the rule gives at a few loads for a capacity and division you type.
The readings of each calibration keep the tolerance and the rule's wording they were judged by, so editing a rule later changes only calibrations judged after it. A rule devices use can be switched off (it's no longer offered) but not deleted.
Types & units
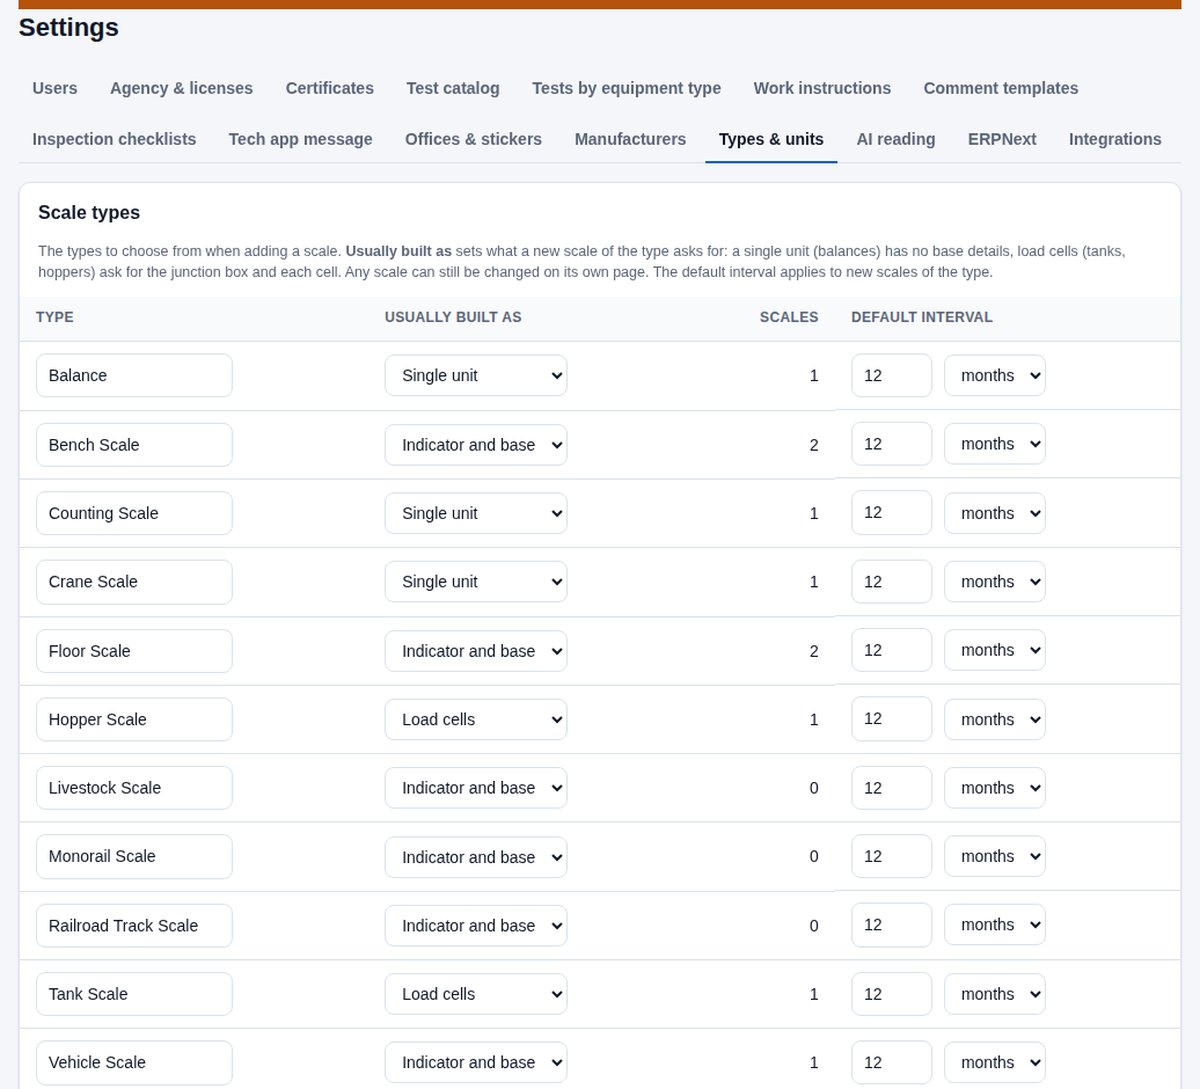
- Equipment types: the list to choose from when adding a device (balance, bench, floor, tank, vehicle, thermometer, viscometer and so on), grouped like the test catalog: Standards, scales and balances, moisture analyzers, temperature, humidity, volume and flow, pipettes and volumetric glassware, dimensional, viscosity, pass/fail and other measurements.
- Standards marks a type whose devices other work is measured against: weight kits, reference thermometers, meters, balances, test chambers, solutions. Whoever owns them, they're calibrated or replaced when they come due. Weight-set types are standards to start with.
- Kind is what the type is: Scale, Weight set, Thermometer, Metal detector, Magnet or Other measuring device (a viscometer, a gauge, a hygrometer). It decides the technician's form, the certificate, the tolerance rules offered and the units a device can be in: pounds and kilograms for scales, °F or °C for thermometers, units such as cP, psi or %RH for other devices, and none for a metal detector, which is judged pass/fail against test pieces, or a magnet, judged against the customer's minimum Gauss and pull. A new type's kind is guessed from its name; check it. A scale type can also be marked Moisture analyzer: its devices get a heating check after the weighing test. Once anything of a type has been calibrated its kind can't change; make a new type of the right kind and move the devices to it instead.
- Usually built as (scales only) sets what a new scale of the type asks for: Single unit (balances: no base details), Indicator and base, or Load cells (tanks and hoppers: the junction box and each cell). Any scale can still be changed on its own page.
- The default interval applies to new scales of the type. A new type starts with your company's interval for new types (Settings › Field work › Field rules; 12 months to start with).
- To add a type, type its name at the bottom of the list, pick its kind (and, for a scale, how it's usually built) and click Add type. Common types the company doesn't have yet are listed under it; click one to add it, or Add all. Rename a type by typing over its name.
- Units: tidy up spellings (lbs → lb) so kits and reports match.
Customers' weights to kits: test weights that came over from the old system one weight per device are proposed as kits, by customer site and due month (weights calibrated together come due together). Review each proposal, untick any weight that doesn't belong, name the kit and make it. The kit is calibrated as one weight set (one certificate, one due date, each weight judged on its own); the single weights are retired, not deleted, and keep their history.
Outgoing mail server
Everything your company sends goes out from your own mailbox, through your own mail server: certificate packages, amended certificates, placed-in-service reports, and customer portal invitations, password resets and due-date reminders. CertaCal doesn't send them from a shared account. Until this page is set up, none of them are sent, and each one says so where it would have gone (for example on the job's email box).
- Where is your email? Pick Website hosting with cPanel, Gmail or Google Workspace, Microsoft 365 / Outlook or Another mail server. It fills in the usual server settings and shows where to find yours.
- From name (what customers see, usually your company's name) and From address (for example certificates@yourcompany.com).
- Check the Outgoing (SMTP) server, Port and Security, then the Username (usually the full email address) and Password. Click Save.
- Under Send a test email, click Send test (leave the address blank to send it to yourself). A green message means it went; a red one shows what the mail server said, such as a wrong password.
- cPanel hosting: in cPanel, Email Accounts › Connect Devices next to the mailbox lists the outgoing server and port (usually 465 with SSL/TLS). The password is the mailbox's own.
- Gmail and Google Workspace: Google needs an app password, not your normal one. Turn on 2-Step Verification for the account, make an app password at myaccount.google.com/apppasswords and paste its 16 letters. Google sends from that account's own address unless another address is set up under Gmail's Send mail as.
- Microsoft 365: Microsoft is switching off password sign-in for sending email by default at the end of December 2026. Until then it works if your Microsoft administrator has SMTP sign-in turned on for the mailbox.
The password is stored encrypted, never shown again (leave it blank when saving to keep it), and left out of the change history and company backups. CertaCal's administrator can't see this page. Only owners and office admins can open it. Remove stops your emails until it's set up again.
AI reading
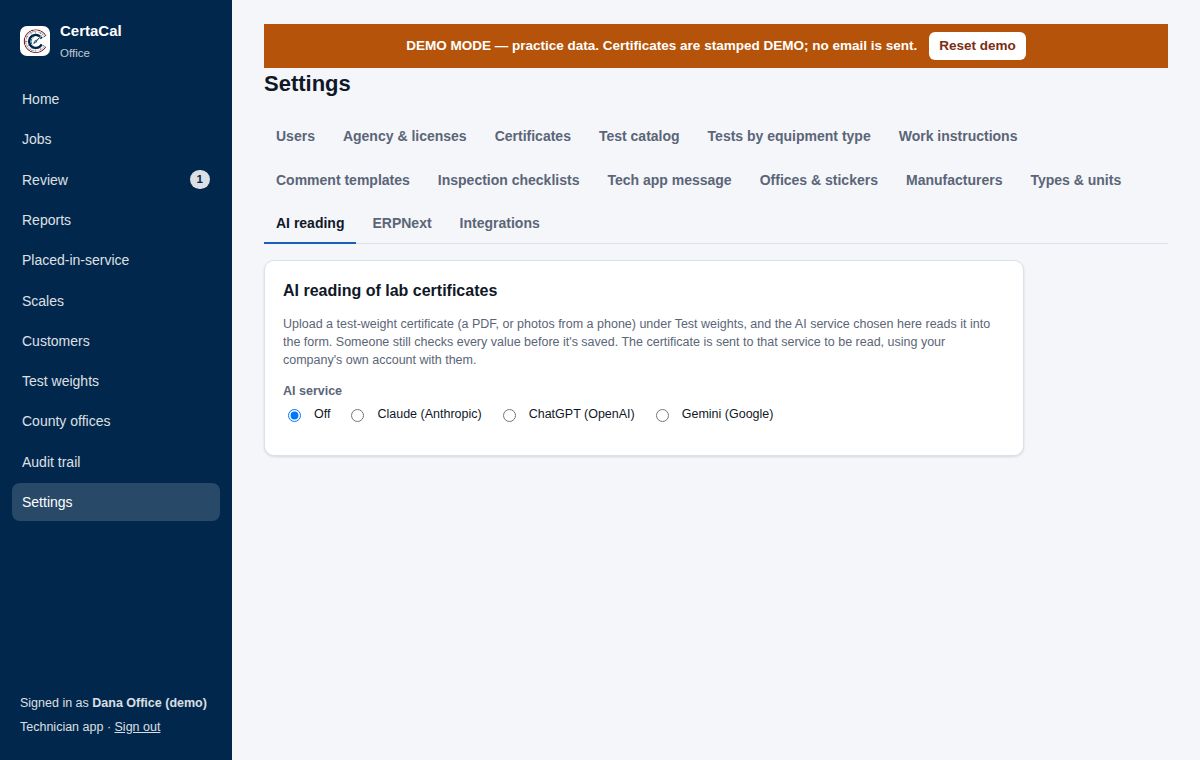
CertaCal can read a lab certificate for your test weights (a PDF, or photos of the paper) and fill in the Record new certificate form for you (see the Test weights chapter). The reading is done by an AI service, using the company's own account with it.
- Pick the AI service: Claude (Anthropic), ChatGPT (OpenAI) or Gemini (Google). Off turns the feature off; certificates are then entered by hand as before.
- Paste the service's API key and click Save key. Get it from that service's developer site: console.anthropic.com, platform.openai.com or aistudio.google.com. The account needs billing set up; reading one certificate costs a few cents.
- Leave Model blank to use the one shown, or type another model name if the service retires it.
- Click Check the key works. A green message means CertaCal reached the service and got an answer.
Once saved, the key is never shown again, only its last four characters. It's stored encrypted and is only ever sent to the service you picked. Picking a different service removes the key, so it can't be sent to the wrong one. Only owners, office admins and quality managers can see this tab.
ERPNext
While the connection is on, ERPNext is the master for dispatch: each Service Appointment becomes a CertaCal visit as soon as it's saved, and visits are booked only in ERPNext. ERPNext owns the booking (customer, location, scales, date, crew leader); CertaCal owns the calibration (readings, review, certificates, the scale's interval and last calibration date). Invoicing stays in ERPNext. Switched off, CertaCal works on its own and schedules its own visits.
- In ERPNext, create a user for CertaCal and use Generate Keys on that User record (API Access). The roles it needs are in docs/ERPNEXT_CONNECTOR.md.
- Here, enter the ERPNext address, API key and API secret, and click Save. The secret is never shown again. The address must be the site's real public address (usually
https://): CertaCal doesn't follow a redirect, and refuses an address on a private network unless your server is set up for an ERPNext on your own network. Changing the address clears the secret: enter it again, so it only ever goes to the site it was made for. - Click Test the connection.
- Tick Which Service Orders become jobs (by default: Agreement (PM), Trouble Call, Calibration Call, Installation).
- Run the match-up once (below), then switch on ERPNext books the visits.
- Set up Instant updates from ERPNext: two Webhook records in ERPNext (Service Appointment and Service Order) with the address, body and secret shown here. Without them CertaCal still checks ERPNext every 2 minutes.
Match up customers, locations and scales (once)
Click Preview the match-up. It changes nothing: it lists every customer, location and scale and whether it will be linked (in both), created in ERPNext (only in CertaCal), created in CertaCal (only in ERPNext) or skipped (for example a location with no street address, or a customer that isn't active). Download the report for the full spreadsheet. When it looks right, click Make these changes… and confirm. Creating records in ERPNext needs the CertaCal user to have the System Manager role for the run; take it off afterwards. The match-up can be run again safely; it never deletes anything.
Needs a link lists what the sync couldn't do, and new scales from ERPNext until you accept or merge them (the technician fills in their details on site).
What CertaCal sends back to ERPNext
With the connection on, CertaCal also sends ERPNext:
- Visit progress: the status and scales done on each visit booked in ERPNext, shown in ERPNext's Tech App.
- Scales added in the field: each one you accept is created in ERPNext as the customer's equipment and put on the Service Order.
- Results: when every scale on a visit is approved, the results, certificates and health report (see Visits booked in ERPNext in the Jobs chapter).
None of this happens without an enabled ERPNext connection, and the ERPNext screens and buttons in CertaCal show only while one is set up.
Integrations
CertaCal has an open programming interface (API), so other programs (an ERP, a field-service program, an accounting package, the company's own spreadsheets) can read and add customers, locations, scales, jobs, calibrations and certificates. Owners and office admins set it up here.
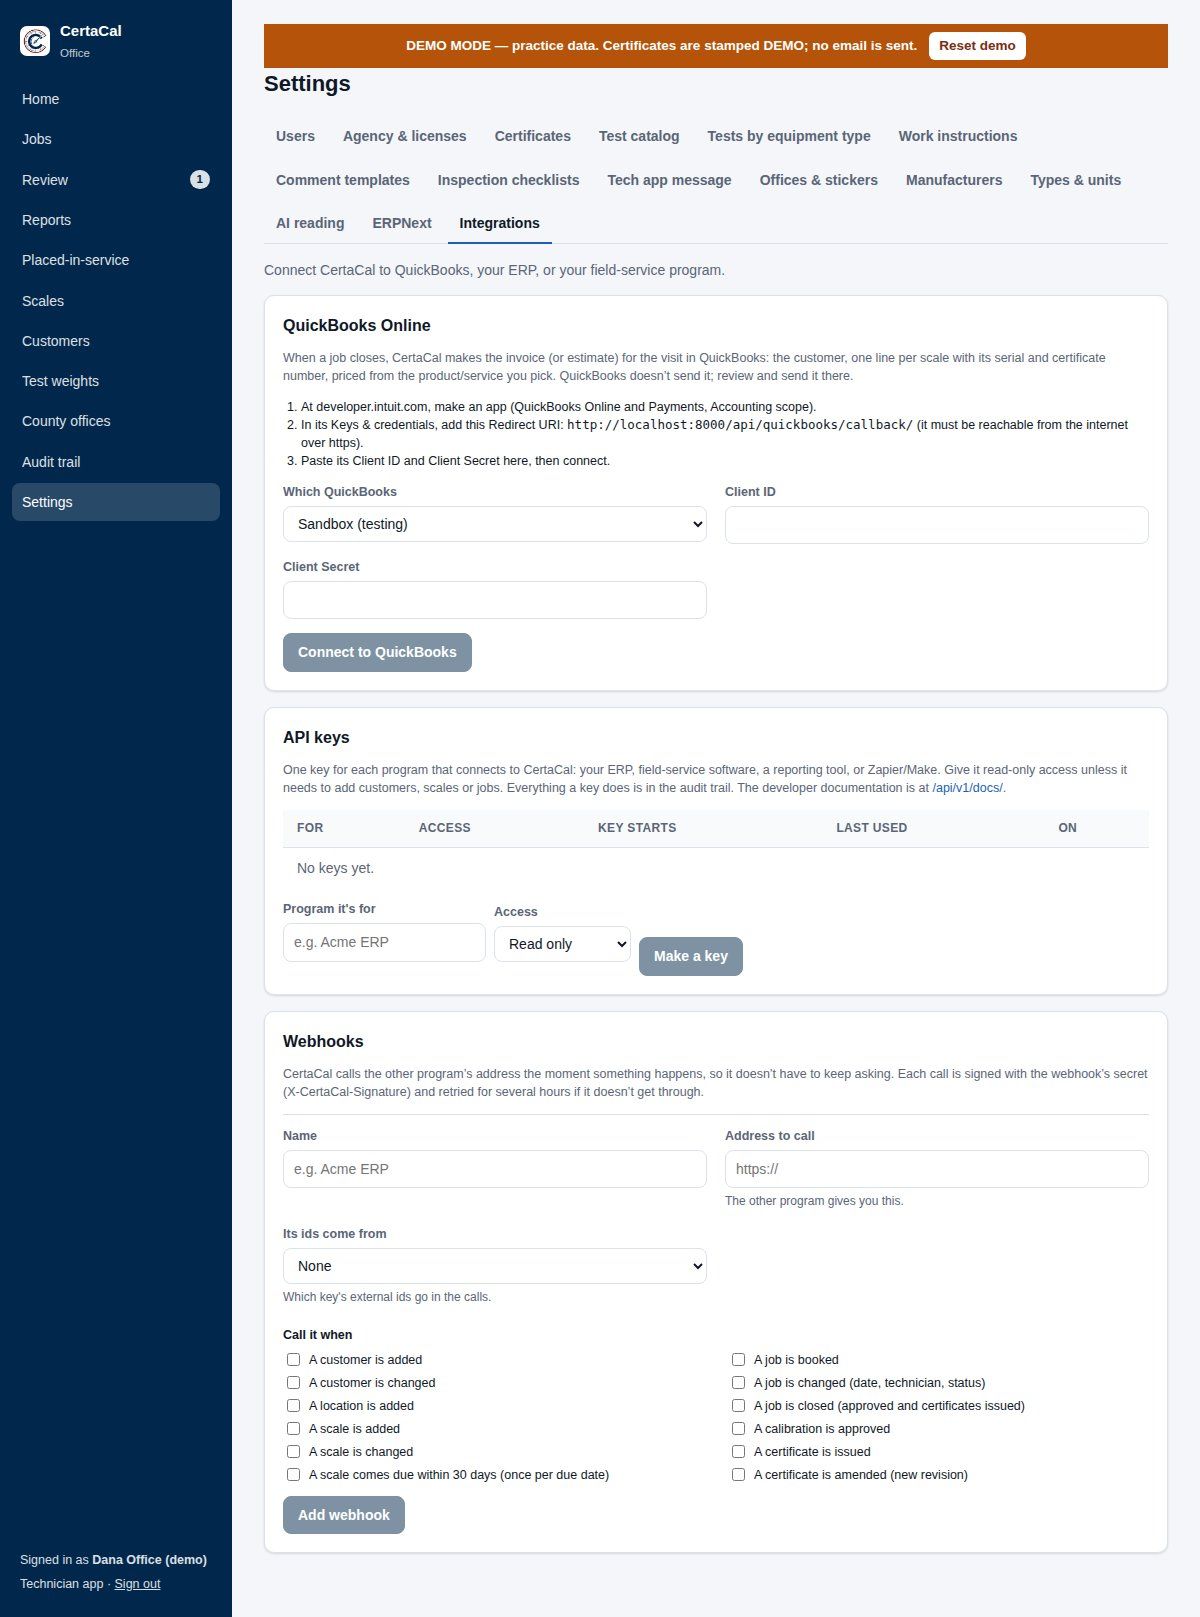
API keys
Each program that connects gets its own key.
- Under API keys, enter the Program it's for (for example Acme ERP) and pick Access: Read only or Read and write.
- Click Make a key. The key is shown once: copy it into the other program (or give it to whoever sets that program up) and click I've saved it.
- The table shows each key's name, access, the first characters of the key, and when it was last used. Switch a key off the moment it's no longer needed, or if it may have leaked.
Everything a key does is in the audit trail as API: name of the program. The other program's developer finds the full reference at /api/v1/docs/ on the CertaCal address. The other program can store its own ids on CertaCal records, so records match without duplicates.
A key can read customers, locations, scales, jobs, calibrations and certificates, and add or change customers, locations, scales and jobs. It can't record calibrations. Recording them from your own field app is an upgrade, set up for your company under an agreement on what your app does and what the API lets it do: your app sends the readings, and CertaCal judges them, scores the job and sends it to review as usual. Ask CertaCal about it.
Webhooks
A webhook makes CertaCal call the other program the moment something happens, instead of the other program asking every few minutes.
- Under Webhooks, enter a Name, the Address to call (the other program gives you this; it must start with https://), and which key's ids go in the calls (Its ids come from).
- Tick Call it when: a customer, location or scale is added or changed; a scale comes due soon (Due dates & reminders); a job is booked, changed or closed; a calibration is approved; a certificate is issued or amended.
- Click Add webhook. Give the other program the secret shown, so it can check each call really came from CertaCal.
Send a test sends a sample call. Each webhook lists its recent calls with the other program's Answer; Send again repeats one that failed. A call that doesn't get through is retried automatically for several hours.
QuickBooks Online (through Make)
CertaCal works with QuickBooks Online through Make (make.com), where you connect your own QuickBooks. When a job closes, CertaCal sends the visit's invoice (or estimate, or sales receipt) to your Make scenario: the customer, and one line per scale with its serial and certificate number. Make creates it in QuickBooks and tells CertaCal its number and, if you set it up, when it's paid. QuickBooks doesn't send it; you review it and send it from QuickBooks.
Setting it up is in the step-by-step guide QuickBooks through Make (the link at the top of this section; it opens at /help/quickbooks/), with a starter scenario to import into Make. In short:
- Under API keys, make a Read and write key named Make.
- In Make, connect QuickBooks, import the starter scenario and add its QuickBooks steps.
- Under Webhooks, add the Make scenario's address and tick A closed job's invoice is ready for QuickBooks.
- Switch When a job closes on.
The three steps at the top of the section show Done as each is set up.
Make is An invoice, An estimate, or A sales receipt (paid on the spot), for customers who pay when the work is done. A sales receipt counts as paid.
QuickBooks products and services: each line names the QuickBooks product/service it bills on, and Make finds it by name. Type the name exactly as it is in QuickBooks, or leave the box blank to use the name shown in grey. Each scale (blank: Calibration) is priced by its product/service in QuickBooks; A different product/service for some scale types bills, for example, truck scales on their own item.
Service agreements and quotes: when agreements are on, name the product/service for each agreement line (Service, Labor, Truck charge, Travel labor and your three Misc lines). When quotes are on, also Materials and Per diem: a job from an accepted quote bills the quoted price as Service, or for time and materials the hours as Labor and Travel labor, the Truck charge and each part on the service report as Materials, at the quoted rates (see Quotes). A visit covered by an agreement with prices bills its lines instead of one line per scale, at the agreement's prices, addressed to the agreement's accounting contact. Hourly lines use the technicians' times from the Customer Service Report; without times the line goes in at 0 hours and says so, for you to fix before sending.
Accepted quotes: on (the default), each accepted quote goes to Make as an estimate, when a webhook ticks An accepted quote's estimate is ready for QuickBooks (see Quotes).
Bill from the service report (off by default): each invoice also gets the Customer Service Report's on-site hours as Labor and drive hours as Travel labor, at the price list's rates (Settings › Company › Quotes; travel only when it's per hour), the truck charge, and each part as Materials at its price. Jobs under a priced service agreement and jobs from a quote bill as before. When technicians record mileage (Settings › Field work › Field rules) and the price list's travel is by the mile, the recorded miles bill as Mileage too.
Bill locations as sub-customers (off by default): a visit at one of a customer's locations is billed to the QuickBooks sub-customer Customer:Location (or Customer - Location when another customer already uses the name). Sub-customers' invoices chooses Bill with the parent customer or Bill each location on its own. The Make scenario needs the sub-customer steps in the guide.
Recent lists each job sent: the QuickBooks document Make made, Sent to Make, waiting for QuickBooks, or why it couldn't be sent, with Send again. Send a closed job now sends an older job by its CertaCal job number.
When Make writes paid status back, each job, the customer's page and Recent show it: paid, partly paid, unpaid, overdue, void or deleted. The customer's page gets a QuickBooks card with what's owed and overdue on CertaCal's invoices, and Office › Money adds a From QuickBooks line. Customer details edited in QuickBooks don't come back to CertaCal on their own; a Make scenario can update them through the API.
Demo
Only CertaCal's administrator sees this tab, at the administration address. Public demo switches the practice company (see The demo company) on or off for the whole site, not just your company.
- Off: the Try the demo buttons disappear from the sign-in and welcome pages, and anyone using the demo is signed out straight away.
- On: the buttons come back. The practice company keeps its data; use Reset demo inside it to start fresh.
If the note says the server's settings keep the demo off, the switch has no effect until the person who runs the server allows it.
Manufacturers and Job Link
Manufacturers and distributors that use CertaCal (manufacturer's hubs) send service jobs to service companies: to providers not on CertaCal by email, and to service companies with their own CertaCal account through Job Link.
A service company chooses whether manufacturers can find it. Under Settings › Connections › Job Link, the owner fills in the listing (the name to show, the states and areas served, scale types, accreditation and a contact) and ticks List us in the directory. Only what's in the listing is shown, to manufacturers' office staff, and only while it's listed: unlisted, no manufacturer can find you or tell that you use CertaCal. A manufacturer that finds you sends an invitation, by email and on the same page: Accept or Decline. Once linked, it can send you jobs; it never sees your customers, prices or other jobs. End stops new jobs from it; jobs already sent are finished.
A manufacturer's hub finds providers under Settings › Connections › Job Link: search by state served and words (an area, a scale type, an accreditation), then Invite, with a message if you like. The provider's owner accepts or declines; Your links shows where each stands, and End stops sending to one.
Sending a job to a linked provider. On a scheduled job, Send to a linked provider: pick the provider, give the amount agreed for the job if there is one, and your terms (what you last sent that provider fills in). The job arrives in the provider's own CertaCal as a request under Jobs › Requests, with your customer, location and scales: ones the provider already has are matched, and new ones are added for its office to check. The provider's office gets an email. It accepts the job and picks its technician, or declines it with a reason; you get an email either way, and a declined job is back on your board. Until it's accepted, Take it back withdraws it. Once accepted, the job's progress shows on your job, with the provider's technician; the technicians who work your jobs count as your service agents for the month.
For the provider, the job is one of your own: your technician does it in the technician app, and your office reviews it as usual. The request says which manufacturer sent it and its terms; accepting the job accepts them. Cancelling an accepted job gives it back to the manufacturer.
The paperwork. The certificates, reports and ticket for the job are the provider's, printed "Serviced for" the manufacturer under the provider's name. The customer is the manufacturer's, so the manufacturer reviews the work and emails it. When the provider has finished and reviewed its job, the manufacturer's job shows Ready for your review (Awaiting review), and whoever sent it gets an email. Open the certificates on the job, then:
- Approve and send to the customer: the certificates and the completed ticket go to the customer from the manufacturer's email, with its own wording (Emails to customers), copied to whoever sent the job and the office copy, and the job closes.
- Send it back, with what needs fixing: the provider's job opens again with your note, and its office and technician get an email. It re-tests what's needed or amends the certificate and finishes the job again, and it comes back to you for review.
The provider never emails the manufacturer's customer. The job's certificates are also on the manufacturer's job to open. The manufacturer sees nothing else of the provider's. Placed-in-service reports stay the provider's to file.
In your own systems. A manufacturer's hub can follow its jobs from its own software. Under Settings › Connections › Integrations, a webhook can subscribe to hub_job.sent, hub_job.accepted (with the provider's technician), hub_job.declined (declined or taken back, with the reason) and hub_job.finished. An API key reads the same records from /api/v1/hub-jobs/: each job, its provider and where it stands, and your ticket's dispatch values. The reports Providers on your jobs and Your models on your jobs are under Reports.
Users and roles
Everyone who signs in to CertaCal has their own account. Never share a login: every calibration, review and change is recorded against the person who did it, and a certificate names who performed and who approved the work.
Click Settings › Company › Users.
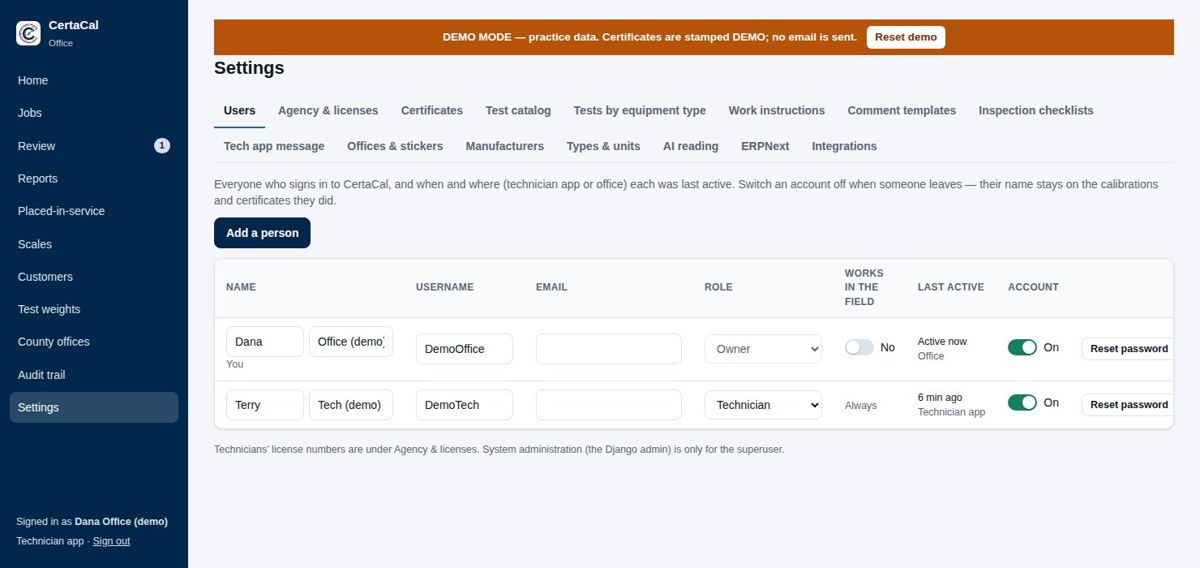
The table lists everyone: name, username, email, role, whether they work in the field, when they were last active, and whether their account is on.
Who's signed in
The Last active column shows when each person last used CertaCal and where: Active now (in the last five minutes), minutes or hours ago, or the date, with Technician app or Office underneath. Hover over it to see when they last signed in. Your own name and role are at the bottom of the menu.
Adding a person
- Click Add a person.
- Enter their first and last name and their email. Leave Username blank and CertaCal makes it from their name, in lower case: first initial and last name, for example jsmith for Jane Smith. If that's taken, whoever was added second gets first name and last initial (johns for John Smith). Usernames aren't case-sensitive when signing in. Former technicians brought over with the calibration history are named the same way (swittig) and are switched off.
- Pick their role. The line under the form says what the role can do.
- Leave Starting password blank, so they choose their own.
- Click Add.
Then the owner clicks Sign-in link on their row and sends it to them: copy it into a text, or Email to… once your company's email is set up. The link works once, for as long as Settings › Security says (7 days unless you change it). They open it, see their name and username, and choose a password. Sign-in links at the top of the list gives a link for everyone who hasn't chosen a password yet, one line each; those people show No password yet. Make a new link whenever one is lost or runs out.
You can still type a starting password instead (at least 10 characters). Give it to them in person, never by email or text.
For a technician, also add their license numbers under Settings › Calibration › Agency & licenses.
Choosing a role
| Role | Choose it for |
|---|---|
| Technician | Field staff who do calibrations. Works in the technician app only. |
| Reviewer | Someone who reviews and approves jobs but doesn't set up customers or schedules. Can look at everything in the office app. |
| Office admin | Office staff who set up customers and scales, schedule jobs, handle placed-in-service reports and weights, and manage users. |
| Quality manager | The person responsible for the quality system (ISO/IEC 17025): weight certificates and impact reviews, certificate wording, work instructions, checklists. Can do everything an office admin does. |
| Auditor | An internal or external auditor. Sees everything, changes nothing. |
| Owner | The company's owners. Everything, including other owners' accounts. |
Changing someone's account
- Name, username and email: edit the box and click away. If you change someone's username, tell them; their password stays the same.
- Works in the field: switch it on for an owner, office admin or quality manager who also does calibrations. They're then listed on the Jobs board, can be assigned visits, and see their own jobs when they sign in to the technician app. Technicians always work in the field.
- Office: the office this person works out of (shown when you have more than one office). The Jobs board's office filter lists them under it. Leave it blank and they're listed under every office.
- Photo required: switch it on and this person must take at least one photo to complete every calibration they do. Others on the same job aren't affected. A photo is required when the scale's Photo required on every calibration is on (every technician) or the technician's own Photo required setting is on (that technician only). A customer set to No photos allowed overrides both: no photos at all.
- Role: pick a new one from the drop-down. It takes effect the next time their screen loads.
- Reset password: type a new password (10 or more characters) and click Set.
- App setup code (technicians and people who work in the field): opens a page with a QR code to print or show on screen. In the Android app, Change › Scan setup code reads it, and the app is then set up to sign in at your company's address with that person's username. They still type their own password: the code holds no password. Scanned with a phone's camera, it opens a page with Open in the CertaCal app. The Android app is installed by hand for now: ask CertaCal for the app file, send it to the technician, then give them their App setup code.
- Account On/Off: switch it Off when someone leaves. They can't sign in, but their name stays on every calibration and certificate they did. Show switched-off accounts at the bottom lists them; switch one back on if they return.
A few rules protect the accounts:
- Only an owner can make someone an owner, or change an owner's account.
- Nobody can change their own role. Ask another owner or admin.
- You can't switch off your own account.
The system administration pages
The Django admin at /admin/ isn't part of your company's CertaCal: it opens only at CertaCal's administration address. Everything the office needs is in the office app.
Daily and weekly routine
A checklist for the office. Each item links to the chapter that explains it.
Every morning
- Open Home and work down What needs attention, red items first.
- Placed-in-service: clear anything marked Needs information. These have a legal deadline.
- Jobs → Requests (from technicians and customers): accept or decline each one.
- Scales added in the field: accept or merge each one, so their calibrations can be approved.
- Review: for each finished job, audit the highlighted scales, decide anything flagged, and approve the job or send it back. Check yesterday's jobs were emailed to the customers (a red box means the email failed).
Every week
- Jobs → Needs scheduling: book a visit for every location with scales overdue or due in the next 30 days.
- Check next week's board: every visit has a technician, and notes where the site needs them (gate codes, contacts).
- Test weights: anything Expired or no certificate or due in the next 30 days? Plan the lab trip.
- Test weights › Intermediate checks: record any check that's due or overdue.
Every month
- Reports → Service agreements: review the agreements that are due, and contact customers whose agreements have ended.
- Reports → Adjustment / fail: scales that keep failing. Suggest repair or replacement to the customer.
- Reports → Response time: are certificates reaching customers quickly?
- Reports → Job quality scores: each technician's average. Who needs a ride-along, or help with photos, notes or signatures?
- Settings › Company › Users: switch off anyone who has left. Last active shows who hasn't signed in for a while.
- Customers: merge any customer showing Looks like the same customer.
- Settings › Company › Audit trail → Check the trail (quality manager): confirm every entry is intact.
Glossary
| Term | Meaning |
|---|---|
| Acceptance tolerance | The tighter HB44 tolerance for a new, newly installed or just-repaired device. |
| Accuracy class | I, II, III, III L or IIII — how precise the scale is designed to be. Sets its tolerances. |
| Adjusted | Result when a scale passes As Left but its As Found readings differ from the As Left readings: something was adjusted. |
| Applied load | The certified weight actually placed on the scale for a test point. |
| As Found | Readings before any adjustment or repair. |
| As Left | Readings after your adjustments, as you leave the scale. |
| Audit (of a scale) | A reviewer's hand check of one scale on a job: its readings, photo and the program's quality score. |
| Audit trail | CertaCal's sealed record of every sign-in and every add, change or delete, with before and after values. |
| Build (increasing load) test | Readings taken as weight is added in steps. |
| Certificate | The customer's record of a calibration. Issued by CertaCal when a reviewer approves the job (or the calibration). Has a number, a QR code to verify it, and a digital (DCC) copy inside the PDF. |
| CLC | Concentrated load capacity: the most a vehicle scale section is rated to carry. A section test above it is allowed but flagged. |
| CoC | Certificate of Conformance — the NTEP or CTEP number showing a legal-for-trade model is type-approved. |
| County sealer | The county weights-and-measures office in California that receives placed-in-service reports. |
| DCC | Digital Calibration Certificate: a machine-readable copy of the certificate, embedded in the PDF. |
| Demo company | A practice company with made-up data, opened with Try the demo. Certificates are stamped DEMO and nothing is emailed. |
| Displayed weight | What the scale's indicator shows, written with every decimal place it shows (20.00, not 20). |
| Division (d) | The smallest step the indicator shows. |
| Drop (decreasing load) test | Readings taken as weight is removed in steps. |
| Error | Reading minus applied load. |
| HB44 | NIST Handbook 44 — the U.S. rules and tolerances for commercial weighing and measuring devices. |
| Health report | The summary page emailed to the customer with the certificates for a job. |
| Impact review | When a test weight or reference standard comes back from the lab out of tolerance, the check of every calibration it was used on since its last good certificate. |
| Intermediate check | A check of a test weight or reference material against a known reference between lab calibrations: every six months unless your company policy says otherwise. |
| Job | One visit to one customer location, with the scales to be done. |
| Job review | The reviewer's decision on a whole job: approved or sent back, with the program's score and the scales audited. |
| Kit | A set of the company's test weights that travel together, with a certificate. |
| Legal for trade | A device used to buy or sell by weight. State-regulated. |
| Location (site) | One address of a customer. A customer can have several. |
| Maintenance tolerance | The HB44 tolerance for devices in service. Used for routine calibrations. |
| N/A (not inspected) | A scale that couldn't be tested on the visit, with the reason. |
| Placed-in-service report | The form telling weights and measures a legal-for-trade device was installed, repaired, moved or removed. |
| Quality score | CertaCal's own score (out of 100) for a calibration, worked out from its record: tests done, readings, record complete, scale details. A job's score is the average. |
| Recall | Finding every certificate a weight was used on, e.g. when a weight is found out of tolerance. |
| Reference standard | A certified weight used as the "known" value. |
| Review | The office check of a job (or a calibration) before its certificates are issued. |
| Service agreement | A customer's or location's contract for regular service: its prices, how often visits happen, and its term. |
| Shift test | The same weight placed on each corner or quarter of the platform. |
| Tag (red / blue / yellow) | A weights-and-measures inspector's mark: out of service / stop-use / warning. |
| Tolerance | The largest error allowed at a test load. |
| Traceability | The unbroken chain of calibrations linking our weights to national standards. |
| Uncertainty | An estimate of how far our own measurement could be off. |
| Work instruction | The written procedure for a kind of scale, shown to the technician. |
| Works in the field | A setting for an owner, office admin or quality manager who also does calibrations: they can be dispatched jobs. |